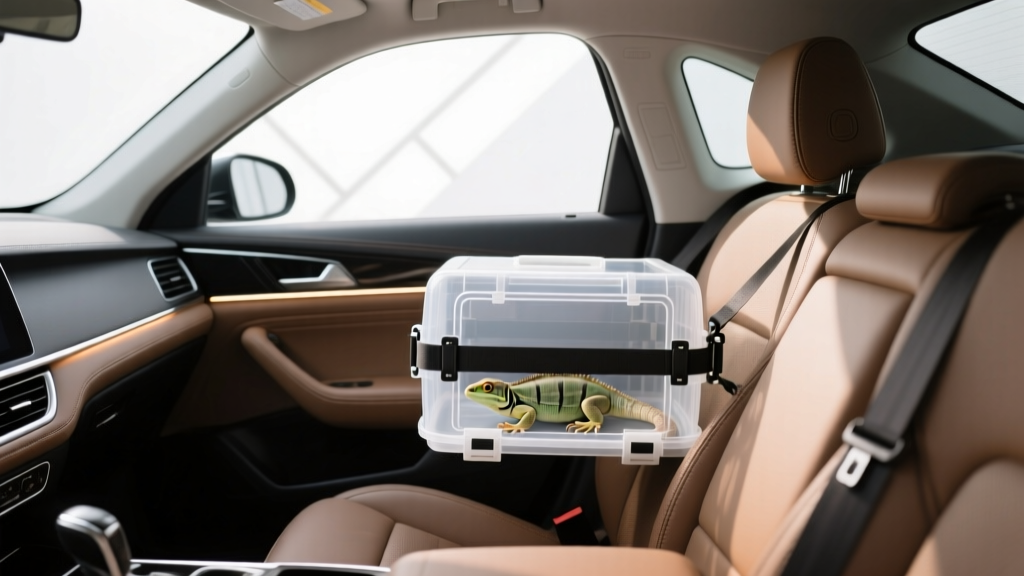
Reptile Transport Box Installation: Step-by-Step (2026)
Transporting a reptile in a vehicle isn?t like tossing a gym bag on the back seat. Reptiles are sensitive to temperature swings, vibration, and sudden stops?exactly the things that happen during everyday driving. If you?re heading to the vet, moving to a new home, traveling to an expo, or simply relocating an enclosure, a properly installed reptile transport box helps keep your animal safe and your car interior protected.
The other reason this matters: a loose carrier is a real safety hazard. In a hard brake, even a small box can become a projectile. A secure setup reduces risk for your pet, your passengers, and your vehicle?s interior surfaces. The goal is simple?stable, ventilated, temperature-managed transport that doesn?t slide, tip, or overheat.
This guide walks you through choosing a suitable reptile transport box and installing it securely in a car or SUV using common anchor points and restraint methods. You?ll also learn what to avoid, what products work well, and how to do a quick safety check before every trip.
What Counts as a ?Reptile Transport Box? for Car Use?
For vehicle transport, a reptile transport box is a secure, ventilated container designed to keep an animal contained, cushioned, and stable. Depending on species and trip length, that may be:
- Hard-sided carriers (plastic kennels, locking tote-style carriers)
- Purpose-built reptile shipping boxes (insulated, often used for short transport; best when paired with secure outer restraint)
- Locking storage totes (heavy-duty lidded bins with added ventilation?popular for large snakes)
- Soft-sided carriers (sometimes used for small lizards, but usually harder to secure and less crush-resistant)
For most car owners, a hard-sided, latchable carrier with good ventilation and a flat base is the easiest to install safely using seat belts or cargo anchors.
Before You Install: Plan for Safety, Temperature, and Vehicle Layout
Choose the Best Location in Your Vehicle
Your best options depend on vehicle type and passenger needs:
- Rear seat (most sedans): Ideal for using a seat belt to restrain the box and keeping it within the climate-controlled cabin.
- Rear footwell (behind a front seat): Good for smaller carriers?often more stable because it?s ?wedged? between seat rails and carpet, but you must ensure ventilation isn?t blocked.
- Cargo area (SUV/hatchback/wagon): Works well when you have cargo tie-downs and can keep the box out of direct sun through the hatch glass.
Avoid: trunks (poor airflow and temperature control), placing the box against active airbags, or any location where the box can shift into a driver control area.
Temperature Management Basics (Real-World Friendly)
Most reptile transport issues happen because of heat, not cold. A black carrier in direct sun through a side window can heat up fast?even on mild days.
- Pre-condition the cabin: run A/C or heat for a few minutes before loading.
- Keep the carrier out of direct sunlight (use window shades or a light towel without blocking vents).
- For longer trips, use a digital thermometer with a probe inside the carrier (wire routed safely so it can?t be chewed or snagged).
- Skip loose heat packs unless you?re experienced?overheating is common. If used, wrap and separate from the animal with cardboard, and monitor temperature closely.
Quick Checklist: What to Gather
- Reptile transport box with locking latches
- Non-slip mat (rubber shelf liner or automotive cargo mat)
- Seat belt (built-in) and/or ratchet strap or cam buckle strap
- Microfiber towel or foam padding (for leveling and vibration damping)
- Small flashlight (helpful for checking latch engagement)
- Optional: digital thermometer, window shade, spare ventilation screen
Choosing the Right Transport Box: Features That Make Installation Easier
From a car interior perspective, these features matter as much as reptile comfort:
- Flat, rigid base so it sits flush on seats or cargo floors
- Positive-lock latches (not just friction-fit lids)
- Multiple belt/strap paths (molded handles or slots allow better restraint)
- Ventilation on multiple sides so airflow isn?t blocked by a seatback
- Easy-clean materials (accidents happen; smooth plastic wipes clean)
Product Recommendations (Practical Picks for Most Vehicles)
These categories are widely used and easy to secure with seat belts or cargo tie-downs:
- Hard-sided pet carriers (small to medium reptiles): Look for models with metal doors or heavy-duty plastic doors and dual latches. They?re easy to belt in and resist crushing.
- Heavy-duty locking totes (large snakes): Choose thick-wall bins with strong latches. Add ventilation holes (carefully) and use a strap around the tote for backup security.
- Insulated reptile shipping boxes (short trips): Great for temperature buffering, but they must be restrained inside a larger box or tightly strapped to prevent tipping and crushing.
Comparison tip: If your goal is ?install once, repeat often,? a hard-sided carrier with built-in handles and a consistent belt path is usually better than a lightweight foam shipper that changes shape when strapped down.
Step-by-Step Reptile Transport Box Installation (Rear Seat Method)
This is the most common setup for sedans and crossovers and works well for short and medium trips.
Step 1: Prep the Seat Surface
- Clear the seat: remove loose items that can shift (water bottles, tools, toys).
- Lay down a non-slip mat where the box will sit. This reduces sliding and protects upholstery.
- If the seat is contoured, add a folded towel under the mat to create a flatter platform.
Step 2: Position the Box Correctly
- Place the box on the seat so the door or lid opens away from you when possible (less chance of accidental opening when reaching in).
- Orient ventilation holes so at least one side has unobstructed airflow (not pressed directly into the seatback).
- Center the box on the seat cushion. Avoid hanging an edge off the seat?this encourages tipping.
Step 3: Route and Lock the Seat Belt
- Pull the seat belt out slowly and wrap it around the carrier?s midpoint (not just the top handle).
- Buckle the belt and press the carrier firmly into the seat cushion.
- Engage the seat belt?s locking mode (most cars do this by pulling the belt all the way out, then letting it retract). You?ll hear/feel the belt ratchet as it tightens.
- Feed slack back in until the carrier is snug and cannot rock side to side.
Step 4: Add a Secondary Restraint (Recommended)
Seat belts can loosen slightly as the vehicle moves. A secondary strap adds redundancy.
- Use a cam buckle strap (gentler than a ratchet strap) around the carrier and through a fixed point if available.
- If no anchor points are nearby, strap around the carrier and the seat base frame (only if accessible and safe?avoid sharp edges).
- Do not overtighten to the point of deforming the carrier lid or compressing ventilation openings.
Step 5: Final Stability Test
- Grab the box at the base and attempt to move it forward/back and side to side.
- A properly installed carrier should move less than an inch and should not tip when you simulate a turn (a firm push on one upper corner).
- Confirm all latches are fully engaged?use a flashlight if needed.
Step-by-Step Installation (Cargo Area Method for SUVs & Hatchbacks)
If you transport larger containers or multiple boxes, the cargo area can be excellent?if you use tie-downs correctly.
Step 1: Create a Flat, Non-Slip Base
- Lay a cargo mat or non-slip liner in the cargo area.
- If your cargo floor is uneven, level it with a folded towel or a firm foam pad under the mat.
Step 2: Position the Box Low and Forward
- Place the transport box as close to the rear seatbacks as possible, not near the hatch glass.
- Keep it low?avoid stacking boxes unless you have a rigid crate system designed for stacking.
Step 3: Use Tie-Down Anchors and Straps
- Locate factory cargo tie-down hooks (usually on the floor corners).
- Run two straps in a ?cross? pattern over the box for best anti-tip performance.
- Tighten evenly until the box cannot slide or rotate. Avoid crushing foam shippers.
Step 4: Manage Sun and Cabin Airflow
- Use a rear window shade or cover the cargo glass if sunlight is intense.
- Make sure rear A/C vents (if equipped) are open; otherwise, consider placing the box in the back seat instead.
Practical Tips From Real-World Driving
- Think ?hard brake.? If the box would hit the back of a front seat in a sudden stop, it?s not secure enough.
- Keep a cleanup kit in the car: paper towels, pet-safe disinfectant, spare liner, and a trash bag.
- Noise and vibration matter. A thin foam pad under the carrier can calm a stressed reptile by reducing vibration.
- Make stops strategic. Park in shade, and don?t leave the carrier in a parked car. Even with cracked windows, temperatures can spike quickly.
- Use labeling for multi-box trips: painter?s tape with the reptile?s name and ?THIS SIDE UP? reduces mishandling when loading/unloading.
Common Mistakes to Avoid
- Relying on the floor alone: Setting a carrier on carpet without a restraint almost guarantees sliding in turns.
- Blocking ventilation: Pressing vent holes against a seatback or wrapping the carrier completely in a towel restricts airflow.
- Overheating with heat packs: Unregulated heat sources can create hot spots. If you must use them, separate with insulation and monitor temperature.
- Using weak latches or friction-fit lids: Totes that pop open under strap pressure or vibration are a no-go.
- Placing the carrier in front of an airbag zone: A deploying airbag can crush or launch a carrier.
- Overtightening straps: Deforming the lid can create gaps or cause latch failure.
FAQ: Reptile Transport Boxes and Car Installation
Can I buckle a reptile transport box using the seat belt like a child seat?
Yes?this is one of the safest and simplest methods for a hard-sided carrier. Use the lap portion across the carrier?s midsection and engage the seat belt?s locking mode so it stays tight.
Is the trunk okay for transporting reptiles?
Usually not. Trunks have poor airflow and limited temperature control, and they?re harder to monitor. The back seat or a climate-controlled cargo area is a better choice.
Should the carrier be covered with a towel?
A partial cover can reduce stress, but don?t block ventilation. A good approach is draping a light towel over the top while keeping side vents clear, and checking temperature during the trip.
What?s better: a foam shipping box or a hard plastic carrier?
For car travel, a hard plastic carrier is typically easier to secure with a seat belt and better at handling bumps and sudden stops. Foam shippers can be useful for temperature buffering, but they need careful restraint to prevent crushing or tipping.
How do I keep the box from sliding on leather seats?
Use a non-slip liner under the carrier and tighten the seat belt in locking mode. Leather is slick, so the mat makes a noticeable difference, especially in corners.
Can I transport more than one reptile in the same box?
It depends on species, size, and temperament, but it?s generally safer to transport reptiles separately to prevent stress, injury, or overheating. If you must combine, use dividers designed for secure separation and ensure ventilation and space are adequate.
Conclusion: Your Next Steps for a Safer Transport Setup
A solid reptile transport box installation comes down to three things: stability (no sliding or tipping), secure containment (locked latches and a backup restraint), and controlled environment (temperature and airflow you can actually manage). Once you set up a repeatable method?rear seat seat-belt restraint or cargo-area tie-downs?each trip becomes faster and safer.
Next steps:
- Choose a hard-sided, latchable carrier sized for your reptile and your vehicle.
- Install a non-slip base and practice tightening the belt/straps before travel day.
- Do a 30-second ?hard brake test? tug and latch check every time you load up.
For more practical car interior guides, smart accessory installs, and travel-friendly setup ideas, explore the latest articles on carinteriormix.com.