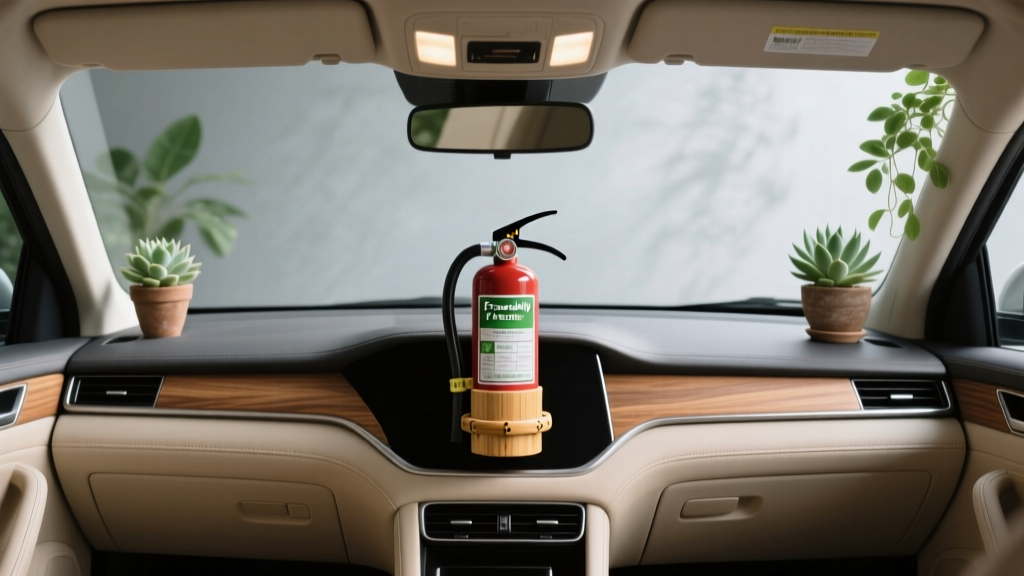
Eco-Friendly Fire Extinguisher Mounts (2026)
A fire extinguisher in your vehicle is one of those upgrades you hope you never use?yet it can save your car, your trip, and the people inside if something goes wrong. The challenge is mounting it in a way that?s secure, accessible, and doesn?t permanently damage your interior with drilled holes, cracked trim, or scratched plastics. Many common mounting kits rely on heavy metal brackets and single-use plastic straps, and they often encourage drilling into panels that weren?t designed for it.
Eco-friendly mounting alternatives are about reducing waste, avoiding unnecessary interior damage, and choosing materials that last longer (so you don?t rebuy and re-trash mounts every year). They also tend to be more flexible: the best options can be removed, transferred to another car, or repositioned as your setup changes?without leaving a mess behind.
This guide walks through practical, vehicle-friendly, and lower-impact ways to mount a fire extinguisher. You?ll learn which materials make sense, where to mount for quick reach, and how to install and maintain a secure setup that doesn?t rattle, block airbags, or turn into a projectile during hard braking.
What ?Eco-Friendly? Means for Fire Extinguisher Mounting
For car interior accessories, ?eco-friendly? isn?t just about recycled content?it?s about overall impact: durability, repairability, minimal packaging, and avoiding irreversible modifications that shorten the life of interior parts.
Look for These Eco-Minded Qualities
- Drill-free installation (uses existing bolts, straps, or clamps): prevents cracked trim and avoids replacing panels later.
- Long-lasting materials like stainless steel, aluminum, or robust textile webbing: fewer replacements over time.
- Replaceable components (straps, buckles, pads): you can service the mount instead of tossing it.
- Low-VOC and non-toxic materials (especially adhesives): better for cabin air quality.
- Minimal packaging and reputable sourcing: small but meaningful reductions in waste.
Quick Safety Reality Check
No matter how ?green? the mount is, it must be safe. A 2.5 lb extinguisher can become a serious hazard if it breaks free in a crash. Choose solutions that:
- Hold the extinguisher firmly with no wobble
- Don?t interfere with seat movement, pedals, or airbags
- Allow one-handed access from your seated position when possible
- Keep the pressure gauge visible for quick checks
Choosing the Right Extinguisher First (Because the Mount Depends on It)
Before shopping mounts, confirm your extinguisher size, shape, and weight. Most car owners choose:
- 2.5 lb ABC dry chemical: versatile and common; can be messy but effective for many vehicle fire types.
- Clean agent extinguishers (often Halotron-style): less residue in the cabin; typically more expensive.
- Compact 1 lb units: easier to mount but shorter discharge time.
Mounting tip: standard cylindrical extinguishers are easier to secure than odd-shaped canisters. Measure the bottle diameter and bracket width so you don?t end up over-tightening straps (which can damage the label or gauge area).
Eco-Friendly Mounting Alternatives (With Pros, Cons, and Best Use Cases)
1) Seat-Rail Bolt Mounts (No Drilling, Very Secure)
Seat-rail mounts use existing seat bolts to anchor a bracket. This is one of the most secure and reusable approaches?and it avoids putting holes in plastics and carpet.
- Pros: excellent strength, clean install, transferable to another vehicle with the right hardware
- Cons: requires careful torque and correct bolt fit; must avoid interfering with seat travel
- Best for: daily drivers, overlanding rigs, track day cars
Step-by-Step: Installing a Seat-Rail Bolt Mount
- Park on a flat surface, turn the car off, set the parking brake.
- Slide the seat fully back to access the front seat bolts (or forward for rear bolts depending on mount design).
- Identify the correct bolt the mount is designed to share. Use the mount maker?s guidance for your vehicle.
- Remove the seat bolt carefully using the correct socket. Don?t force it?seat hardware can be thread-locked.
- Position the bracket so it doesn?t contact seat wiring, carpet edges, or trim.
- Reinstall and torque the seat bolt to the manufacturer?s spec. If you don?t have torque specs, consult a service manual or reputable database.
- Attach the extinguisher with the included strap or clamp. Confirm the pin can be pulled and the extinguisher can be removed quickly.
- Test seat movement through the full range. If anything binds, reposition immediately.
Real-world example: In a compact SUV, mounting a 2.5 lb extinguisher on the passenger seat rail often keeps it accessible without crowding the driver footwell. Owners who commute daily like that it stays out of sight but is still reachable from the front seats.
2) Heavy-Duty Textile Webbing Straps (Reusable, Low Waste)
Instead of plastic quick straps or brittle brackets, consider robust webbing straps made from nylon, polyester, or (better) recycled fibers. These can secure an extinguisher to a seat base, cargo tie-down points, or a metal seat frame?without drilling.
- Pros: lightweight, replaceable, adaptable, often lower material footprint than metal brackets
- Cons: must be tensioned correctly; can loosen over time if not checked; not ideal for very heavy extinguishers
- Best for: hatchbacks, wagons, SUVs with cargo loops, temporary setups
Step-by-Step: Strapping to Cargo Tie-Down Points
- Choose a location that won?t crush the extinguisher under luggage (side wall of cargo area is usually better than the floor).
- Use two straps minimum: one near the top third of the bottle and one near the bottom third.
- Protect the interior with a small piece of recycled rubber or felt pad between the extinguisher and trim to prevent scuffs.
- Tighten evenly until the bottle cannot rotate or slide.
- Check access: you should be able to release at least one strap quickly with one hand.
- Do a shake test: push and pull firmly in multiple directions; retighten if there?s movement.
Practical tip: Avoid routing straps over sharp metal edges. If you must, add a sleeve or edge protector to prevent fraying.
3) Clamp-Style Mounts on Metal Bars (Durable and Transferable)
If your vehicle has a metal support bar (common in some off-road builds, cargo barrier systems, or aftermarket seat supports), clamp mounts can work well. Choose clamps made from stainless steel or anodized aluminum, with replaceable rubber inserts.
- Pros: very durable, easy to move, minimal waste long-term
- Cons: limited to vehicles with suitable mounting bars; can rattle if not padded
- Best for: 4x4 builds, utility vehicles, custom interiors
Eco angle: A high-quality clamp can last for years across multiple vehicles, which often beats buying a cheap universal bracket that fails and gets replaced repeatedly.
4) MOLLE Panels and Recycled-Fabric Pouches (Great for Overlanding)
MOLLE-style mounting systems aren?t just for gear bags. A well-made MOLLE panel (mounted to a seatback, cargo area, or drawer system) can hold an extinguisher pouch securely. Look for pouches made from recycled nylon or other durable fabrics, and panels that bolt into existing points.
- Pros: modular, organized, easy to pair with other safety gear (first aid, flashlight, gloves)
- Cons: quality varies; some soft pouches aren?t rigid enough for hard braking unless properly strapped
- Best for: overlanding, camping rigs, vehicles with drawer systems
Setup tip: If using a soft pouch, choose one with a secondary retention strap (buckle or Velcro) and anchor the pouch at multiple points to prevent bounce.
5) Upcycled Mounting Boards (A Smart DIY Option)
If you like DIY projects, an upcycled mounting board can be a solid eco-friendly approach. You create a base plate from reclaimed plywood, bamboo, or even a repurposed cutting board-style panel, then attach the extinguisher bracket to it. The board can be secured using existing cargo anchors or strap loops.
- Pros: uses reclaimed materials, customizable, reduces plastic packaging waste
- Cons: must be built carefully; moisture protection needed; takes time
- Best for: cargo-area setups, drawer systems, wagons/SUVs
Step-by-Step: DIY Upcycled Board Mount (Cargo Area)
- Pick the board: 1/2-inch (12 mm) plywood or a sturdy reclaimed panel works well. Avoid crumbly MDF.
- Seal the board: use a low-VOC sealant or water-based polyurethane to reduce odor and moisture absorption.
- Attach the extinguisher bracket: use stainless hardware with washers and lock nuts. If possible, choose a bracket with a metal strap rather than brittle plastic.
- Add anti-rattle padding: recycled rubber sheet or dense felt where the board contacts the vehicle.
- Secure the board to the vehicle: use cargo tie-down points with straps or turnbuckles. Avoid relying on Velcro alone.
- Test under load: yank the extinguisher forward and side-to-side. If anything flexes, reinforce the board or improve anchor points.
Real-world example: A weekend camper van owner mounts a 2.5 lb extinguisher to a sealed bamboo board strapped to factory D-rings. The board spreads the load, prevents trim stress, and can be removed for cleaning or reconfiguring the cargo area.
Product Recommendations and Comparisons (What to Look For)
Rather than chasing the cheapest universal bracket, focus on systems that are secure, serviceable, and designed for vehicle vibration. Here?s a practical comparison of common mount types you?ll see while shopping.
Mount Type Comparison
- Seat-rail bolt bracket: best all-around for safety and reuse; ideal for daily drivers; usually metal with a strap or quick-release.
- Stainless quick-release roll bar style clamp: excellent for off-road/cage-equipped builds; durable and long-lived; use rubber inserts to protect metal bars.
- Webbing strap kit with cam buckles: flexible and low-waste; best for cargo areas; ensure straps are rated and buckles won?t slip.
- MOLLE pouch + panel: great modularity; confirm the pouch has real retention and the panel mounts to existing points.
Material Checklist for Eco-Friendly Choices
- Metals: stainless steel or anodized aluminum resist corrosion and last longer.
- Straps: heavy webbing with replaceable buckles; recycled fabric options when available.
- Pads/inserts: recycled rubber or silicone to stop rattles and protect trim.
- Adhesives (if used): low-VOC, automotive-rated; avoid unknown ?super tape? that melts in heat.
Where to Mount a Fire Extinguisher Inside Your Car
The best location balances quick access with minimal interference. Good spots vary by vehicle layout, but these are common winners:
- Front seat rail (passenger side): accessible from driver seat in many cars, low-profile, secure with bolt mounts.
- Side of cargo area: easy to reach when unloading; great for strap kits and mounting boards.
- Behind a front seat (with MOLLE panel): works best when passengers aren?t constantly kicking the seatback.
Avoid these locations:
- Loose on the floor or under a seat without restraint
- On top of the rear parcel shelf (projectile risk)
- Blocking side curtain airbag zones, knee airbags, or seat airbag panels
- Where it can interfere with pedals or seat locking mechanisms
Common Mistakes to Avoid
- Using adhesives as the primary mounting method: cabin heat cycles can weaken many tapes and glues. Use adhesive only as anti-rattle support, not as the main anchor.
- Mounting to flimsy plastic trim: trim clips aren?t designed for crash loads.
- Over-tightening straps on the gauge or valve area: can damage components or make the extinguisher hard to remove.
- Ignoring seat bolt torque: seat mounting hardware is safety-critical. If you?re unsure, get specs and torque properly.
- Choosing a mount that requires two hands to release: a good setup lets you remove the extinguisher quickly under stress.
- Skipping monthly checks: vibration loosens hardware and straps over time.
Maintenance: Keep It Safe, Quiet, and Ready
Even the best eco-friendly mount needs occasional attention. Build this quick routine into your car care:
- Monthly: check the pressure gauge (needle in the green), confirm the pin is present, and shake-test the mount.
- Every 3-6 months: inspect straps for fraying, check bolts for tightness, and replace worn pads.
- After extreme temps or rough trails: recheck tension and look for bracket shift or rattles.
Noise tip: If you get a rattle, don?t ignore it. Add a rubber isolator between bracket and metal contact points, and use a secondary retention strap to eliminate micro-movement.
FAQ: Eco-Friendly Fire Extinguisher Mounting Alternatives
Can I mount a fire extinguisher using Velcro?
Velcro alone isn?t recommended as the primary restraint. Heat, dust, and vibration reduce holding power, and crash loads are far beyond what most hook-and-loop systems can handle. If you use Velcro, treat it as a stabilizer paired with straps, clamps, or a bolted bracket.
Is a seat-rail mount safe for cars with airbags and seat wiring?
It can be safe when installed correctly. The key is keeping the bracket clear of wiring harnesses and ensuring it doesn?t restrict seat movement or block airbag deployment zones. If your seat has electrical connectors, avoid pulling on wiring while positioning the bracket.
What?s the most eco-friendly mounting option overall?
For most drivers, a durable seat-rail bracket or a long-life clamp system is the best balance. These mounts tend to last years, move from car to car, and avoid drilling holes that can lead to interior part replacement.
Where should I mount an extinguisher if I have a small coupe?
Many coupes do well with a passenger seat-rail mount or a compact extinguisher in the cargo area side pocket secured with two straps. The goal is secure retention without taking away legroom or interfering with seat travel.
Do I need a special mount for a clean agent extinguisher?
Not usually, but verify the bottle diameter and weight. Some clean agent extinguishers have slightly different proportions. Choose a mount with an adjustable strap or a correctly sized clamp.
How tight should the extinguisher strap be?
Tight enough that the extinguisher cannot rotate, slide, or rattle when you push it firmly. Avoid crushing the gauge area or deforming the bottle label. If your mount uses a cam buckle, recheck tension after a week of driving.
Actionable Next Steps
- Pick your mounting location first (seat rail, cargo side, seatback MOLLE), based on access and safety.
- Choose a durable, drill-free system that uses existing bolts or strong anchor points.
- Install it carefully using the step-by-step guidance above, then do a firm shake test.
- Add anti-rattle padding to protect trim and keep the cabin quiet.
- Set a reminder for monthly gauge and mount checks.
If you?re upgrading your vehicle?s safety setup, a thoughtful mount is just as important as the extinguisher itself?especially if you want a cleaner, lower-waste approach that respects your interior. Explore more car interior guides and practical accessory tips on carinteriormix.com.