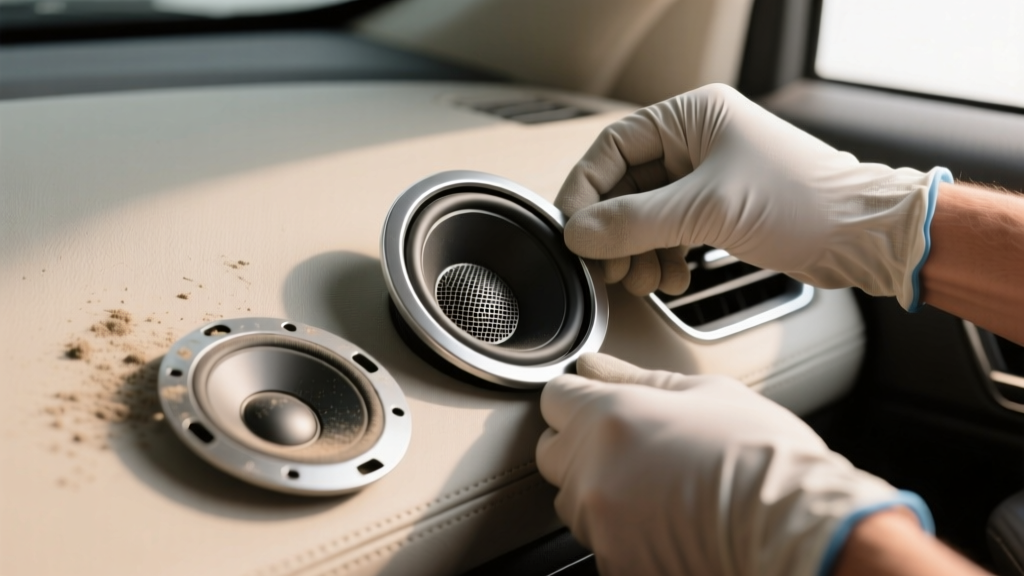
Speaker Grille Replacement: Easy DIY Guide (2026)
A cracked, rattling, or missing speaker grille can make an otherwise clean interior look worn out. Even worse, a damaged grille can let shoes, cargo, pet claws, and loose objects reach the speaker cone?one accidental kick and you?re shopping for a full speaker replacement instead of a simple trim piece.
Speaker grille replacement is one of those ?small job, big payoff? upgrades. Done right, it restores the factory look, cuts down on buzzes and vibrations, and protects your audio investment. Whether you?re fixing a daily driver, refreshing a used-car purchase, or cleaning up an install after an aftermarket speaker upgrade, this guide walks you through choosing the right grille and installing it without breaking clips or scratching panels.
What a Speaker Grille Does (and Why It Fails)
Key purposes of a speaker grille
- Physical protection: Shields the speaker cone and surround from impact, dust, and debris.
- Cosmetics: Keeps the door panel or dash looking finished and OEM.
- Noise control: A secure grille helps prevent rattles and vibrations at higher volume.
Common reasons grilles get damaged
- Sun/heat exposure: Dash and rear deck grilles can become brittle and warp.
- Door kicks and scuffs: Door-mounted grilles are frequent victims, especially in tight parking spaces.
- Pets and cargo: Wagging tails, crates, and shifting luggage can crack or pop grilles loose.
- Prior repairs: Broken clips from past door-panel removal often lead to poor fitment and buzzing.
Types of Speaker Grilles (OEM vs Aftermarket)
OEM (factory) replacement grilles
OEM grilles are the safest choice for fitment and appearance. They match factory texture, color, and mounting points. The downside is cost and availability?older vehicles may require salvage yards or discontinued-part searches.
Aftermarket grilles
Aftermarket grilles range from universal mesh covers to vehicle-specific trim pieces. Quality varies widely.
- Universal grilles: Good for custom installs or when the factory grille is part of a door panel that can?t be purchased separately.
- Brand-specific grilles: Many aftermarket speaker brands offer grilles designed for their speaker baskets (common for component and coaxial speakers).
- Custom/3D-printed grilles: Great for restorations, rare trims, or custom audio builds when you can?t source OEM.
Which should you choose?
- Choose OEM if you want stock appearance, perfect alignment, and minimal hassle.
- Choose aftermarket if you?re running custom speakers, your OEM grille is unavailable, or you want a different look (metal mesh, logo badges, color accents).
Before You Buy: Fitment Checklist
Speaker grille replacement problems usually start at the shopping stage. Use this checklist to avoid ordering the wrong part.
- Confirm location: Dash, front door, rear door, rear deck, tailgate, or pillar.
- Measure size: Common speaker sizes are 3.5", 4", 5.25", 6.5", 6x8", 6x9". Grilles must match the opening and mounting style.
- Check mounting method: Clips, screws, twist-lock tabs, adhesive, or integrated into a door panel insert.
- Match color/finish: ?Black? can mean charcoal, piano black, satin black, or textured. If you?re picky about interior aesthetics, compare part photos in direct light.
- Look up the part number: For OEM parts, the correct part number is your best friend. Use your VIN when possible.
- Inspect surrounding trim: Sometimes the grille isn?t the only issue?warped door panel material or broken mounting bosses can prevent a new grille from sitting flush.
Tools and Supplies You?ll Want
Most speaker grille replacements are straightforward, but having the right tools prevents broken clips and scratched panels.
- Plastic trim removal tools (panel poppers)
- Small flathead screwdriver (wrapped in tape if needed)
- Phillips and/or Torx drivers (common: T20/T25)
- Pick tool for stubborn clip release
- Microfiber towel (to protect trim)
- Isopropyl alcohol (for cleaning adhesive areas)
- Automotive-grade double-sided tape (if the grille uses adhesive)
- Replacement clips (often sold separately for OEM grilles)
- Optional: butyl tape or foam tape (to eliminate future rattles)
Step-by-Step: How to Replace a Speaker Grille
Exact steps vary by vehicle, but the process below covers the most common door and dash setups. Work slowly?interior plastics get brittle with age, especially in cold weather.
Step 1: Identify how the grille is retained
- Visible screws: Usually easiest?remove screws and lift the grille out.
- Hidden clips: Most common?requires careful prying at the correct edge.
- Integrated into the door panel: The grille may be a separate insert, or it may be molded in (no separate replacement).
- Adhesive-backed mesh: Often used in custom installs or some rear-deck applications.
Step 2: Protect the surrounding trim
Place a microfiber towel near the pry points and use plastic tools instead of metal. If you must use a screwdriver, wrap the tip with painter?s tape.
Step 3: Remove the old grille
- Start at a corner or an edge with the most access. If the grille has a small notch, that?s typically the release point.
- Pry gently and listen/feel for clips releasing. Don?t yank?work around the perimeter.
- For screw-mounted grilles: Remove screws evenly and keep them organized.
- For adhesive-backed grilles: Warm the area slightly (hair dryer on low) and peel slowly. Clean leftover adhesive with isopropyl alcohol.
Step 4: Inspect clips, tabs, and mounting points
This is where real-world installs go wrong. A new grille won?t sit right if the door panel?s clip receivers are cracked.
- Replace broken grille clips with new ones (many OEM grilles require transferring clips).
- If a mounting boss is damaged, consider a small amount of plastic epoxy or a compatible repair kit?just keep it neat so the grille can still seat fully.
- Check for loose wiring or foam around the speaker that could cause rattles.
Step 5: Add rattle control (optional but recommended)
If you?ve ever heard buzzing at certain bass notes, this is your chance to fix it.
- Apply thin foam tape along contact points where the grille meets the panel.
- Don?t block the grille openings or cover tweeters.
- A little goes a long way?too much foam can prevent proper seating.
Step 6: Install the new grille
- Align first, then press. Start by lining up top tabs or locating pins.
- Press around the perimeter. You should hear clips snap in evenly.
- For screw-mounted grilles: Tighten screws snug, not over-tight. Stripped plastic is a pain.
- For adhesive installs: Degrease the surface, apply tape cleanly, and press firmly for 30?60 seconds.
Step 7: Test for fitment and rattles
- Run your hand around the edges?no gaps or lifted corners.
- Play music with bass at moderate volume and listen for buzzing.
- If you hear vibration, remove and add a small foam strip at the contact point causing the noise.
Real-World Examples: What to Expect by Location
Door speaker grilles
Door grilles often snap in with clips and may be part of a larger trim bezel. The most common issue is broken tabs from aggressive prying. If your vehicle has a separate sail panel tweeter and a door midbass grille, treat them as different assemblies?mixing parts is a common ordering mistake.
Dash speaker grilles
Dash grilles are frequently brittle from UV exposure. Work in warm temperatures if possible. Many dash grilles release from the windshield side first, and some have hidden clips that break if you pry straight up.
Rear deck grilles
Rear deck grilles can require removing C-pillar trim or the rear seat back to access screws. If you hear rear deck rattles, foam tape along the grille perimeter and a quick check for loose third brake light housings can save you a second teardown.
Product Recommendations and Buying Tips
Because fitment is so vehicle-specific, the best ?recommendation? is choosing the right category of part and a reputable source.
Best options by priority
- Best OEM match: Dealer parts department, OEM parts websites, or a trusted recycler with VIN-based verification.
- Best for aftermarket speakers: Speaker brand grilles designed for your exact model (common with component sets and coaxials).
- Best budget fix: Quality universal mesh grilles with secure mounting rings (avoid ultra-thin plastic that flexes and buzzes).
What to look for in a quality grille
- Rigid frame that doesn?t flex when pressed
- Clean, even perforation or mesh (no sharp edges)
- Solid clip design and included hardware when applicable
- Finish that matches your interior texture (matte vs gloss matters)
Common Mistakes to Avoid
- Prying with metal tools on soft trim: One slip can permanently gouge a door panel.
- Forcing a grille that?s misaligned: This breaks tabs and creates rattles later.
- Ignoring broken receiver clips in the panel: The new grille will pop out or sit unevenly.
- Over-tightening screws: Stripped plastic mounts lead to loose grilles and vibration noises.
- Skipping a test-play: Finding a rattle after everything is back together is frustrating and avoidable.
- Buying based only on speaker size: Two 6.5" grilles can mount completely differently across models and trims.
FAQ: Speaker Grille Replacement
Do I need to remove the whole door panel to replace a speaker grille?
Not always. Many door grilles pop out from the front with trim tools. However, some vehicles use screws accessed from behind the door panel, or the grille is integrated into a bezel that?s easier to remove with the panel off. If you can?t find release notches or visible fasteners, check a model-specific trim removal guide before forcing it.
Will a new grille affect sound quality?
A properly designed grille won?t noticeably reduce sound. Cheap universal grilles with dense mesh or too-small perforations can slightly reduce high-frequency output. If you?ve upgraded speakers and care about clarity, choose a grille designed for audio use and avoid blocking tweeters.
Can I repair a cracked speaker grille instead of replacing it?
Small cracks on hidden edges can sometimes be reinforced with plastic epoxy from the backside. Visible cracks, broken mounting tabs, or warped grilles usually look better and fit better with replacement. If the grille is rare, a repair plus light sanding and interior-grade paint can be a workable compromise.
Why does my speaker grille rattle after replacement?
Common causes include missing clips, misaligned tabs, or the grille contacting the speaker surround or door panel unevenly. Remove it and check clip transfer, seating pressure, and any wiring or foam that might be touching the grille. A thin strip of foam tape at the contact point often fixes it.
Are universal speaker grilles safe for door installs?
They can be, as long as they mount securely and don?t interfere with window operation or door-panel clearance. Avoid sharp screws that could contact wiring or the vapor barrier, and confirm the grille depth won?t touch the speaker cone at full excursion.
What if the grille is molded into the door panel?
If the grille is molded as part of the panel, you may not be able to replace it separately. Options include sourcing a used door panel, using a trim overlay, or carefully cutting and fitting a custom grille insert (best handled by an experienced interior or audio shop).
Wrap-Up: Your Next Steps
If your speaker grille is cracked, missing, or buzzing, start by identifying the exact location and mounting style, then source the right part?OEM if you want factory fitment, aftermarket if you?re customizing or upgrading. Take your time with trim tools, inspect mounting points before installing the new grille, and do a quick audio test to catch rattles while it?s still easy to fix.
Want more practical interior how-tos?from door panel removal tips to rattle fixes and audio upgrade guides? Browse the latest tutorials and deep-dives on carinteriormix.com.