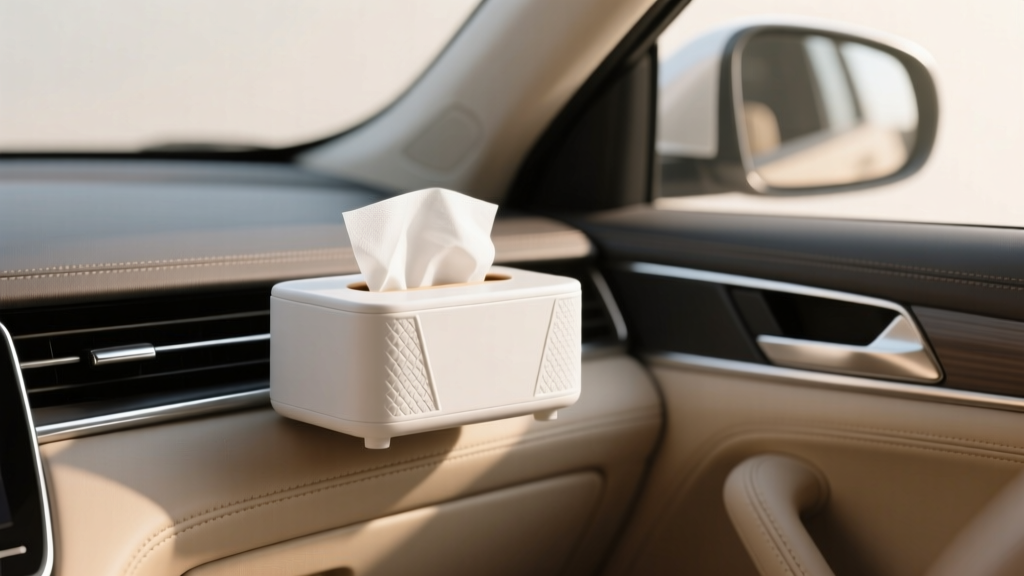
Tissue Box Holder: Setup, Care & Cleaning (2026)
A tissue box holder might seem like a small accessory, but it can make a big difference in how your cabin feels day to day. When it?s installed properly, it keeps tissues within reach for allergies, kids, coffee mishaps, or quick windshield fog cleanup?without the box sliding under the seat or turning into a soggy mess on the floorboard.
There?s also a cleaner-car angle. Loose tissue boxes and half-open packs attract dust, trap crumbs, and can become a breeding ground for odors if they get damp. A well-chosen holder protects the tissues, keeps the interior looking organized, and reduces the temptation to stash used napkins in door pockets.
This guide breaks down how to choose the right holder, install it securely (without damaging trim), and keep it clean so it stays looking OEM-neat. You?ll also find product comparisons, common mistakes to avoid, and a short FAQ for the questions car owners ask most.
Why a Tissue Box Holder Belongs in a Well-Kept Car Interior
- Safety and convenience: A stable holder means you can grab a tissue quickly without fumbling for a box under the seat.
- Cleaner cabin: Covered holders reduce dust buildup on tissues and minimize loose paper scraps.
- Better aesthetics: A holder looks intentional compared to a branded cardboard box rolling around.
- Protects upholstery: It prevents wet tissue packs from contacting seats, carpet, or leather.
Real-world example: If you?ve ever tossed a tissue pack on the passenger seat during winter, you?ve likely seen it soak up condensation from a water bottle or melted snow from gloves. That moisture can transfer to upholstery and leave a musty smell behind. A holder mounted away from wet items solves that quickly.
Types of Tissue Box Holders (And Which One Fits Your Car Best)
1) Visor-Mounted Holders
Best for: Drivers who want quick access and a simple install.
- Usually straps around the sun visor with Velcro or buckles
- Works best with soft tissue packs (not bulky cube boxes)
- Ideal for sedans, commuters, and rideshare vehicles
Watch-outs: Can interfere with visor mirrors or airbags (some cars have warning labels and airbag zones around visor areas). Also, very thick holders may make the visor droop.
2) Headrest/Hanging Holders
Best for: Families, rear-seat passengers, and SUVs.
- Hangs from headrest posts using straps
- Great for kids who need tissues without asking the driver
- Often fits larger packs and looks tidy from the front seats
Watch-outs: If hung too low, it can bump knees or get kicked. Choose a position that doesn?t block rear screens or seatback pockets.
3) Console/Armrest Holders
Best for: Drivers who prefer a built-in look and one-handed access.
- May sit in a cup holder base, slot between seats, or mount to the console side
- Works well in trucks and larger cabins with more space
Watch-outs: Avoid anything that crowds shifter movement, parking brake access, or cup holders you use daily.
4) Dashboard or Trim-Mounted Holders (Adhesive or Clip)
Best for: Minimalist setups and compact cars where space is tight.
- Some use 3M-style adhesive pads; others clip into trim seams
- Can look clean if positioned carefully
Watch-outs: Cheap adhesives can stain trim or fail in heat. Never mount in front of airbags, vents needed for defrosting, or areas that obstruct visibility.
5) Seat Gap / Between-Seat Holders
Best for: People who want the tissues hidden but reachable.
- Tucks between seat and center console
- Often doubles as a small organizer
Watch-outs: Can rub leather/trim over time if the holder has rough edges. Choose a soft-touch material or add a protective felt strip.
Choosing the Right Holder: What to Look For
- Material quality: PU leather or genuine leather for durability and easy wiping; fabric/canvas for softer feel; ABS/plastic for rigid form but may rattle.
- Refill type: Decide whether you?ll use standard square boxes, rectangular boutique boxes, or soft tissue packs.
- Closure design: Zipper closures protect tissues from dust but can snag; magnetic or snap lids are fast; open-slot designs are quickest but expose tissues.
- Mounting method: Straps are safest and reversible; adhesives are clean-looking but riskier; clips vary by car trim fit.
- Heat resistance: Interiors get hot. Look for heat-stable adhesives (if used), and avoid holders that warp or off-gas odors.
Quick fit tip: Before buying, measure your preferred tissue pack (length x width x height) and compare it to the holder?s internal dimensions. A pack that?s too tight leads to torn tissues and frustrating refills.
Setup Guide: Step-by-Step Installation (By Mounting Style)
Option A: Installing a Visor-Mounted Holder
- Test visibility: Sit in your normal driving position and flip the visor down. Confirm the holder won?t block your view or hit the rearview mirror.
- Check visor features: Make sure you can still use the vanity mirror (if you care) and that any warning labels remain visible.
- Thread and tighten straps: Wrap straps around the visor and tighten evenly to prevent sagging.
- Load tissues correctly: If the holder has a slot, align the tissue opening directly beneath it to reduce tearing.
- Do a ?one-hand pull? test: Pull a tissue with one hand. If the pack lifts or bunches, re-seat it or add a non-slip pad inside.
Option B: Installing a Headrest/Hanging Holder
- Choose the best seat: Most drivers prefer it behind the passenger seat to avoid distractions while driving.
- Adjust height: Hang it high enough that rear passengers can reach it, but not so low it gets kicked.
- Secure the straps: Tighten straps so the holder doesn?t swing during braking or turns.
- Check seat movement: Slide the seat forward/back and recline it. Confirm straps don?t bind or rub aggressively.
- Refill and test access: Have a passenger pull a tissue while the car is parked. If it swings, tighten or add a secondary stabilizing strap.
Option C: Installing an Adhesive-Mounted Holder (Dashboard/Console Side)
- Pick a safe location: Avoid airbag deployment zones, steering column areas, and anything that obstructs vents, screens, or visibility.
- Clean the surface: Wipe with a 70% isopropyl alcohol solution on a microfiber towel. Let it dry fully.
- Warm the adhesive (optional but helpful): In cool weather, warm the adhesive pad slightly with your hands or mild cabin heat.
- Apply firm pressure: Press for 30?60 seconds. Don?t hang weight immediately.
- Let it cure: Give it several hours (ideally 24) before loading a full pack, especially in humid conditions.
- Test in real conditions: After a few drives, check for edge lift. If it?s peeling, remove and switch to a strap or clip style.
Option D: Installing a Console/Cup Holder Base Tissue Holder
- Confirm cup holder sizing: Make sure it doesn?t wobble or interfere with your most-used drink size.
- Add a non-slip liner: A thin silicone coaster or felt pad reduces rattles.
- Position for one-hand access: You should be able to pull a tissue without twisting your shoulder or elbowing the shifter.
- Do a brake test (parked): Tug the holder forward to simulate braking. If it shifts, improve the base grip.
Care and Cleaning: Keep Your Holder Looking New
Weekly Quick Clean (2?3 Minutes)
- Remove lint and dust with a microfiber towel.
- Use a soft detailing brush to clean seams, stitching, and tissue slots.
- Wipe nearby areas (visor, headrest posts, console) where fingerprints collect.
Monthly Deep Clean (10?15 Minutes)
For PU Leather or Genuine Leather Holders
- Wipe with a damp microfiber towel (water only) first.
- Use a pH-balanced leather cleaner (or interior-safe cleaner labeled for leatherette/PU).
- Apply a light leather conditioner if it?s genuine leather and looks dry.
- Buff dry to avoid a shiny, slippery finish.
For Fabric/Canvas Holders
- Vacuum with a soft brush attachment.
- Spot-clean with upholstery cleaner or a mild soap solution.
- Blot?don?t scrub aggressively?to prevent fuzzing and pilling.
- Air dry fully before reinstalling to avoid mildew smells.
For Plastic/ABS Holders
- Use a gentle interior cleaner and microfiber towel.
- Avoid harsh solvents (they can haze the plastic).
- If it rattles, add felt tape at contact points.
Keeping Tissues Fresh (Yes, It Matters)
- Avoid leaving tissues in direct sun: Heat can dry them out and make them tear easily.
- Don?t store damp packs: If a pack gets wet, replace it. Damp tissue odor lingers.
- Consider sealed refills: If you rarely use tissues, choose soft packs with a resealable flap.
Product Recommendations: What Works Best for Most Cars
Best All-Around: Headrest-Hanging PU Leather Holder
- Looks upscale and matches many interiors (black, beige, tan)
- Easy to wipe clean
- Great access for both front and rear passengers
Ideal for: SUVs, family cars, rideshare drivers, and anyone who wants less clutter up front.
Best for Commuters: Visor Holder for Soft Packs
- Fast reach when you?re parked or stopped
- No adhesives needed
- Affordable and easy to swap between vehicles
Ideal for: Solo commuters and compact cars with limited console space.
Best OEM-Like Look: Console-Side Mount (Strap or Clip, Not Cheap Adhesive)
- Can blend into the interior and stay out of sight
- One-handed access if positioned correctly
- Less risk than adhesive-only mounts in high heat
Ideal for: Trucks and larger sedans where the console area is a natural storage zone.
Quick Comparison: Strap vs. Adhesive
- Straps: More secure long-term, removable, less chance of trim damage.
- Adhesive: Cleaner look, faster install, but more likely to fail in heat or leave residue.
Common Mistakes to Avoid
- Mounting in an airbag zone: Never attach accessories where an airbag could deploy (A-pillars, steering wheel areas, passenger dash airbag cover, some seat sides).
- Blocking visibility: A visor holder that droops into your sightline is a no-go.
- Ignoring heat: Cheap materials can warp, crack, or smell after a few hot days.
- Overstuffing the holder: A pack that?s too large causes tearing and stresses seams or zippers.
- Using harsh cleaners: Strong degreasers, bleach, or ammonia can discolor leatherette and weaken stitching.
- Leaving moisture trapped: Cleaning a fabric holder and reinstalling it damp is a recipe for mildew odor.
Practical Tips for a Cleaner, More Usable Setup
- Add a mini trash solution nearby: A small door-pocket trash bag reduces used tissue buildup.
- Pair with interior wipes: Keep disinfecting wipes separate from tissues to prevent accidental moisture transfer.
- Use a non-slip liner: Even premium holders can slide on leather seats or glossy consoles without a grippy base.
- Match the tissue type to the dispenser: Thicker lotion tissues pull better from wide slots; standard tissues work best with narrow slots.
- Check it seasonally: Summer heat and winter condensation are when holders fail or start smelling?do a quick inspection every few months.
FAQ: Tissue Box Holders in Cars
Where is the best place to mount a tissue holder in a car?
For most drivers, behind the front passenger headrest is the sweet spot: easy for everyone to reach, minimal distraction, and it doesn?t interfere with driving visibility. If you drive solo and want quick access, a visor-mounted holder for soft packs can work well?just keep it out of your sightline.
Can a tissue holder damage my car?s interior?
It can if you use low-quality adhesive, mount it on delicate trim, or let a rigid holder rub against leather over time. Strap-mounted designs are the safest. If you must use adhesive, prep the surface properly and avoid textured or soft-touch panels that can stain.
What tissues work best with car tissue holders?
Soft tissue packs are the most universal because they fit visor, headrest, and compact console holders. If you prefer boxed tissues, choose a holder designed for that box size (cube vs. rectangular). Overstuffing is what causes jams and torn tissues.
How do I stop the tissues from tearing when I pull them out?
Make sure the pack opening is centered under the slot, and avoid packs that are too tight. If the holder compresses the pack, remove a few tissues to reduce tension or switch to a slightly smaller refill. A wider slot design also helps.
How often should I clean the tissue holder?
A quick wipe weekly keeps dust and fingerprints under control. Plan a deeper clean monthly (or sooner if you have kids, pets, or frequent sneezes in the car). If the holder gets wet, dry it promptly and replace any damp tissues.
Is it okay to use a tissue holder in hot climates?
Yes, but choose heat-resistant materials and be cautious with adhesive mounts. PU leather, quality stitching, and strap systems handle heat better than cheap glued seams. Also keep tissues out of direct sun so they don?t dry out and shred.
Next Steps: Set It Up Once, Enjoy It Every Day
Pick a holder style that matches how you use your car?family-hauler, commuter, road-trip machine?then mount it securely in a spot that doesn?t interfere with airbags, visibility, or controls. Once it?s installed, a simple routine (weekly wipe, monthly deeper clean, and replacing any damp packs) keeps it looking sharp and your cabin feeling organized.
If you?re refreshing your interior setup, consider pairing your tissue holder with a small car trash bin, console organizer, and a gentle interior cleaner so everything stays tidy without extra effort.
Thanks for reading?explore more practical car interior guides and product tips at carinteriormix.com.