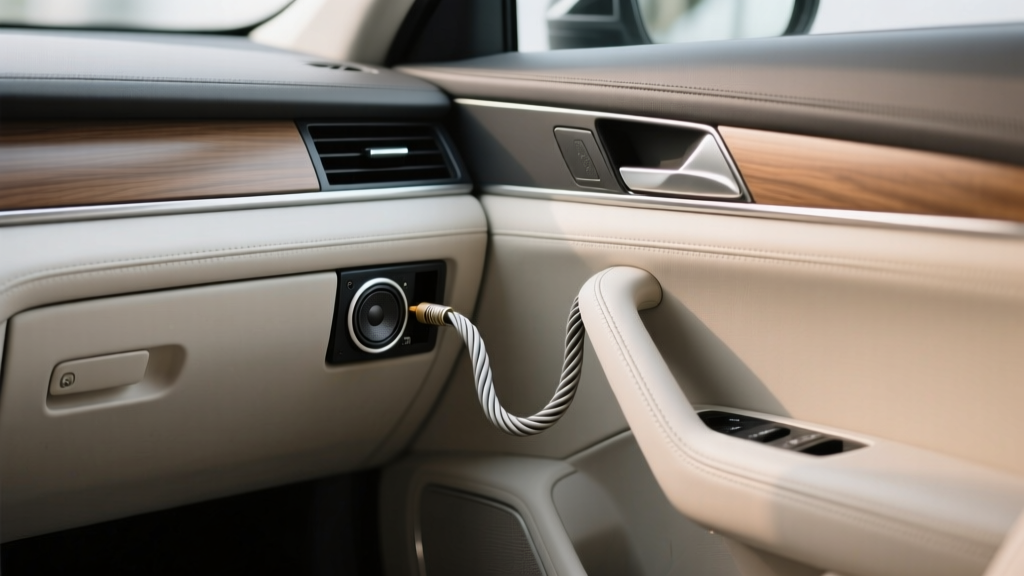
Speaker Wire Installation Guide: CarInteriorMix
Upgrading your car?s audio doesn?t always start with a new head unit or expensive speakers. A surprisingly common bottleneck is the speaker wire itself?undersized wire, questionable factory routing, loose connections, and years of vibration can all rob your system of clarity and punch. If you?ve ever heard crackling at higher volume, uneven left/right output, or bass that feels ?thin,? your wiring is one of the first places to look.
Installing speaker wire the right way also makes future upgrades easier. Whether you?re adding an amplifier, swapping door speakers, or building a clean trunk setup, a neat, properly sized run of wire saves time and prevents electrical headaches. This guide walks you through the entire process step by step, with practical tips you can use in almost any vehicle.
Below you?ll find everything from choosing the correct wire gauge to routing safely through doors, along with product recommendations, common mistakes to avoid, and a quick FAQ for the questions car owners ask most.
What Speaker Wire Does (and Why Quality Matters)
Speaker wire carries amplified audio signal from your head unit or amplifier to the speakers. Unlike power wire, speaker wire doesn?t feed 12V to equipment?so it?s often treated as ?simple.? But the realities of car interiors (heat, moisture, movement, vibration, tight panels) make installation quality just as important as the wire itself.
- Correct gauge reduces resistance so your speakers get the power you paid for.
- Good copper (true OFC) improves reliability and corrosion resistance.
- Clean routing prevents pinches, rattles, and broken conductors over time.
- Solid connections prevent intermittent sound and channel dropouts.
Tools and Materials Checklist
Having the right tools turns this from a frustrating trim-removal session into a smooth project.
Essentials
- Speaker wire (enough length for all runs)
- Trim removal tools (plastic pry set)
- Wire stripper/cutter
- Crimp tool (if using crimp connectors)
- Electrical tape and/or heat shrink tubing
- Zip ties (standard and small)
- Fish tape or a stiff pull rod (for door boots and tight channels)
- Multimeter (continuity and polarity checks)
Nice to Have
- Label maker or masking tape + marker (label every run)
- Tesa cloth tape or automotive harness tape (quiet, OEM-like finish)
- Panel clip assortment (in case you break a few)
- Small flashlight or headlamp
Choosing the Right Speaker Wire (Gauge, Material, and Type)
Speaker Wire Gauge: Quick Recommendations
Wire gauge (AWG) matters most when you?re running longer distances or higher power (amplified setups). Use this as a practical baseline:
- 16 AWG: Great for most door speakers on head unit power and short-to-medium runs.
- 14 AWG: Ideal for amplified door speakers, longer runs to rear deck speakers, and most subwoofer-to-amp speaker-level runs.
- 12 AWG: Best for higher-power subwoofers or long runs to a trunk sub enclosure.
Real-world example: If your amplifier is in the trunk and you?re feeding front door speakers, the run length can add up quickly once you account for routing. Many enthusiasts choose 14 AWG for front speakers to keep resistance low and future-proof the install.
OFC vs CCA: Don?t Guess?Choose Wisely
- OFC (Oxygen-Free Copper): Better conductivity and durability; recommended for most installs.
- CCA (Copper-Clad Aluminum): Cheaper but higher resistance and more fragile; can cause power loss and is less tolerant of repeated flexing (like in doors).
If you?re running wire through door boots or places that move every time you open the door, OFC is worth it.
2-Conductor vs Separate Wires
- 2-conductor ?zip? speaker wire: Easiest and cleanest; one jacket with two conductors.
- Separate conductors: More flexible for tight areas but easier to tangle and harder to keep tidy.
Planning Your Speaker Wire Routing
A clean plan prevents rework. Before you cut anything, map your path from source (head unit or amp) to each speaker.
Decide Where the Signal Starts
- Head unit to speakers: Typical for simple upgrades without an amplifier.
- Amplifier to speakers: Common for sound quality builds; the amp is often under a seat or in the trunk.
Routing Best Practices
- Follow factory harness paths where possible (they?re designed to avoid pinch points).
- Avoid routing speaker wire alongside power wire for long distances. If you must cross, cross at 90 degrees.
- Leave a little service loop near speakers and at the amp so you can remove panels later.
- Label each run: FL, FR, RL, RR (front left, front right, rear left, rear right).
Step-by-Step Speaker Wire Installation
The steps below apply to most vehicles. Your trim layout and door boot access will vary, but the overall flow stays the same.
Step 1: Disconnect the Battery (Smart Habit)
Speaker wire itself isn?t a power cable, but you?ll often be working near airbags, power wiring, or amplifier connections. Disconnect the negative battery terminal before removing major trim or making amp connections.
Step 2: Remove Trim Panels Carefully
- Start with door sill trim and kick panels (common wire pathways).
- Use plastic trim tools to avoid marring panels.
- Keep clips and screws organized by area (a small tray helps).
Tip: If a panel won?t budge, stop and look for hidden screws behind caps, handles, or rubber mats. Forcing trim is the fastest way to break clips.
Step 3: Measure and Cut Wire (Add Slack)
- Run a temporary string or fish tape along your planned route to estimate length.
- Add extra slack (usually 1?3 feet per run depending on the vehicle).
- Cut each run and label both ends immediately.
Real-world example: Door speakers often require more slack than expected because the wire must travel through the kick panel, into the door jamb, through the boot, and then to the speaker location inside the door.
Step 4: Route Wire Through the Cabin
- Lift door sills and tuck wire alongside factory harnesses.
- Secure every 12?18 inches with zip ties or cloth harness tape.
- Keep wire away from seat rails, sharp brackets, and moving pedals.
Step 5: Route Wire Into the Door (The Tricky Part)
Door routing is where most first-time installs get stuck.
- Locate the factory rubber door boot between the door and the body.
- Inspect for existing slack or spare channels?some boots have room; others are packed.
- Use a fish tape/pull rod to guide wire through the boot.
- Pull slowly and avoid tearing the boot (a torn boot can let water into the cabin).
Tip: A small amount of silicone-safe lubricant can help the wire slide through a tight boot. Avoid petroleum-based products that can degrade rubber.
Step 6: Connect to the Speaker
Depending on your setup, you?ll connect to an aftermarket speaker, factory speaker, or crossover (component sets).
- Aftermarket speaker terminals: Usually spade terminals (0.187? and 0.250? common). Use properly sized female spade connectors for a secure fit.
- Factory harness integration: Consider a vehicle-specific speaker adapter harness to avoid cutting factory wiring.
- Component speakers: Route wire to the crossover, then from crossover to woofer and tweeter.
Polarity matters: Keep positive to positive and negative to negative. Incorrect polarity can cause weak bass and a ?hollow? sound as speakers move out of phase.
Step 7: Connect at the Amplifier or Head Unit
- Strip wire cleanly (don?t nick strands).
- Twist strands tightly and insert into the terminal block.
- Tighten firmly?snug, not stripped.
- Match channels correctly (front left to front left, etc.).
Tip: If your amp uses set-screw terminals, a ferrule can make the connection cleaner and more reliable, especially with fine-strand OFC wire.
Step 8: Test Before Reassembly
- Reconnect the battery.
- Play a familiar track at low volume first.
- Verify each speaker plays and is on the correct side (left/right, front/rear).
- Listen for buzzing/rattles that might indicate a wire touching a panel.
If something sounds off, troubleshoot now?reopening doors and sills after everything is clipped back together is no fun.
Step 9: Reassemble Panels and Finalize the Install
- Secure loose wire with zip ties so it can?t rattle.
- Reinstall trim panels in reverse order.
- Confirm windows, locks, and door handles work normally after door panel reinstallation.
Recommended Speaker Wire and Accessories (What?s Worth Buying)
You don?t need boutique wiring for good sound, but you do want reliable materials that won?t corrode or break.
Speaker Wire Picks (General Guidance)
- Best all-around for most cars: 16 AWG OFC, 2-conductor (easy routing, plenty for head unit power).
- Best for amplified door speakers: 14 AWG OFC (more headroom, great long-term choice).
- Best for subwoofer runs: 12 AWG OFC (especially if the amp is far from the enclosure).
Accessories That Make Installs Cleaner
- Heat shrink tubing: Stronger and neater than electrical tape alone.
- Crimp connectors (quality ones): Spades, butt connectors, and ring terminals as needed.
- Tesa cloth harness tape: Helps prevent rattles and gives an OEM-style finish.
- Speaker adapter harnesses: Keeps factory wiring intact and speeds up door installs.
Common Mistakes to Avoid
- Using CCA wire in doors: Constant flexing can fatigue the conductor faster; OFC is safer.
- Running speaker wire next to power wire for long distances: Can introduce noise in sensitive systems.
- Skipping labels: You?ll regret it when every white wire looks the same behind the dash.
- Pinching wire under trim: A pinched wire can short or fail over time and may create rattles.
- Mixing polarity: One reversed speaker can kill bass and ruin your stereo imaging.
- No strain relief at the door: The door opening/closing movement needs slack and secure anchoring.
Practical Tips for a More OEM-Like Result
- Route along factory harnesses and tape to them every so often with cloth tape.
- Use grommets if you pass through any metal openings?never let wire rub on bare metal.
- Keep your wire runs symmetrical left vs. right where possible for easier troubleshooting.
- Take a photo before removing connectors and clips; it?s an instant reference during reassembly.
FAQ: Speaker Wire Installation Questions
What gauge speaker wire should I use for car door speakers?
For most door speakers on head unit power, 16 AWG OFC is perfect. If you?re running an amplifier or have a longer-than-average run, 14 AWG OFC is a great upgrade.
Can speaker wire cause poor sound quality?
Yes. Undersized wire can add resistance (reducing power), and bad connections can create intermittent sound or distortion. Incorrect polarity can make bass noticeably weaker.
Do I need to disconnect the battery to run speaker wire?
It?s strongly recommended. You?ll often remove trim near electrical systems, and if you?re connecting to an amplifier or working behind the head unit, disconnecting the negative terminal reduces the risk of shorts.
How do I know which speaker wire is positive and negative?
Many 2-conductor speaker wires have a stripe, ridge, or different color on one side?use that consistently as positive (or negative), and label it. If you?re unsure, use a multimeter or a battery ?pop test? on a loose speaker (only briefly) to confirm cone direction.
Is it okay to reuse factory speaker wire?
Sometimes, yes?especially for modest systems. But for amplified setups, old or thin factory wire can limit performance. Running new wire is often the cleaner solution when you?re already pulling panels.
How can I prevent rattles after installing speaker wire?
Secure the wire so it can?t tap against metal or plastic, and use cloth harness tape where it contacts trim. Also confirm nothing is loose inside the door panel before reassembly.
Next Steps: Make Your Install Reliable and Upgrade-Ready
If you want a speaker upgrade that actually sounds like an upgrade, start with wiring you can trust. Choose the right gauge, stick with OFC when possible, route cleanly along factory paths, and test everything before clipping trim back into place. A careful speaker wire install pays off immediately in sound consistency?and it saves hours when you add an amp, component speakers, or a sub later.
If you?re ready to keep improving your cabin audio and comfort, explore more step-by-step car interior and audio guides on carinteriormix.com.