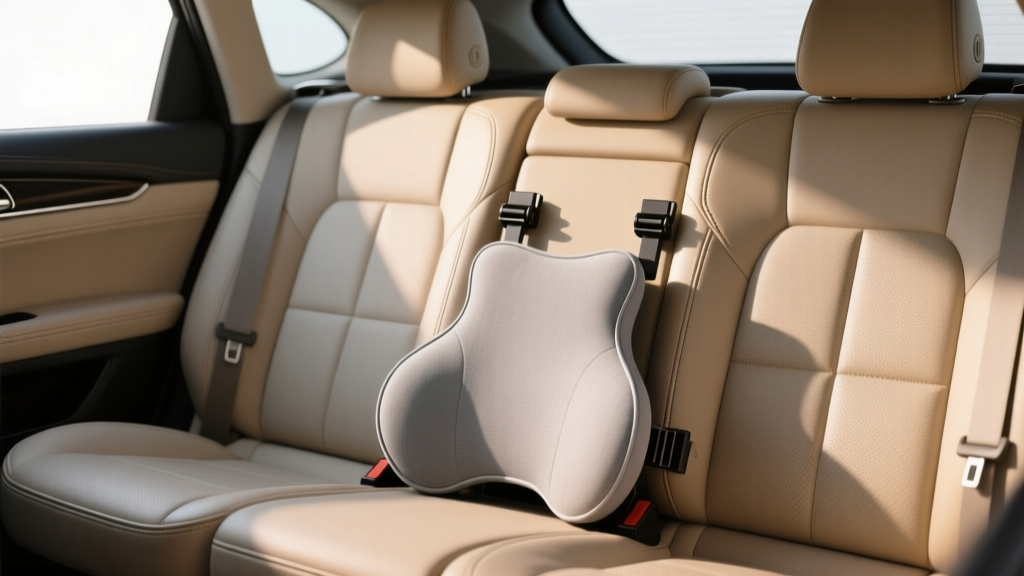
Lumbar Support Installation: Step-by-Step (2026)
If you?ve ever finished a long drive with a tight lower back or felt like you?re constantly shifting to get comfortable, your seat?s lumbar support (or lack of it) is often the culprit. A properly supported lumbar curve helps your spine stay in a neutral position, which reduces fatigue and makes your seating posture more consistent?especially on commutes, road trips, and stop-and-go driving where you can?t ?stretch it out? as easily.
The good news: adding lumbar support doesn?t have to mean buying new seats or living with a bulky cushion that slides around. Whether you choose an external lumbar pillow, a seat-back insert, or a more OEM-style internal bladder system, you can dramatically improve comfort with basic tools and a careful approach. This guide walks you through your options and gives you clear, step-by-step lumbar support installation instructions, plus common mistakes to avoid so your upgrade looks clean and feels factory.
Before you start, keep one principle in mind: the best lumbar support is the one you barely notice. It should fill the small gap in your lower back?supportive, not pushy.
Choosing the Right Type of Lumbar Support
There are three common paths for a lumbar support upgrade. The best choice depends on your budget, your seat style, and how ?factory? you want the end result to look.
1) External Lumbar Cushion (Fastest Install)
- What it is: A pillow or contoured cushion strapped to the seat back.
- Best for: Quick comfort gains, leased vehicles, frequent driver swaps.
- Pros: Installs in minutes; easy to move between vehicles.
- Cons: Can shift; may not match interior; straps can interfere with some seat covers.
2) Seat-Back Insert Pad (Semi-Hidden Upgrade)
- What it is: A slim foam or gel pad placed between the seat cover and seat foam (or sometimes inside a seat cover).
- Best for: A cleaner look without major disassembly.
- Pros: More stable than an external cushion; subtle appearance.
- Cons: Requires partial seat cover access; fit varies by seat design.
3) Internal Lumbar Bladder Kit (Most OEM-Like)
- What it is: An inflatable bladder (manual bulb pump or electric) mounted inside the seat back under the upholstery.
- Best for: Drivers who want adjustability and a factory-style feel.
- Pros: Adjustable support; hidden installation; excellent long-distance comfort.
- Cons: More involved install; requires careful routing of hoses/wiring.
Tools, Supplies, and Safety Prep
What you need depends on the installation type, but having a few basics on hand makes every method cleaner and safer.
Common Tools and Supplies
- Trim removal tools (plastic pry tools)
- Socket set and Torx bits (common seat fasteners)
- Zip ties and cloth automotive tape (to prevent rattles)
- Needle-nose pliers (for upholstery clips/hog rings)
- Marker or painter?s tape (to mark positions)
- Shop towel and mild interior cleaner
- Optional: hog ring pliers and hog rings (for some seat upholstery designs)
Airbag and Electrical Safety (Read This First)
Many modern seats contain side airbags, occupancy sensors, and seatbelt pretensioner wiring. If you?re installing anything inside the seat, follow these precautions:
- Disconnect the negative battery terminal and wait 10?15 minutes before unplugging seat connectors.
- Never probe airbag connectors with a test light or meter unless you know the correct procedure.
- Don?t route wires or hoses across airbag deployment paths (often labeled on the seat frame).
- If you remove the seat, keep it upright and handle it carefully?avoid putting pressure on side bolsters where airbags may be housed.
Step-by-Step: Installing an External Lumbar Cushion
This is the quickest lumbar support installation and works well for drivers who want immediate improvement with minimal effort.
- Set your seat position. Adjust seat height, tilt, and distance the way you normally drive. Lumbar support should be tuned to your real driving posture.
- Locate the ideal lumbar zone. The cushion should sit in the small of your back (roughly beltline height), not mid-back.
- Attach the straps properly. Run straps behind the seat back. If there?s a plastic seat-back panel, route straps around it carefully to avoid bending clips.
- Tighten evenly. Over-tightening can cause the cushion to bow or feel like a ?lump.? Tighten until it doesn?t slip when you enter/exit the car.
- Test drive and micro-adjust. Move the cushion up/down by 1?2 inches until your pelvis feels stable and your shoulders relax against the seat.
Practical Tip
If the cushion slides during entry, add a strip of non-slip shelf liner between the cushion and seat fabric/leather. It?s inexpensive and invisible once installed.
Step-by-Step: Installing a Seat-Back Lumbar Insert Pad
A lumbar insert pad is a great middle ground: more stable than a strap-on cushion, but usually doesn?t require removing the entire seat. Some vehicles make this easier than others depending on upholstery attachment style.
- Inspect how the seat back is finished. Look for a rear panel, zipper, J-channels, or clips at the lower edge of the seat back upholstery.
- Create access to the seat foam.
- If there?s a zipper, unzip it partially.
- If there are J-channels (interlocking plastic strips), carefully separate them.
- If there are clips, use trim tools to release without tearing the upholstery.
- Clean the area. Wipe away dust and debris so the pad sits flat and doesn?t create wrinkles.
- Position the pad. Place it centered left-to-right and aligned with your lumbar curve. Start slightly lower than you think?you can always move it up.
- Secure it (if applicable). Many pads include adhesive backing or Velcro. Use cloth automotive tape or Velcro strips if you want extra hold without damaging foam.
- Reattach upholstery. Make sure edges align evenly. A crooked reattachment will show as wrinkles and can cause discomfort.
- Seat test. Sit normally for 2?3 minutes. If it feels like it pushes your spine forward too much, lower the pad or choose a thinner insert.
Real-World Example
On many daily-driver sedans with flat seat backs, a medium-density foam insert around 1?1.5 inches thick is often enough to reduce slouching on 45?60 minute commutes. Drivers who pick a thick insert (2+ inches) frequently report feeling ?arched,? which can be just as tiring as no support.
Step-by-Step: Installing an Internal Lumbar Bladder Kit (Manual or Electric)
If you want adjustable lumbar support that feels closer to factory, an internal bladder system is the most rewarding. Plan for 1?3 hours depending on seat design and your experience.
What Comes in Most Kits
- Inflatable bladder
- Manual bulb pump with release valve or electric pump module
- Air line (hose) and fittings
- Mounting pads/Velcro and basic hardware
Step-by-Step Installation
- Disconnect the battery. Remove the negative terminal and wait 10?15 minutes.
- Decide whether to remove the seat.
- Leave seat in car: faster, but tighter workspace.
- Remove seat: easier upholstery access and routing; best for first-time installers.
- If removing the seat, unplug connectors safely. Slide the seat to expose bolts, remove them, tilt seat back, and unplug connectors gently. Don?t pull on wires?use connector tabs.
- Open the seat back upholstery. Use the lower attachment point (zipper/J-channel/clips). Work slowly to avoid tearing.
- Identify safe mounting location. Center the bladder in the lumbar region. Avoid:
- Side airbag modules
- Seat frame edges that could pinch the bladder
- Sharp springs or wires
- Mount the bladder. Use the kit?s Velcro or mounting pads. The bladder should lie flat with no folds. Folds can create pressure points.
- Route the air line. Run the hose down the inside of the seat back, following existing harness paths where possible. Secure with zip ties and wrap contact points with cloth tape to prevent squeaks.
- Choose your control placement.
- Manual pump: often best tucked along the seat side near the plastic trim, reachable but discreet.
- Electric switch: mount to a seat side panel or center console blank (avoid drilling into areas with wiring/airbags).
- Electric kit wiring (if applicable). Use a fused power source. Many owners tap an accessory circuit so the system turns off with the key. Keep wiring away from seat tracks and moving mechanisms.
- Reassemble upholstery. Ensure the fabric/leather is evenly tensioned. Reconnect J-channels/clips fully to avoid gaps.
- Reinstall seat and reconnect battery. Torque seat bolts to manufacturer spec if available. Turn ignition on and verify there are no airbag warning lights.
- Initial adjustment. Inflate slowly while seated. Stop as soon as you feel your pelvis stabilize and your lower back contact becomes even.
Pro Tip for Comfort Tuning
Many people overinflate an internal bladder at first because it feels ?supportive? for 30 seconds. The sweet spot usually feels subtler: just enough to prevent slouching, not enough to push your ribs forward. If you feel your shoulders lifting off the seat, you?ve gone too far.
Product Recommendations: What to Look For (Without the Hype)
Specific brand availability changes, but the features below are consistent indicators of a lumbar support product that installs cleanly and lasts.
Best for Quick Relief: Contoured Memory Foam Lumbar Cushion
- Breathable cover (mesh or perforated fabric)
- Dual straps (top and mid) to prevent sagging
- Moderate thickness (avoid oversized ?office chair? pillows in small cabins)
Best Value Hidden Upgrade: Slim Lumbar Insert Pad
- High-density foam that won?t collapse after a month
- Multiple thickness options (0.5", 1", 1.5")
- Velcro mounting instead of aggressive adhesives
Most OEM-Like: Internal Bladder Kit
- Reinforced bladder material with smooth edges
- Quality fittings that don?t leak (listen for hissing after inflation)
- For electric kits: fused harness and a compact pump rated for automotive use
Common Mistakes to Avoid
- Installing too high. Lumbar support belongs at the beltline area. Too high feels like a mid-back lump and can cause shoulder fatigue.
- Choosing ?maximum thickness? by default. More support isn?t always better. Start slimmer and add thickness only if needed.
- Ignoring airbag zones. Side airbags are often in the outer bolster. Don?t mount bladders, straps, or wiring where deployment could be obstructed.
- Poor hose/wire routing. A hose that rubs a seat frame or track will eventually wear through or create squeaks.
- Not testing before final reassembly. For internal kits, inflate/deflate once before you close the upholstery to confirm placement and hose integrity.
- Over-tightening cushion straps. This can distort the cushion shape and create pressure points.
Extra Practical Tips for a Factory-Clean Result
- Use cloth automotive tape anywhere a hose or wire touches metal. It prevents rattles and looks professional.
- Match the seat?s contour. If your seat has aggressive bolsters, avoid wide cushions that bridge across bolsters and force you forward.
- Check your seating ergonomics. Lumbar support works best when:
- Your hips are slightly higher than your knees (or at least level)
- Your shoulders rest naturally against the seat
- You?re not reaching for the wheel
- Re-evaluate after a week. Your body may need a few days to adapt to better posture. Small adjustments beat full re-installs.
FAQ: Lumbar Support Installation
How do I know if I need more lumbar support or less?
If your lower back feels unsupported and you find yourself slouching, you likely need more. If the support feels like it?s pushing you forward, causing upper-back tension, or creating a sharp pressure point, you need less (or a lower position). The right setting feels steady and neutral, not aggressive.
Will installing lumbar support affect my seat?s side airbags?
External cushions and slim inserts usually won?t interfere if they don?t wrap tightly around the outer bolsters. Internal bladder kits require extra caution: keep components away from side airbag modules and deployment paths. When in doubt, consult your service manual or a professional upholsterer.
Can I install an internal lumbar bladder without removing the seat?
Often yes, especially if the upholstery has a zipper or accessible lower attachment. That said, removing the seat makes routing cleaner and reduces the chance of broken clips or strained connectors?just follow battery disconnect steps and handle wiring carefully.
Why does my new lumbar support feel uncomfortable at first?
If you?ve been driving with poor posture for a long time, a corrected spine position can feel ?different? for a few days. Start with minimal support and gradually increase. If discomfort is sharp, localized, or worsens quickly, reposition the support lower or reduce thickness.
Do lumbar cushions work with seat covers?
Yes, but fit varies. Strap-on cushions may slip on smooth seat covers. A better option is a lumbar insert designed to sit under the seat cover, or a seat cover that includes built-in lumbar padding.
What?s the best option for long road trips?
An internal adjustable bladder system is the most versatile because you can fine-tune support as your posture changes over hours. If you want a simpler solution, a high-quality contoured foam cushion with stable straps is a solid second choice.
Next Steps: Get the Fit Dialed In
Once your lumbar support is installed, take a short drive on your usual routes and adjust in small increments. Aim for consistent contact in the lower back and a relaxed upper body. If you?re sharing the car with another driver, mark your ideal position with a small piece of tape on the adjustment control or note the ?feel? of the inflation level so you can return to it quickly.
For more practical, enthusiast-friendly interior upgrades?from seat comfort to trim care and cabin ergonomics?browse the latest guides on carinteriormix.com.