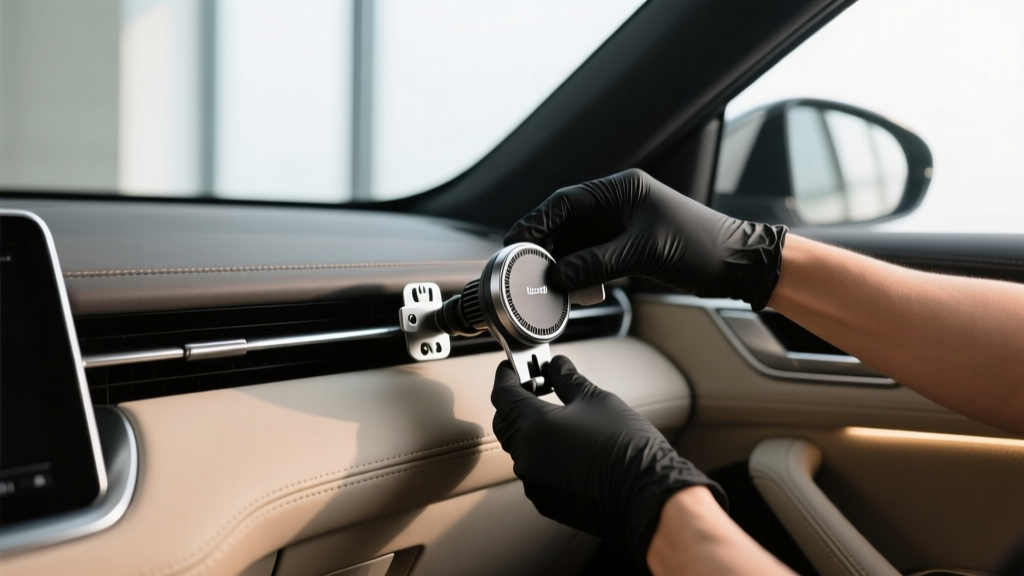
Ionizer Mount Installation Guide | CarInteriorMix
Car interiors trap a surprising amount of what you don?t want to breathe: lingering food smells, pet odors, smoke residue, and airborne dust that gets kicked up every time you close a door or switch the HVAC on. If you drive daily, carpool, or spend long stretches commuting, air quality becomes more than a ?nice to have??it affects comfort, alertness, and how fresh your cabin feels day after day.
A car ionizer can help reduce odor-causing particles and improve perceived air freshness, especially when paired with good cabin filter habits. But the ionizer itself is only half the story. How and where you mount it determines whether it?s effective, safe, and not constantly in your way. A good mount prevents rattles, keeps cables out of sight, avoids blocking airbags, and puts the device where airflow can carry its output through the cabin.
This guide walks you through choosing the right location, picking a mount style, prepping the surface, routing power cleanly, and testing the setup. You?ll also find product-style recommendations, common mistakes to avoid, and a quick FAQ?everything you need for a tidy, reliable ionizer installation.
What a Car Ionizer Does (and What It Doesn?t)
Most car ionizers generate negative ions (and some create a small amount of ozone depending on design). The goal is to help charged particles clump together and drop out of the air or get trapped by filters, while also reducing certain odors. Results vary widely by device quality, cabin size, and how clean your interior already is.
- Best for: mild to moderate odors, reducing ?stale? cabin air, improving perceived freshness, supporting your cabin air filter.
- Not a substitute for: cleaning spills, removing mold sources, replacing a saturated cabin filter, or fixing HVAC issues.
- Pro tip: If your car has persistent musty smells, check for a clogged A/C evaporator drain and replace the cabin air filter before blaming the ionizer.
Choose the Right Mount Location
Before you peel any adhesive or tighten any clamps, pick a location that balances airflow, safety, and convenience. The ?best? spot depends on whether your ionizer is a small USB model, a cupholder unit, or a larger device with a fan.
Top Recommended Locations
- Center console area (near HVAC airflow): Great balance of airflow and accessibility. Ideal for USB ionizers and compact units.
- Dashboard (non-airbag zone): Effective if it sits near vents and doesn?t block visibility. Use a low-profile mount.
- Front seatback (rear-facing): Useful for families and rideshare drivers to distribute toward rear passengers. Mount to a seatback pocket edge or headrest post mount if available.
- Rear console or rear vent area: Good for larger vehicles where rear passengers need airflow support.
Locations to Avoid
- Airbag deployment zones: This includes the steering wheel, passenger dash airbag cover, A-pillar airbags, seat side airbags, and some knee airbags.
- Directly in front of vents if it blocks airflow: You want the ionizer to benefit from airflow, not choke it.
- Footwells: Higher risk of kicking, cable snagging, and dust buildup.
- Loose on the dash: Even ?grippy? bases can become projectiles during hard braking.
Mount Types: Which One Fits Your Car and Ionizer?
Ionizers come in a few shapes, so the best mounting method depends on your device and interior surfaces. Here are the most common mount styles and how they compare.
1) Adhesive Pad / 3M VHB Tape Mounts
- Best for: lightweight ionizers, smooth plastic surfaces, discreet installs.
- Pros: clean look, low rattle risk, easy placement.
- Cons: can fail on textured dashboards or if the surface wasn?t prepped; removal may require care.
2) Vent Clip Mounts
- Best for: compact ionizers, plug-in devices, quick installs.
- Pros: easy to install/remove; uses airflow immediately.
- Cons: can stress fragile vent slats; may rattle; weight can cause droop.
3) Cupholder-Based Units
- Best for: larger ionizers with fans, multi-function purifiers.
- Pros: stable; no adhesives; good for heavier devices.
- Cons: takes up storage space; may interfere with shifting/controls depending on layout.
4) Headrest Post / Seatback Mounts
- Best for: distributing toward the rear seats; rideshare and family vehicles.
- Pros: keeps the dash clean; improves rear coverage.
- Cons: cable routing is trickier; must avoid interfering with seat movement.
Tools and Supplies Checklist
You can install most ionizer mounts with basic supplies. Gather these before you start so you?re not rushing mid-install.
- Microfiber cloth
- Isopropyl alcohol (70%+), or automotive interior surface prep wipes
- Adhesive promoter (optional, useful for textured plastics)
- Trim tool or plastic pry tool (for safe cable routing)
- Cable clips or adhesive cable anchors
- Zip ties (small)
- 12V adapter or USB car charger (as needed)
- Spare 3M VHB tape (if your mount?s tape is low quality)
Step-by-Step Ionizer Mount Installation
Step 1: Plan the Power Source and Cable Path
Decide whether you?ll power the ionizer from:
- USB port: clean for small ionizers; check whether the port stays powered when the car is off.
- 12V socket: more universal; may be in the console or dash; often switched with ignition.
- Hardwire kit (advanced): cleanest look, but requires fuse-tap knowledge and care.
Real-world example: If your SUV?s only 12V socket is in the cargo area, a cupholder ionizer up front will require a long cable?better to use a front USB port or choose a different mount location.
Step 2: Confirm Safety Clearances
- Turn the steering wheel lock-to-lock and make sure nothing interferes.
- Check passenger dash for airbag seams or ?SRS/AIRBAG? markings?don?t mount there.
- Move seats through full range to ensure the device and cable won?t snag.
Step 3: Dry Fit the Mount and Ionizer
Hold the mount in place without removing adhesive backing. Check:
- Visibility (no blocking gauges or sightlines)
- Reach (easy to turn on/off or adjust)
- Stability (does it wobble when you tap it?)
- Cable exit direction (helps hide wires)
Step 4: Prep the Surface Properly (This Is Where Installs Succeed or Fail)
- Wipe dust and oils with a clean microfiber.
- Clean again using isopropyl alcohol and let it air-dry fully.
- If the surface is heavily textured, consider an adhesive promoter or use a clamp/vent/cupholder option instead.
Practical tip: If your dash has a soft-touch coating, adhesives may bond poorly or peel the finish. Test an inconspicuous area first or choose a non-adhesive mount.
Step 5: Install the Mount (Adhesive, Vent Clip, or Cupholder)
For Adhesive/VHB Tape Mounts
- Warm the cabin slightly if it?s cold (adhesives bond better around room temperature).
- Peel backing and place the mount once?avoid repositioning after contact.
- Press firmly for 30?60 seconds with steady pressure.
- Wait 1?24 hours before heavy use (follow the tape/manufacturer guidance) for best bond strength.
For Vent Clip Mounts
- Choose a vent with sturdy slats and minimal flex.
- Insert the clip straight to avoid twisting the slat.
- Use the included stabilizer leg (if provided) against the vent frame.
- Check for rattles by tapping the ionizer gently.
For Cupholder Units
- Adjust expandable bases so the unit doesn?t rock.
- Keep it away from shift levers, drive mode knobs, and parking brake switches.
- Confirm cupholder depth allows airflow and doesn?t trap heat around the unit.
Step 6: Route the Cable Cleanly
Clean cable routing is what separates a ?quick install? from a professional-looking one.
- Run the cable along existing seams: console edges, trim gaps, or under rubber mats.
- Use a trim tool to gently tuck the cable?never force it.
- Secure with cable clips/anchors every 6?10 inches to prevent rattles.
- Leave a small service loop near the ionizer so you can unplug it without yanking the mount.
Tip for stealth: If your USB port is in the center console, route the cable down behind the console edge and back up through a small gap?many cars have factory wire paths you can follow.
Step 7: Power On and Function Test
- Verify the unit powers up consistently with ignition behavior you prefer (switched vs always-on).
- Confirm no new buzzing/rattling appears over rough pavement.
- Check that vents still move freely and airflow is not obstructed.
- If the unit has multiple modes, choose a moderate setting first and evaluate odor improvement over a few drives.
Product Recommendations: What to Look For
Rather than focusing on a single brand, evaluate ionizers and mounts based on design and how they fit your vehicle layout.
Best for Most Drivers: Compact USB Ionizer + Adhesive or Vent Mount
- Look for low-noise operation and a status indicator that isn?t overly bright at night.
- Choose a mount with quality adhesive (3M VHB) or a vent clip with a stabilizer foot.
Best for Rideshare/Family Vehicles: Seatback/Headrest Mount or Rear Console Placement
- Prioritize wider distribution toward rear passengers.
- Consider a unit with a fan assist if your rear airflow is weak.
Best for Odor-Prone Use Cases: Ionizer + HEPA-Style Fan Purifier (If Space Allows)
- If you transport pets, gym bags, or smoke exposure is common, a small purifier with a filter can outperform ionizers alone.
- Make sure it?s stable (cupholder or dedicated bracket) and doesn?t block airbags or controls.
Common Mistakes to Avoid
- Mounting on or near airbag covers: even a small device can become dangerous during deployment.
- Skipping surface prep: oils from interior protectants can cause adhesive failure within days.
- Overloading vent slats: heavy devices can crack slats or cause permanent droop.
- Letting the cable dangle: it looks messy and can snag on shifters, pedals, or passengers? feet.
- Assuming ?more is better?: max settings aren?t always necessary; start moderate and assess comfort.
- Ignoring the root cause of odors: old cabin filters, damp carpets, and dirty HVAC systems will overpower any ionizer.
Maintenance Tips for Long-Term Performance
- Clean the unit: dust the vents and housing monthly; keep intake/exhaust clear.
- Replace the cabin air filter: a clogged filter reduces airflow and traps odors?most drivers benefit from replacement every 12 months (more often in dusty areas).
- Re-check the mount seasonally: temperature swings can loosen adhesives and plastic clips.
- Keep interior dry: moisture is the enemy of fresh cabin air?dry mats after rain and address leaks quickly.
FAQ: Ionizer Mount Installation Questions
Where should I mount a car ionizer for best results?
Near active airflow is usually best?close to center vents or the center console area?without blocking vent movement or any airbag zones. If you want better coverage for rear passengers, consider a seatback or rear console placement.
Can I mount an ionizer on the dashboard?
Yes, if the surface is suitable for adhesive and you?re well away from passenger airbag panels and sightlines. A low-profile mount on a flat, stable dash section works better than mounting on textured or soft-touch materials.
Why does my adhesive mount keep falling off?
Common causes are poor surface prep (dressings/oils), textured surfaces, cold temperatures during installation, or low-quality tape. Clean with isopropyl alcohol, warm the cabin, and use genuine 3M VHB tape. If your dash texture is aggressive, switch to a cupholder or clamp-style mount.
Are vent clip mounts safe for my vents?
They can be, but heavy devices can stress vent slats. Use a lightweight ionizer and a vent clip with a stabilizer foot, and avoid forcing the clip. If your vents feel flimsy, choose an adhesive or cupholder solution.
Will an ionizer remove smoke smell permanently?
It can reduce lingering odor, but permanent smoke smell usually requires deeper cleaning: upholstery and headliner treatment, replacing the cabin air filter, cleaning HVAC ducts/evaporator, and removing residue from hard surfaces. An ionizer works best as ongoing support after cleaning.
Should I run the ionizer all the time?
Most drivers run it during trips and shut it off when parked, especially if the power outlet stays on with the ignition off. If your car?s USB/12V port is always live, continuous use can drain the battery over long periods.
Wrap-Up and Next Steps
A well-mounted car ionizer should feel like part of the interior: stable, quiet, and out of the way?while keeping the cabin smelling fresher on real daily drives. Start by choosing a safe location, match the mount style to your surfaces and device weight, prep the mounting area like a detailer would, and route power so nothing dangles or rattles.
Your next steps:
- Replace your cabin air filter if it?s overdue.
- Pick a mount location that avoids airbags and benefits from HVAC airflow.
- Install the mount with proper surface prep and clean cable routing.
- Test for rattles and adjust placement before committing long-term.
For more practical interior upgrades, detailing tips, and install guides, explore the latest articles on carinteriormix.com.