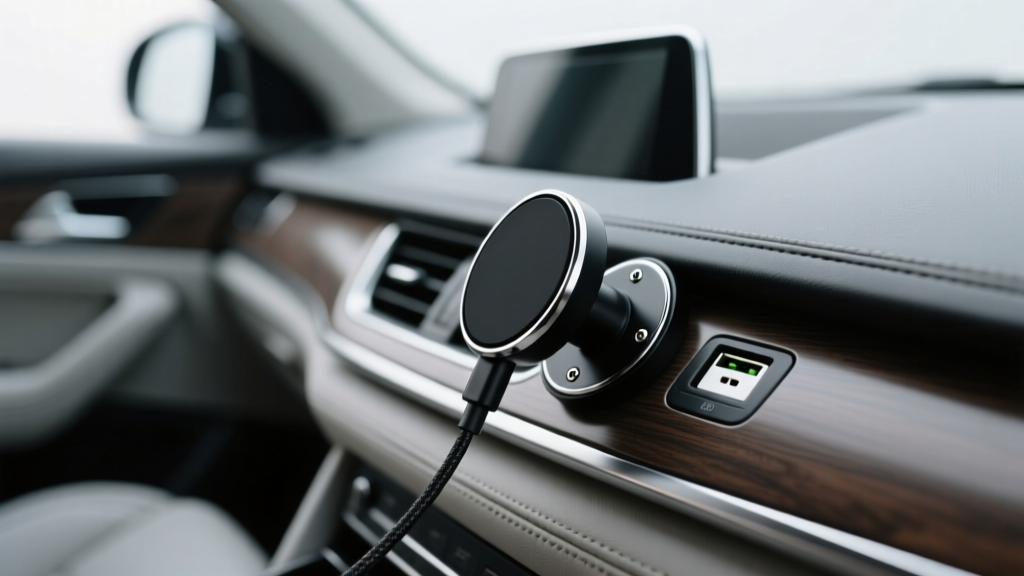
Charger Cable Holder Installation: CarInteriorMix
A messy charging cable is one of those small car-interior annoyances that can snowball into bigger problems. Cables slide under seats, dangle near the pedals, snag on the shifter, and collect dust and crumbs. If you?ve ever reached for your phone in a hurry and found the cable tip missing (again), you already understand the appeal of a proper charger cable holder.
A well-placed cable holder makes your cabin feel more organized and intentional. It also helps protect your charging cables from kinks and fraying, keeps connectors clean, and reduces distractions while driving. Whether you?re using a factory USB port, a 12V socket charger, or a multi-device hub, a cable holder is a simple upgrade that pays off every day.
This guide walks you through picking the right style, choosing a smart mounting location, and installing it cleanly on common interior surfaces. You?ll also find product-style recommendations, real-world placement examples, and a list of common mistakes that lead to holders popping off or leaving sticky residue.
What Is a Charger Cable Holder (and Why It?s Worth Installing)?
A charger cable holder is any interior accessory designed to secure a charging cable in a predictable, easy-to-reach spot. Most holders either clamp the cable, guide it through a channel, or use a magnetic tip system that ?parks? the connector when it?s not in use.
Benefits you?ll notice right away
- Less clutter: Cables stop sliding into footwells and cupholders.
- Safer driving: Fewer distractions from hunting for a cable or pulling it from under a seat.
- Longer cable life: Reduced tugging and bending at the connector strain relief.
- Cleaner look: Your center console and dash look more ?OEM? and less like a charging station.
- Better passenger experience: Rear-seat riders can easily find and return cables.
Choose the Right Cable Holder Style
Before you install anything, match the holder to your cabin layout and your cable type (USB-C, Lightning, Micro-USB). The ?best? option depends on where you want the connector to live and how permanent you want the mount to be.
1) Adhesive clip holders (most common)
These are small clips or channels with adhesive backing. They?re affordable and work well on flat, clean surfaces like a glossy console side panel.
- Best for: One or two cables near the console or dash
- Pros: Easy install, low cost, flexible placement
- Cons: Adhesive can fail on textured plastics or if surfaces aren?t cleaned
2) Magnetic cable holders (premium convenience)
Magnetic systems typically use a base stuck to the interior plus a magnetic tip (or collar) on the cable. You ?snap? the connector into place when done.
- Best for: Drivers who charge multiple times a day and want a tidy ?dock?
- Pros: Quick one-handed parking, clean look
- Cons: Costs more; some systems require proprietary tips or adapters
3) Seat-gap and console-side organizers (no adhesive)
These wedge between the seat and console or hook to a trim edge, sometimes adding a pocket for a phone or wallet.
- Best for: Renters/lease owners who don?t want adhesive on trim
- Pros: Removable, adds storage
- Cons: Fit varies by vehicle; can interfere with seat movement if poorly sized
4) Vent-clip cable management (limited but useful)
Some holders clip near vents or mount to a vent phone holder with cable routing built in.
- Best for: Dash-mounted phone setups
- Pros: Keeps cables up and away from console clutter
- Cons: Not ideal in hot climates (heat can soften adhesives and affect cable longevity)
Tools and Supplies You?ll Want on Hand
Most cable holder installs are simple, but the difference between ?stays put for years? and ?falls off next week? is surface prep.
- Isopropyl alcohol (70?90%) and a clean microfiber towel
- Painter?s tape (for test placement and alignment)
- Plastic trim tool (optional, for tucking cables along gaps)
- Zip ties or Velcro cable wraps (for cleaning up slack)
- Heat source (optional): Warm hands or a gentle hair dryer to help adhesive bond in cold weather
Plan the Best Installation Location (Real-World Examples)
Good placement keeps the cable connector within easy reach without crossing high-use controls. Sit in your normal driving position and do a quick ?reach test? before committing.
Smart locations that work in most cars
- Center console side panel (driver side): Great for cable access without cluttering cupholders.
- Front edge of the console near the shifter: Convenient, but be careful not to block shifting or drive-mode buttons.
- Dash lower trim near infotainment (not on airbags): Ideal if your USB port is in the dash area.
- Inside the console storage bin: Best for a hidden, clean setup if you usually leave your phone in the console.
- Rear of the center console (for passengers): Perfect for families and rideshare drivers.
Locations to avoid
- Any airbag deployment zone: A-pillars, steering wheel area, upper dash, and side curtain airbag paths.
- Pedal/footwell area: Even a ?small? cable loop can become a safety hazard.
- High-heat surfaces: Direct sun on top of the dash can weaken adhesives and bake cable jackets.
- Rough, rubberized, or heavily textured trim: Adhesive pads struggle to bond long-term.
Step-by-Step: Adhesive Cable Holder Installation
This is the most common installation method, and it?s where careful prep makes the biggest difference.
Step 1: Test placement with painter?s tape
- Sit in the driver?s seat and plug in your cable.
- Route the cable the way you actually use it (to a phone mount, to the console, to a wireless charging pad, etc.).
- Use painter?s tape to temporarily hold the cable holder in place.
- Check for interference with shifting, cupholders, parking brake, seat movement, and lid hinges.
Step 2: Clean the surface properly
- Wipe the mounting area with a dry microfiber to remove dust.
- Apply isopropyl alcohol to a microfiber (not directly onto electronics or seams) and wipe the area.
- Let it air-dry completely for at least 60 seconds.
Tip: If your interior has silicone dressings or shiny protectants, you may need two alcohol wipes. Adhesive pads hate oily residue.
Step 3: Warm the adhesive (if needed)
- If it?s cold outside (generally below 60�F / 16�C), warm the trim with your hand for 20?30 seconds.
- You can also warm the adhesive pad lightly with a hair dryer on low, held at a safe distance.
Step 4: Stick the holder and apply firm pressure
- Peel the backing off the adhesive without touching the sticky surface.
- Place the holder exactly where you want it (this is why the tape test matters).
- Press firmly for 30?60 seconds, focusing pressure across the entire adhesive area.
Step 5: Let the adhesive cure before heavy use
Many automotive-grade adhesives achieve a stronger bond over time.
- Minimum: Wait 1 hour before tugging or re-routing cables aggressively.
- Ideal: Wait 24 hours before frequent plugging/unplugging.
Step 6: Route the cable cleanly and manage slack
- Run the cable along trim edges and gaps where possible.
- Tuck it gently using a plastic trim tool (avoid metal tools that can mar panels).
- Bundle excess length under the console, inside the armrest, or behind a panel using Velcro wraps.
Real-world example: If your 12V socket is in the front of the console, route the cable down the passenger side of the console and bring the connector back up near the shifter. That keeps the bulk of the cable hidden and leaves a short ?grab zone? near your hand.
Step-by-Step: Magnetic Cable Holder Installation
Magnetic holders install similarly, but there are two extra considerations: magnet alignment and connector compatibility.
- Pick the ?parking spot? first: Choose a flat area where the connector can snap in without twisting the cable.
- Install the base: Follow the same clean?warm?press?cure process as adhesive holders.
- Add the magnetic tip or collar: Ensure it seats securely and doesn?t loosen when unplugging from your phone.
- Check one-handed operation: You should be able to park the connector by feel without looking away from the road.
Tip: If you share the car, magnetic setups reduce the ?dangling cable? problem because anyone can quickly snap the connector back into place.
Product Recommendations: What to Look For (and Quick Comparisons)
Rather than chasing a specific brand, focus on features that matter in real car interiors: heat resistance, adhesive quality, and cable compatibility.
Key features worth paying for
- Automotive-grade adhesive: 3M VHB-style tape holds up best to heat/cold cycles.
- Wide cable channels: Better for thicker braided cables and USB-C fast-charge cords.
- Soft-touch or silicone contact points: Helps prevent cable jacket wear and reduces rattles.
- Low-profile design: Less likely to catch sleeves, bags, or knees.
- Multi-slot holders: Great if you carry both USB-C and Lightning.
Which style should you buy?
- Best budget choice: Adhesive clip/channel holder with quality tape
- Best ?factory-clean? look: Magnetic parking holder near console or dash
- Best for leases or frequent interior changes: Seat-gap/console organizer style
- Best for families: Rear console multi-slot holder + short cables for passengers
Common Mistakes to Avoid
- Skipping the alcohol wipe: Interior dressings and skin oils are the #1 cause of adhesive failure.
- Mounting on textured plastic: The holder may stick initially, then release during a hot afternoon.
- Placing it in an airbag zone: Even small accessories can become dangerous projectiles or interfere with deployment.
- Pulling on the cable to unplug: Unplug from the connector head; repeated yanks can rip the holder off the trim.
- Leaving slack in the footwell: Loose loops near pedals are a real safety risk.
- Not letting adhesive cure: A rushed install often ends with the holder sliding off under the first ?real? pull.
Practical Tips for a Cleaner, Longer-Lasting Setup
- Use the shortest cable that fits your routine: A 3 ft cable is easier to manage than a 6 ft cable in most front seats.
- Match cable color to interior trim: Black or charcoal blends into most consoles and looks more OEM.
- Add a second holder as a ?strain relief? point: One holder near the power source and another near the connector reduces tugging.
- Keep ports accessible: Don?t bury your USB hub behind the seat where you?ll end up yanking cables to find it.
- Consider a right-angle connector cable: Especially helpful if your phone sits in a shallow tray or against the console wall.
FAQ: Charger Cable Holder Installation
Will adhesive cable holders damage my interior trim?
Most won?t damage trim when installed on smooth, hard plastics and removed carefully. Problems usually come from cheap adhesive, mounting on soft-touch coatings, or removing the holder too quickly. If you plan to remove it later, choose a holder with a quality adhesive pad and avoid rubberized trim.
How do I remove a cable holder without leaving residue?
Warm the adhesive with a hair dryer on low, then gently work dental floss or fishing line behind the holder to ?slice? through the tape. Roll leftover adhesive off with your thumb or use a mild adhesive remover that?s safe for automotive interiors (test in a hidden spot first).
Where should I mount a cable holder if I use a dash phone mount?
A good setup is a holder on the lower dash or console side panel that lines up with your phone mount?s charging port. Keep the cable run short and avoid crossing HVAC controls or the steering column area.
Do magnetic cable holders affect my phone or key fob?
Most small magnets used for cable parking won?t harm modern phones, but they can interfere with some wireless charging alignments if placed too close to the charging coil. Keep magnetic mounts away from wireless charging pads, and don?t store key fobs directly against strong magnets.
My holder keeps falling off?what am I doing wrong?
The usual causes are mounting on textured/dirty surfaces, installing in cold temperatures, or not applying enough pressure during installation. Re-clean the area with alcohol, warm the surface, and consider upgrading to a holder with automotive-grade tape.
Is it better to mount inside the console or outside near the shifter?
If you want a cleaner look and don?t need constant access, inside the console is great. If you plug/unplug frequently or use a phone mount, an outside mount near the console edge is more convenient?just ensure it won?t interfere with shifting, drive modes, or cupholder use.
Wrap-Up: Your Next Steps
Pick a holder style that matches how you charge day-to-day, test the location with tape, and take the extra two minutes to clean the surface with isopropyl alcohol. Install with firm pressure, let the adhesive cure, then route the cable so it stays out of the footwell and away from high-use controls. A simple cable holder can make your interior look cleaner, feel more premium, and keep charging frustration out of your routine.
If you?re ready to level up your cabin organization even further, explore more practical interior upgrades and how-to guides on carinteriormix.com.