Cargo Organizer Setup: Step-by-Step Installation (2026)
A messy trunk has a way of turning small errands into a full-blown scavenger hunt. One hard brake, one sharp corner, and suddenly your grocery bags tip over, your tool kit slides into your spare tire well, and that bottle of windshield washer fluid is rolling around like it owns the place. A properly installed cargo organizer solves these problems fast?while also protecting your interior trim, reducing rattles, and making everyday driving feel more put together.
Cargo organizers aren?t just for road-trippers or detail-obsessed owners. If you carry sports gear, kids? items, pet supplies, work tools, emergency kits, or shopping bags, an organizer is one of the highest value ?quality-of-life? upgrades you can make. The key is choosing the right style for your vehicle and installing it so it stays put when the cargo area gets real-world use.
This guide walks you through choosing the best organizer for your setup, prepping your cargo area, installing different organizer types step-by-step, and avoiding the common mistakes that cause sliding, tipping, and wasted space.
What a Cargo Organizer Does (and Why Installation Matters)
Most drivers buy a trunk organizer thinking it?s a simple drop-in solution. Sometimes it is?but the difference between ?looks good? and ?works every day? is installation. A poorly secured organizer can:
- Slide around on carpet or plastic cargo floors
- Tip over during turns or braking
- Block access to underfloor storage, spare tire panels, or cargo hooks
- Create annoying squeaks and rattles
- Become a safety hazard if heavier items shift forward
A properly installed cargo organizer uses the vehicle?s existing tie-down points, anti-slip bases, Velcro strips (on carpet), or straps to make the organizer act like a semi-fixed ?module? in your trunk.
Choose the Right Cargo Organizer for Your Vehicle
Measure First: The 2-Minute Fit Check
Before you buy?or before you start installing?measure your cargo area so the organizer doesn?t interfere with daily use.
- Width: side-to-side at the narrowest point (often between wheel wells)
- Depth: from hatch latch area to the back of the rear seats
- Height: if you plan to stack items or use a cover/tonneau
- Floor type: carpet, hard plastic, rubber mat, or reversible floor panel
Real-world example: Many compact SUVs have wide cargo areas but narrow wheel-well clearance. A ?full-width? organizer might fit on paper yet prevent the rear seatbacks from folding flat. A slightly smaller organizer anchored properly often works better than a big one that you constantly remove.
Common Types of Cargo Organizers (Pros and Cons)
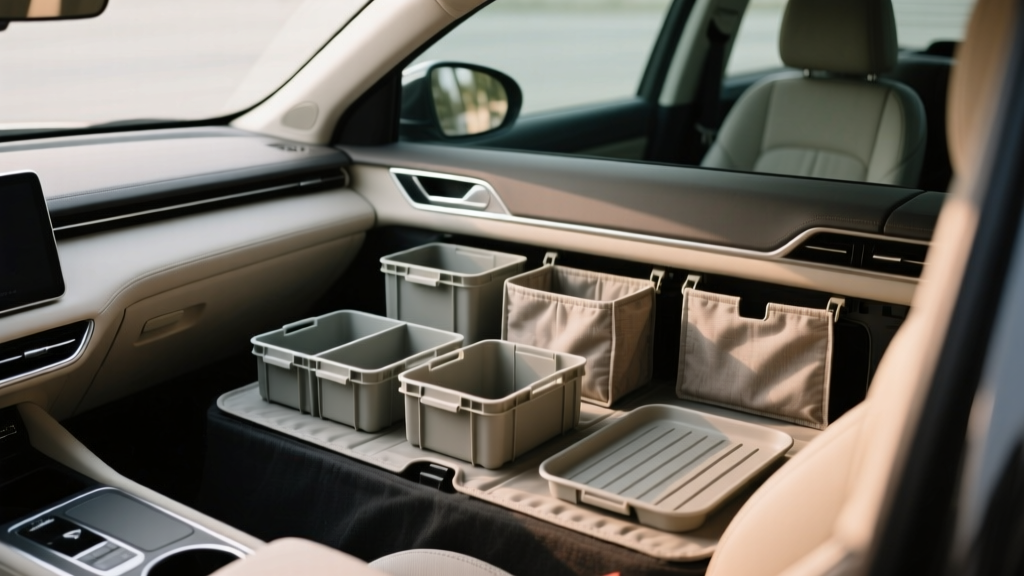
- Foldable box organizer: Easy, affordable, collapsible. Best for groceries, day-to-day items. Can slide unless anchored.
- Rigid bin system: More stable and durable. Great for tools and heavier gear. Takes up space even when empty.
- Strap-and-net systems: Minimal footprint. Ideal for securing loose items against the seatback. Not great for small items unless paired with pouches.
- Modular Velcro dividers (carpeted cargo floors): Customizable. Excellent grip on carpet. Won?t work well on plastic/rubber floors.
- Trunk tray + organizer combo: Tray protects the floor; organizer stays cleaner and more stable. Excellent for pets, outdoor gear, and wet items.
Tools and Supplies You?ll Want on Hand
Most cargo organizers install without tools, but a few basics make the job cleaner and more secure:
- Measuring tape
- Microfiber towel and interior-safe cleaner
- Hook-and-loop (Velcro) strips (automotive grade)
- Non-slip cargo liner or anti-slip mat (optional but highly effective)
- Scissors or utility knife (for trimming adhesive strips)
- Small flashlight (for locating cargo hooks and anchors)
Prep Your Cargo Area Before Installation
Step 1: Empty and Clean
- Remove everything from the cargo area, including underfloor compartments if you?ll access them regularly.
- Vacuum dirt and grit?especially near the hatch threshold and corners.
- Wipe down plastic side panels and the cargo floor. Adhesive and Velcro solutions stick best to clean surfaces.
Step 2: Identify Anchoring Points
Look for these common trunk anchor options:
- D-rings or metal loops at the corners
- Plastic cargo hooks on side panels
- Seatback anchor bars (in some SUVs/wagons)
- Factory cargo net mounting points
Step 3: Decide on a ?Home Base? Layout
Think about how you actually use the trunk:
- Daily driver setup: Organizer tight to one side + open space for larger items.
- Family setup: Organizer against rear seats for easy reach + small center lane for stroller or backpacks.
- Work/trades setup: Organizer near tailgate for quick tool access + tie-down straps for larger cases.
Step-by-Step Installation: Foldable Box Organizer (Most Common)
Step 1: Assemble and Inspect
- Unfold the organizer and insert any stiff panels (bottom or side walls).
- Confirm the lid (if included) closes without bowing.
- Check the base: many organizers include anti-slip feet or Velcro strips?note which style you have.
Step 2: Position for Stability
- Place the organizer on the flattest section of the cargo floor.
- Keep it away from angled seatback hinges or uneven underfloor panel seams if possible.
- Leave clearance to open underfloor storage if you use it often (jumper cables, inflator kit, tow hook).
Step 3: Anchor It (Pick the Method That Matches Your Floor)
Method A: Velcro to Carpet (Best on carpeted cargo areas)
- Press the organizer down where you want it.
- If the organizer has built-in Velcro, apply firm pressure along the base perimeter.
- If it doesn?t, add adhesive-backed hook-and-loop strips to the organizer base (loop side on carpet contact surfaces if required by the product design).
- Test by tugging sideways. A good setup should resist sliding without lifting.
Method B: Strap to D-rings / Tie-down loops (Best for heavier loads)
- Locate two tie-down points near the organizer.
- Route adjustable straps through the organizer?s side handles or anchor loops (if provided).
- Clip or loop straps to the vehicle?s D-rings.
- Tighten until snug?secure enough to prevent movement, but not so tight that it warps the organizer.
Method C: Anti-slip mat + organizer (Best for plastic floors or rubber mats)
- Lay a non-slip mat or thin rubber shelf liner under the organizer footprint.
- Place the organizer on top and press down.
- Combine with straps if you carry heavier items (tools, fluids, recovery gear).
Step 4: Load Smart (Weight Distribution Makes or Breaks It)
- Put heavier items in the lowest compartments, closest to the seatbacks.
- Use smaller pockets for light items (microfiber towels, gloves, first-aid items).
- Keep liquids upright and consider a small leak-proof bin inside the organizer for detailing supplies.
Step-by-Step Installation: Cargo Net and Strap Systems
Option 1: Horizontal Cargo Net (Floor-Level Retention)
- Hook the net into factory anchor points (usually four corners).
- Adjust tension so the net sits slightly taut, not slack.
- Place items under the net; the net should compress them enough to prevent sliding.
Option 2: Vertical Net (Seatback Retention)
- Attach the top hooks to higher anchor points or seatback anchors (if available).
- Attach the bottom hooks near the cargo floor anchors.
- Adjust until the net holds items firmly against the seatback without overstretching.
Pro tip: Nets work best for soft items (jackets, backpacks, grocery bags). For hard items (toolboxes, gallon jugs), pair a net with a non-slip mat to stop ?under-net sliding.?
Step-by-Step Installation: Modular Dividers and Blocks (Carpeted Cargo Floors)
These are the adjustable ?L-block? or divider-style organizers that grip carpet using aggressive hook material.
- Clean and vacuum the carpet thoroughly; hooks don?t grip well with sand and pet hair.
- Place your grocery bags or bins where you want them, then position dividers around them.
- Press each divider down firmly and test by pushing sideways.
- Refine spacing: keep about a finger-width gap so you can remove bags without pulling the divider loose.
Real-world example: If you regularly carry two grocery bags and a small cooler, set up a U-shape around the cooler and a separate lane for bags. This keeps cold items stable and prevents bread from getting crushed.
Product Recommendations and Comparison (What to Look For)
Rather than focusing on one brand, use these buying criteria to match an organizer to your vehicle and usage:
Best for Groceries and Daily Use: Foldable Trunk Organizer
- Look for: reinforced bottom, stiff side panels, non-slip base or Velcro, removable cooler section if you shop often
- Ideal for: sedans, hatchbacks, compact SUVs
Best for Tools and Heavier Gear: Rigid Bin or Hard-Sided Organizer
- Look for: thick walls, solid handles, tie-down compatibility, washable interior
- Ideal for: trucks, work vehicles, weekend DIYers
Best for Minimalists: Cargo Net + Non-Slip Mat
- Look for: quality hooks, adjustable tension, multiple mounting options
- Ideal for: people who want maximum open space most of the time
Best Upgrade Combo: Cargo Liner + Organizer
- Look for: liner with raised edges, organizer with waterproof base
- Ideal for: pet owners, outdoor gear, wet/dirty items
Common Mistakes to Avoid
- Ignoring the floor surface: Velcro-based organizers won?t hold on plastic or rubber mats. Use straps or a non-slip mat instead.
- Placing the organizer on an uneven panel seam: Underfloor lids and fold lines can make the organizer rock or tip.
- Overloading one side: A heavy toolbox in an outer compartment makes tipping more likely. Center heavy weight low and toward the seatbacks.
- Blocking emergency access: Don?t bury your first-aid kit, tire inflator, or tow strap under a fully packed organizer.
- Using weak adhesive strips: Cheap hook-and-loop adhesive can peel in heat. Use automotive-grade adhesive if you?re adding your own.
- Skipping test drives: A setup that feels stable while parked can shift after a few turns. Always do a quick road test and adjust.
Practical Tips for a Cleaner, Quieter Cargo Area
- Add ?zones?: emergency gear (never changes), daily items (charging cables, reusable bags), and rotating items (sports, errands).
- Use small bins inside the organizer: one for detailing supplies, one for kid/pet items, one for car care extras.
- Prevent rattles: line hard compartments with a thin rubber mat or microfiber towel.
- Label frequently used pockets: especially helpful for families or shared vehicles.
- Keep a collapsible tote: handy for bringing multiple items into the house without unloading the entire organizer.
FAQ: Cargo Organizer Setup and Installation
How do I keep a trunk organizer from sliding around?
Match the retention method to your floor: Velcro for carpet, straps for D-rings/tie-down loops, and a non-slip mat for plastic or rubber floors. For the best results, combine a non-slip base with straps if you carry heavier items.
Will Velcro damage my cargo carpet?
Most organizer Velcro is designed for automotive carpet and shouldn?t damage it under normal use. The bigger risk is aggressive hook blocks pressed hard into delicate carpet fibers. If you?re concerned, use a non-slip mat plus straps instead of heavy hook-style dividers.
Where should I place a cargo organizer in an SUV or hatchback?
For stability and safety, place it close to the rear seatbacks and slightly to one side, leaving open space for larger items. If you frequently access the spare tire compartment, leave enough room to lift the floor panel without removing the organizer.
What?s the best cargo organizer setup for grocery runs?
A foldable organizer with at least two compartments works well. Add dividers or smaller bins for fragile items, and use either Velcro (carpet) or a non-slip mat (plastic) to prevent tipping. Position it so bags can be lifted straight up without snagging.
Can I install a cargo organizer in a truck bed?
Yes, but pick a weather-resistant, rigid organizer or bed bin system. In an open bed, water and UV exposure matter. Use bed rail tie-down points and secure with straps; don?t rely on Velcro-style solutions.
How do I organize emergency gear so it?s always accessible?
Dedicate one fixed compartment to essentials: first-aid kit, flashlight, tire inflator, gloves, basic tools, and a small blanket. Keep it closest to the hatch opening or in the top layer so you can reach it without unloading everything.
Wrap-Up: Your Next Steps
Start by measuring your cargo area and deciding what you carry most often. Choose an organizer style that matches your floor surface and daily routine, then install it using the right retention method?Velcro for carpet, straps for tie-down points, and non-slip mats for smoother cargo floors. Once it?s in, do a quick test drive, listen for movement or rattles, and refine your loadout until everything stays quiet and secure.
If you?re ready to keep upgrading your interior comfort and functionality, explore more practical how-tos and product guides on carinteriormix.com.