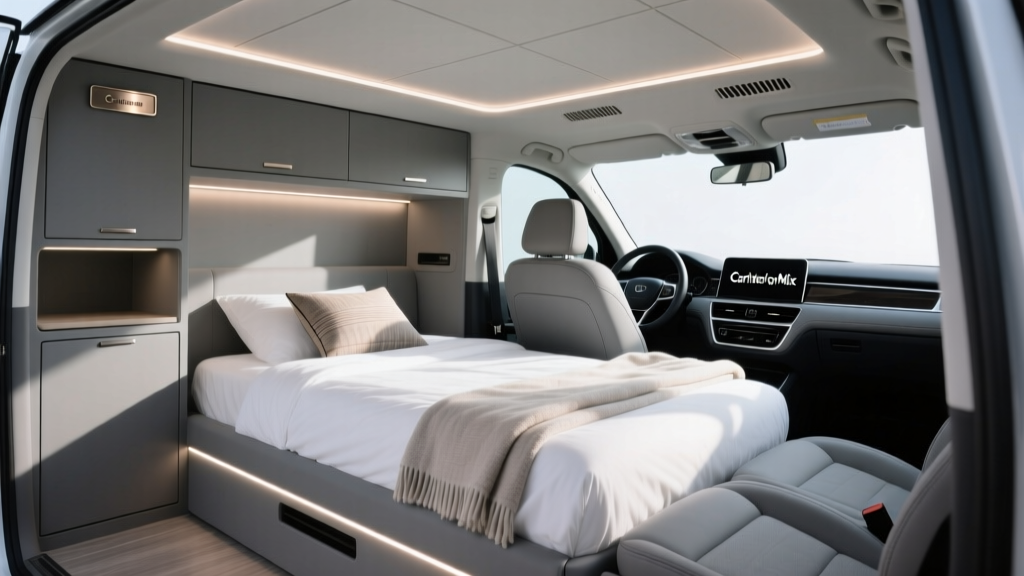
Bed Conversion Installation Guide | CarInteriorMix
Turning your vehicle into a comfortable sleep-ready space is one of the smartest upgrades you can make for road trips, overlanding weekends, tailgate nights, or simply having a safe place to rest between long drives. A proper bed conversion can save money on hotels, extend your travel range, and make your vehicle far more useful?without permanently sacrificing daily drivability.
But ?throw a mattress in the back? rarely works for long. Poor support, uneven floors, trapped moisture, and gear clutter can ruin sleep and even damage your interior. This guide walks you through a dependable, repeatable bed conversion installation?from planning and measuring to building a flat platform and dialing in comfort?so you end up with a setup that?s safe, quiet, and easy to live with.
Whether you?re converting an SUV, crossover, wagon, minivan, or a pickup with a topper, the principles are the same: create a flat, supported surface; keep weight under control; protect your trim; and manage ventilation and storage.
Before You Start: Decide What Kind of Bed Conversion You Want
Not all bed conversions are built the same. Picking the right approach up front prevents rework and wasted money.
Common bed conversion styles
- Simple mattress-only setup: Fast and cheap. Best for occasional use, but comfort and storage are limited.
- Leveling + mattress: Uses foam ?leveling wedges,? folded blankets, or a thin platform to flatten the floor. Good middle ground.
- Platform bed with storage: Most popular for frequent trips. Adds drawer bins, cubbies, or a ?garage? space underneath.
- Modular fold-out platform: Great if you need rear seats during the week. Folds or splits into panels for quick install/removal.
- Commercial kit system: Higher cost, easiest install. Often includes engineered brackets, pre-cut panels, and accessories.
Real-world example: choosing the right setup
A daily-driven compact SUV often benefits from a two-panel fold-out platform that stores in the cargo area. A minivan used for family trips might do better with a full-length platform and storage for bedding underneath, because you can still carry a lot of gear. A pickup with a cap usually needs a low platform to preserve headroom.
Tools, Materials, and Budget Planning
You can build a clean bed conversion with basic tools. The key is using materials that won?t warp, squeak, or smell.
Recommended tools
- Tape measure (at least 10 ft)
- Cardboard for templates
- Jigsaw or circular saw (jigsaw is more forgiving for curves)
- Drill/driver + bits
- Sandpaper or sanding block
- Socket set (for tie-down points if used)
- Staple gun (optional, for carpet wrapping)
- Square/straight edge and marker
Material choices (what works best in vehicles)
- 1/2" plywood: Good balance of strength and weight for small-to-midsize platforms.
- 3/4" plywood: Stronger but heavier. Better for long spans or heavy sleepers/gear.
- 1x2 or 1x3 framing lumber: Great for creating a rigid platform without excessive weight.
- Indoor/outdoor carpet or automotive trunk liner: Reduces squeaks and protects interior panels.
- Closed-cell foam strips: Quiet contact points and prevent rattles.
- Fasteners: Wood screws, L-brackets, and optional threaded inserts for modular builds.
Budget ranges (typical)
- DIY basic leveling + foam: $80?$250
- DIY platform with storage: $200?$600
- Commercial bed conversion kit: $900?$3,000+
Step-by-Step Bed Conversion Installation
Step 1: Measure your interior like a builder, not a guesser
Open the rear hatch and move the front seats to your normal driving position. Fold the rear seats in the configuration you plan to use.
- Measure length: From the back of the front seats (or seatbacks) to the inside edge of the tailgate/hatch.
- Measure width: Narrowest point (often between wheel wells), then widest point.
- Measure height/headroom: Floor to ceiling at the area where your head will be.
- Identify slopes: Many vehicles have a cargo floor that tilts when seats are folded. Use a small level app or a ball to see the direction of slope.
Tip: Make a quick sketch with measurements. Add notes for seat latch locations, tie-down points, and plastic trim that you don?t want to rub.
Step 2: Choose your sleep size and orientation
Pick the mattress size based on your interior measurements:
- Twin (38" wide): Fits many SUVs with room for gear alongside.
- Full (54" wide): Often too wide for small SUVs, but great for minivans and larger rigs.
- Custom cut foam: Most efficient use of space, especially around wheel wells.
Practical tip: If you?re under about 72" of usable length, plan for a diagonal sleep angle or build a platform that extends over folded seatbacks to gain a few inches.
Step 3: Decide on platform height (the comfort vs storage trade)
The higher the platform, the more storage you get underneath?until headroom becomes a problem. For most SUVs and crossovers, a platform height of 6?10 inches is a sweet spot.
- Low platform (4?6"): Best headroom, limited storage.
- Medium (6?10"): Enough room for bins, shoes, kitchen kit.
- Tall (10?14"+): Big storage, but you may feel cramped when sitting up.
Step 4: Build a quick template before cutting wood
Vehicle interiors are rarely square. Use cardboard to template the platform shape.
- Lay cardboard in the cargo area and tape pieces together.
- Trace around wheel wells and trim edges.
- Mark access points (tie-downs, spare tire access panels if relevant).
- Test-fit the template, trim, and repeat until it drops in cleanly.
Tip: Leave a small gap (about 1/8"?1/4") around plastic trim to prevent squeaks and rubbing.
Step 5: Create a level base (the part that makes sleep actually good)
If your folded seatbacks create a hump or slope, you have two common solutions:
- Leveling blocks/spacers: Use wood blocks or dense foam under the platform where needed.
- Two-zone platform: Build a slightly taller rear section so the sleeping surface becomes flat across the whole length.
Real-world example: Many crossovers have seatbacks that sit 1?2 inches higher than the cargo floor. A simple fix is adding a rear platform section that is 1?2 inches taller, then bridging the transition with a hinged panel.
Step 6: Build the platform frame (strong, quiet, and removable)
A basic frame can be made with 1x2 or 1x3 lumber to reduce weight while keeping rigidity.
- Cut side rails and cross supports to match your template footprint.
- Dry-fit in the vehicle before final assembly.
- Screw the frame together with wood screws (pre-drill to prevent splitting).
- Add cross braces every 12?18 inches to prevent flex and squeaks.
- Install rubber feet or foam tape on contact points to protect carpet and reduce noise.
Safety tip: Avoid building a platform that can slide forward in a sudden stop. Use factory tie-down points or design the frame to ?lock? against seat bases or cargo hooks.
Step 7: Cut and install the deck panels
Transfer your template to plywood and cut panels. For modular setups, split the deck into two or three sections.
- Two-panel design: Rear panel stays in the cargo area; front panel folds over seats for sleep.
- Three-panel design: Easier to remove and store; better for small vehicles.
- Cut panels and sand edges smooth (especially near interior trim).
- Test-fit each panel inside the vehicle.
- Attach hinges if you?re using fold-out sections.
- Secure panels to the frame with screws, or use threaded inserts for easy removal.
Step 8: Add surface protection (carpet, liner, and anti-squeak)
A wrapped platform feels more ?factory? and prevents annoying noises.
- Wrap panels with automotive carpet or marine carpet.
- Use spray adhesive rated for heat (vehicles get hot).
- Add foam tape anywhere wood might touch plastic or metal.
Step 9: Choose the right mattress and bedding setup
Comfort comes down to thickness, support, and moisture control.
- Tri-fold foam mattress (4"?6"): Easy to store and quick to deploy.
- Custom cut high-density foam: Best fit and support; great for wheel well contours.
- Inflatable sleeping pad: Light and packable, but less insulation and can feel unstable.
Practical tip: Use a thin moisture barrier or a breathable mattress underlay (even a simple mesh layer) to reduce condensation under the mattress?especially in colder climates.
Step 10: Ventilation, privacy, and power (comfort upgrades that matter)
- Ventilation: Crack windows with rain guards or use bug screens and a small 12V fan.
- Window covers: Reflective insulated shades help privacy and temperature control.
- Lighting: USB LED strip lights or magnetic puck lights keep it simple.
- Power: A compact power station is cleaner than running accessories off the starter battery overnight.
Product Recommendations and Comparisons
DIY platform vs commercial bed conversion kit
- DIY Platform: Lowest cost, fully customizable, requires time and tools. Best for enthusiasts who want a tailored fit.
- Commercial Kit: Clean design, faster install, engineered fitment, typically more expensive. Best if you want a polished result with minimal fabrication.
Mattress recommendations (what to look for)
- Foam density: Higher density generally holds up better on long trips.
- Thickness: 4" works for many; 6" feels more like a real bed on firm platforms.
- Cover: Removable, washable covers are worth it for dust and spills.
Storage solutions that pair well with bed conversions
- Low-profile bins: Slide under a 6?10" platform without snagging.
- Soft bags: Quieter than hard totes and easier to fit around curves.
- Drawer slides (optional): Great access, but add weight and complexity.
Common Mistakes to Avoid
- Building too high: Storage is nice, but losing headroom makes the space feel claustrophobic.
- Skipping the template: Freehand cuts often lead to gaps, rattles, and trim damage.
- No anti-squeak materials: Wood-on-plastic contact will squeak on every bump.
- Overloading the vehicle: Plywood, drawers, and gear add up fast. Keep weight in check and evenly distributed.
- Blocking access to essentials: Don?t bury the jack, spare tire access, or emergency gear under a bolted platform.
- Poor ventilation: Condensation leads to damp bedding and musty odors?especially in cold or humid conditions.
- Not securing the platform: Anything that can slide becomes a hazard in a sudden stop.
Practical Tips for a Quiet, Durable, ?Factory-Like? Install
- Round your corners: Slightly rounded plywood corners are kinder to interior plastics and upholstery.
- Label modular parts: Mark ?Front/Rear? and ?Driver/Passenger? under panels for faster setup.
- Use threaded inserts: If you remove the platform often, inserts prevent stripped screw holes.
- Test sleep before finalizing: Do one night in the driveway. You?ll immediately notice slope, pressure points, and access issues.
- Keep a small interior repair kit: Trim tool, spare clips, and a roll of felt tape can save a trip.
FAQ
How long does a bed conversion install take?
A simple leveling-and-mattress setup can take 30?90 minutes. A DIY platform with templates, cutting, carpeting, and test-fitting typically takes a full day. A commercial kit often installs in 1?3 hours depending on complexity.
Do I need to remove rear seats for a bed conversion?
Not always. Many SUVs and crossovers work well with seats folded flat. If your seats don?t fold flat or you need more length, removing the seat bottoms can help?but check your owner?s manual and consider airbag wiring and seatbelt anchors before removing anything.
What?s the best mattress thickness for sleeping in a car?
For most people, 4"?6" foam is the sweet spot. If your platform is perfectly flat and you prefer firmer sleep, 4" can be enough. If you?re a side sleeper, 6" is usually more forgiving.
How do I prevent condensation under the mattress?
Use ventilation (cracked windows with bug screens), add a small fan, and place a breathable underlay (mesh layer) beneath the mattress. Avoid storing wet gear inside the cabin overnight.
Can I keep my bed conversion installed full-time?
Yes?if it?s secured properly, doesn?t block critical safety functions, and you?re mindful of added weight. Many owners run a two-panel platform full-time and keep the front section folded back for daily driving.
Is a DIY platform safe in a crash?
Any loose cargo is a risk. Your platform should be anchored to factory tie-down points or designed so it can?t slide forward. Keep heavy items low, strapped down, and preferably forward of the rear hatch area.
Your Next Steps
Start by measuring your cargo area and deciding whether you want a quick modular platform or a full storage build. Then:
- Template the shape with cardboard.
- Set your platform height based on headroom and storage needs.
- Build a rigid, quiet frame with anti-squeak materials.
- Choose a mattress that matches your sleep style.
- Do a driveway test night and adjust before your first real trip.
If you?re ready to take your setup further, explore more interior upgrade and DIY comfort guides on carinteriormix.com?and build a vehicle cabin that?s as livable as it is capable.