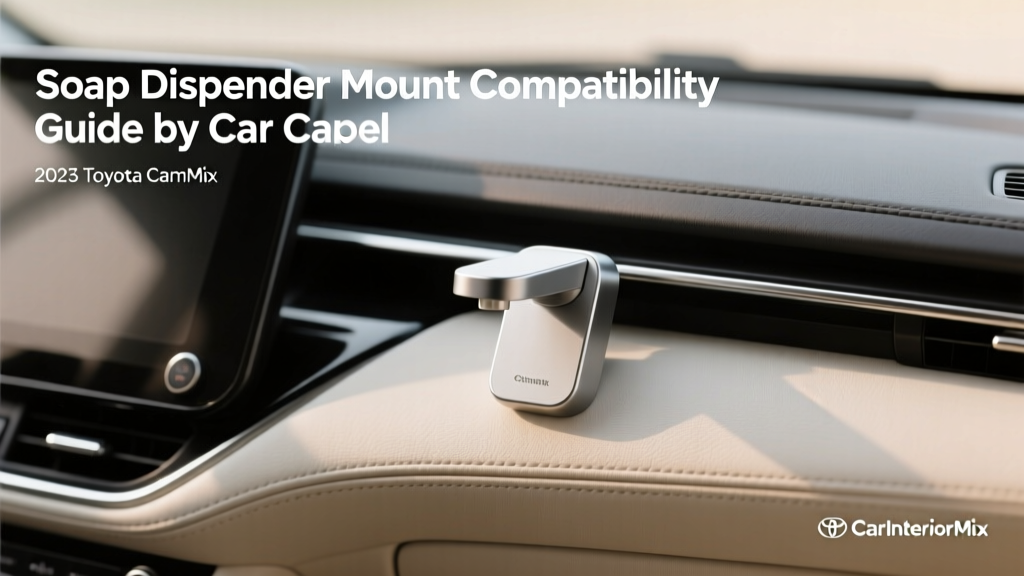
Soap Dispenser Mounts by Car Model (2026)
A clean interior feels better, looks better, and holds its value longer. But anyone who?s tried to keep a daily driver tidy knows the pain points: sticky cupholders, greasy fingerprints on touchscreens, and that ?mystery spill? in the door pocket. A compact soap dispenser mount (or sanitizer/hand soap holder) is one of those small upgrades that can genuinely change your day-to-day routine?especially if you drive kids, rideshare, or work out of your vehicle.
The catch is compatibility. A mount that?s rock-solid in a Toyota RAV4 may rattle in a Honda Civic. A clip that fits a Ford F-150?s thick vent slats might snap or sag in a BMW?s thinner, more delicate vent louvers. This guide breaks down how soap dispenser mounts work, what to look for by vehicle type, and how to choose a setup that stays secure without damaging your interior.
Carinteriormix.com readers tend to care about the details, so we?ll get specific?mount styles, placement options, common fitment quirks, and real-world examples by car model families.
What ?Compatibility? Really Means for a Soap Dispenser Mount
When people ask, ?Will this mount fit my car?? they usually mean three separate things:
- Physical fit: Will the clip/adhesive base/strap fit the intended surface (vent slats, console seam, headrest posts, etc.)?
- Functional fit: Can you actually dispense soap/sanitizer one-handed without the mount twisting, tipping, or leaking?
- Interior-safe fit: Will it damage trim, discolor leather/vinyl, or block airbags, shifters, and controls?
Most ?car soap dispenser mounts? on the market are universal, but universal doesn?t mean perfect. Your car?s vent geometry, dashboard texture, and console layout determine whether a mount behaves like OEM or like a wobbly add-on.
Types of Soap Dispenser Mounts (and Where They Work Best)
1) Vent-Clip Mounts
Best for: quick installs, small dispensers, cars with sturdy horizontal vent slats
Watch out for: thin/fragile slats, vertical vents, vents with motorized movement, blocking airflow
- Look for rubberized jaws and adjustable tension.
- A stabilizer leg that braces against the vent frame helps prevent wobble.
2) Adhesive Dash/Console Mounts (VHB-style tape)
Best for: smooth plastics, textured consoles with flat areas, permanent/clean look
Watch out for: soft-touch coatings, heavily textured dashboards, heat exposure, residue on removal
- Use mounts that include 3M VHB or equivalent automotive-grade tape.
- Choose a location that stays out of direct sun when possible.
3) Cupholder Insert Mounts
Best for: vehicles with oversized cupholders, drivers who want zero adhesive/zero vent stress
Watch out for: taking up cup space, shallow cupholders, interference with armrests/controls
- Ideal for SUVs and trucks with multiple cupholders.
- Works well for wider pump bottles if you choose a snug insert.
4) Seatback/Headrest Post Mounts
Best for: families, rideshare, rear-seat access, keeping soap away from the front console
Watch out for: fixed headrests (no exposed posts), rear airbag zones, kicking from passengers
- Great for minivans and three-row SUVs.
- Pick a mount with a locking strap and a drip tray if possible.
5) Door Pocket / Console Pocket Bracket Mounts
Best for: vehicles with large door bins and deep center storage
Watch out for: tipping during turns, bottle rattles, soap residue on fabric liners
- Add a silicone liner or non-slip pad to reduce movement.
Compatibility Guide by Car Model Family
This section focuses on real-world fitment patterns?what tends to work across common trims and model years. Always double-check your specific vent and console design, especially after a redesign year.
Toyota (Camry, Corolla, RAV4, Highlander, Tacoma)
- Best match: Vent-clip mounts (most Toyota vents are sturdy), cupholder inserts in RAV4/Highlander/Tacoma.
- Common win: Camry and RAV4 typically handle a rubberized vent clip without sagging.
- Tip: Tacoma interiors often have plenty of flat console areas?adhesive mounts work well if you prep the surface carefully.
Honda (Civic, Accord, CR-V, Pilot)
- Best match: Adhesive console mounts and cupholder inserts; vent clips can work but choose lighter dispensers.
- Common win: CR-V/Pilot have practical cupholder layouts?great for insert-style holders.
- Watch out: Some Civic/Accord vent designs are more delicate; avoid aggressive spring clips that pinch hard.
Ford (F-150, Explorer, Escape, Mustang)
- Best match: Cupholder inserts (F-150/Explorer), vent clips with thicker jaws, or adhesive mounts on hard plastics.
- Common win: F-150 cabins have space?mounting near the center stack or in a secondary cupholder is usually easy.
- Watch out: If your trim uses soft-touch panels, test adhesive in a hidden area first to avoid lifting coatings.
Chevrolet/GMC (Silverado, Sierra, Equinox, Tahoe/Suburban, Terrain)
- Best match: Cupholder inserts and console mounts; vent clips vary widely by year/trim.
- Common win: Full-size SUVs and trucks often have large cupholders that accept a stable insert.
- Tip: If you use an adhesive mount, install on the console side rather than the upper dash to reduce heat stress.
Tesla (Model 3, Model Y, Model S, Model X)
- Best match: Cupholder inserts or console-side adhesive mounts.
- Watch out: Vent-clip mounts generally aren?t practical because of hidden airflow design and minimal vent slats.
- Real-world setup: Many Model 3/Y owners place a compact dispenser in a cupholder insert, keeping the dash clean and avoiding adhesive on premium surfaces.
BMW/Mercedes-Benz/Audi (3 Series, X3, C-Class, GLC, A4, Q5)
- Best match: High-quality adhesive mounts with gentle removal tabs, or cupholder inserts (if cupholders are accessible).
- Watch out: Luxury vents can have thinner louvers and more delicate mechanisms?cheap vent clips can cause wear or breakage.
- Tip: Choose a mount with soft silicone contact points and avoid overtightening anything on trim.
Subaru (Outback, Forester, Crosstrek)
- Best match: Cupholder inserts and adhesive console mounts; vent clips typically work if lightweight.
- Common win: Outback/Forester interiors are practical?door pockets and console areas offer options.
- Tip: If you drive on rough roads, prioritize a mount with secondary stabilization (brace leg, strap, or locking collar).
Jeep (Wrangler, Grand Cherokee)
- Best match: Cupholder inserts, strap mounts, and rugged adhesive mounts.
- Watch out: Wrangler cabins see more vibration; a weak vent clip can rattle loose quickly.
- Real-world setup: A cupholder insert plus a compact foam/silicone sleeve around the bottle reduces rattle on trail days.
Minivans (Honda Odyssey, Toyota Sienna, Chrysler Pacifica, Kia Carnival)
- Best match: Headrest/seatback mounts and console mounts for family use.
- Tip: Put the dispenser where kids can reach it without leaning over the shifter?second-row access points are ideal.
- Watch out: Avoid mounting where it can be kicked during entry/exit.
How to Check Your Car?s Fitment in 5 Minutes
Before buying anything, do this quick compatibility check with your phone flashlight and a tape measure (or a notes app).
- Pick your likely location: vent, console side, cupholder, seatback, or door pocket.
- Assess the surface:
- Is it smooth plastic, textured plastic, leather, or soft-touch coating?
- Does it get direct sunlight (dash) or stay shaded (console side)?
- If using a vent clip:
- Check slat orientation (horizontal is usually better than vertical).
- Gently flex a slat?if it feels thin or fragile, skip vent mounts.
- Confirm there?s a frame area for a stabilizer leg to brace against.
- If using adhesive:
- Find a flat spot at least 2 x 2 inches (ideally larger).
- Avoid curved edges and seams that prevent full tape contact.
- Check clearance: Make sure the bottle won?t interfere with:
- Shifter movement
- Parking brake controls
- Climate knobs
- Passenger knee space
- Airbag deployment zones (dash and seat sides)
Step-by-Step: Installing an Adhesive Soap Dispenser Mount (The Right Way)
Adhesive mounts fail almost always because of poor prep or bad placement. Here?s a reliable method that works in most interiors.
- Clean the surface thoroughly: Use 70% isopropyl alcohol on a clean microfiber towel. Remove dressing/shine products completely.
- Dry and warm the area: Tape bonds best around room temperature. If it?s cold, warm the cabin for 10?15 minutes.
- Test position with painter?s tape: Temporarily tape the mount in place and simulate use:
- Can you press the pump one-handed?
- Does your elbow hit the armrest?
- Does it block buttons or vents?
- Apply the mount with firm pressure: Press for 30?60 seconds. Focus pressure across the entire adhesive pad.
- Let it cure: Wait 12?24 hours before loading the bottle for maximum bond strength.
- Install the dispenser and check stability: Start with a partially filled bottle, then fill fully once you confirm it doesn?t twist or peel.
Product Recommendations: What to Buy for Your Vehicle Type
Rather than pushing a single ?best? mount, match the product style to your car and your usage.
Best for Sedans and Compact Cars: Lightweight Vent Clip + Small Bottle
- Choose: rubberized vent clip with a stabilizer support
- Pair with: 30?60 ml refillable pump or sanitizer bottle
- Why it works: less weight means less sag and fewer rattles over bumps
Best for SUVs/Trucks: Cupholder Insert Mount
- Choose: adjustable cupholder insert (expanding base preferred)
- Pair with: 100?250 ml pump bottle (short and wide is more stable than tall and narrow)
- Why it works: zero stress on vents and minimal risk to dash materials
Best for Families/Rideshare: Headrest/Seatback Mount
- Choose: strap-on holder with a locking buckle and rigid backing
- Pair with: leak-resistant pump bottle or foaming dispenser
- Why it works: easy access for rear passengers; keeps mess away from the front controls
Best for Premium Interiors: High-Quality Adhesive Console-Side Mount
- Choose: automotive-grade adhesive pad, rounded edges, and a removable adhesive design if possible
- Pair with: compact bottle to reduce torque on the pad
- Why it works: clean appearance without stressing vent louvers
Common Mistakes to Avoid
- Mounting in an airbag zone: Avoid the passenger dash area and seat side panels where airbags deploy.
- Overloading a vent clip: A full-size pump bottle on a vent mount is a recipe for sagging slats and rattles.
- Sticking adhesive to dirty or dressed plastic: Interior shine products can prevent tape from bonding.
- Choosing tall, top-heavy bottles: Short/wide bottles stay stable and reduce mount stress.
- Ignoring temperature: Heat can soften adhesives; cold can prevent bonding. Install in moderate temps when possible.
- Placing it where it drips: Even good pumps can weep. Don?t mount above cloth, suede, or switchgear without a drip plan.
Practical Tips for Daily Use (Real-World Cleanliness Without the Mess)
- Use a foaming dispenser for less residue: Foam tends to drip less than thin liquid soap.
- Add a mini drip mat: A small silicone coaster or trim-safe pad under the mount helps catch stray drops.
- Refill smart: Refill outside the car when possible. If you must refill inside, lay down a microfiber towel first.
- Keep it reachable, not just visible: If you can?t pump it one-handed at a stoplight, it?s in the wrong spot.
- Do a weekly wipe-down: Quick pass with a damp microfiber prevents buildup around the mount edges.
FAQ: Soap Dispenser Mount Compatibility
Will a vent-clip soap dispenser mount fit my car?
It depends on vent slat thickness and orientation. Most Toyota and many Ford trucks handle vent clips well, while some luxury cars and newer designs with thin louvers are better with adhesive or cupholder mounts. If your vent slats flex easily, skip vent clips.
Is adhesive tape safe on my dashboard?
Automotive-grade tape can be safe on hard plastics, but soft-touch coatings and leather-wrapped surfaces can be risky. A safer approach is mounting on the console side panel rather than the top dash, and always clean with isopropyl alcohol first.
Where?s the best place to mount a soap dispenser in a Tesla?
Most Tesla owners have the best results with a cupholder insert or a console-side adhesive mount. Traditional vent clips usually aren?t practical due to the hidden vent design.
Can I mount a dispenser on a leather or stitched surface?
It?s not recommended. Adhesives can discolor or lift leather finishes, and pressure points may leave marks. Use a cupholder insert, seatback mount, or a bracket that anchors to plastic trim instead.
What size bottle works best for car interior mounts?
For vent clips and adhesive mounts, small bottles (roughly 30?100 ml) are the most stable. For cupholder inserts or seatback mounts, you can often use 100?250 ml bottles, preferably short and wide to reduce tipping.
How do I remove an adhesive mount without damaging trim?
Warm the adhesive with gentle heat (a warmed cabin or a hair dryer on low), then use dental floss or a plastic trim tool to separate it slowly. Clean residue with an adhesive remover safe for automotive interiors and finish with a mild interior cleaner.
Wrap-Up: Choose the Mount That Matches Your Interior, Not Just Your Bottle
If you want the simplest path to compatibility, start with your vehicle?s strongest mounting points:
- Sedans/compacts: light vent clip or small adhesive mount on a console side panel
- SUVs/trucks: cupholder insert for maximum stability
- Families/rideshare: seatback/headrest mount for easy passenger access
- Premium interiors: quality adhesive on hard plastics (or cupholder insert) to protect delicate vents
Your next step: take five minutes to check your vent design, measure your cupholders, and pick a dispenser size that won?t fight gravity. Once you dial in a stable mount, keeping your interior fresh becomes a habit instead of a hassle.
Want more practical interior upgrades? Explore our latest guides and fitment tips at carinteriormix.com.