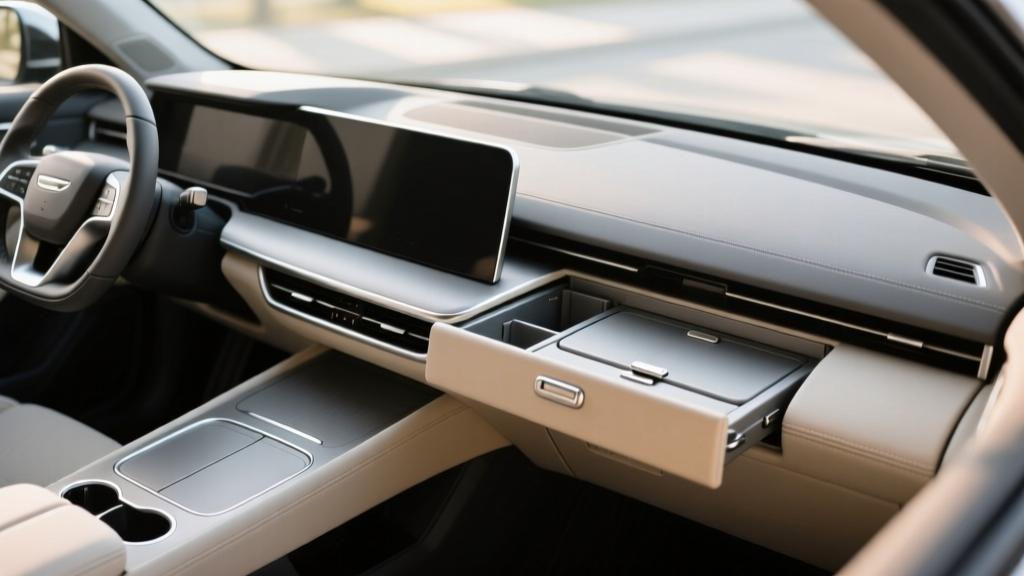
Storage Compartment Design: Car Interior Upgrade (2026)
Every car has a ?storage personality.? Some interiors feel calm and intentional, with a spot for everything from sunglasses to charging cables. Others turn into a rolling junk drawer?coins in the cupholders, receipts in the door pockets, and a glove box avalanche every time you open it. The difference usually isn?t how much space the car has; it?s how well that space is designed and used.
Upgrading storage compartments isn?t just about convenience. A smarter layout can reduce distractions, protect valuables, prevent rattles, keep your cabin cleaner, and even make your interior feel more premium. When storage is planned like a professional?based on habits, safety, and ergonomics?it improves the day-to-day driving experience more than most ?cosmetic? mods ever will.
This guide breaks down how to evaluate your current setup, choose the right organizers and add-ons, and install upgrades cleanly. You?ll also get product-type recommendations, common mistakes to avoid, and real-world examples that mirror how owners actually use their cars.
What ?Professional? Storage Design Really Means
Professional storage compartment design is less about adding more bins and more about creating a system that matches your routine while staying safe and visually integrated.
The Four Principles: Access, Safety, Silence, and Aesthetics
- Access: Frequently used items should be reachable without leaning, digging, or taking your eyes off the road.
- Safety: Nothing should become a projectile in a sudden stop; avoid storing hard/heavy items loose.
- Silence: Loose objects and poorly fitted organizers create rattles?one of the fastest ways to make an interior feel ?cheap.?
- Aesthetics: Upgrades should look factory-clean: consistent materials, tight fit, and no clutter overload.
Hot Zones vs. Cold Zones
Think of your interior storage in zones:
- Hot zones (high frequency): Center console tray, cupholders, driver door pocket, small dash cubbies.
- Warm zones (weekly): Glove box, armrest bin, passenger door pocket.
- Cold zones (occasional): Trunk side pockets, underfloor storage, seatback organizers, spare tire well.
Step 1: Audit Your Current Storage (10 Minutes That Saves You Money)
Before buying organizers, do a quick audit so you don?t end up with a bunch of ?almost fits? accessories.
Quick Inventory Checklist
- Empty your center console, glove box, door pockets, and trunk storage.
- Sort items into: daily, weekly, emergency, and trash/obsolete.
- Measure key areas (length/width/depth) with a tape measure:
- Center console bin depth (many organizers fail here)
- Console tray dimensions
- Door pocket height (bottles vs. slim items)
- Glove box usable space (after manuals)
- Identify your biggest pain point:
- Hard to find small items?
- Charging cable mess?
- Trunk items sliding?
- Too many things in one compartment?
Real-World Example: The ?Cable + Keys? Problem
A common complaint: phone cables, key fobs, and coins floating around the console. The fix usually isn?t a bigger bin?it?s a tiered console organizer (tray + lower bin) plus anti-slip liner to stop everything from skating around during turns.
Step 2: Upgrade the Center Console Like an OEM Designer
The center console is the command center for most drivers. A professional upgrade creates layers and categories.
Best Upgrades for the Center Console
- Vehicle-specific console organizer tray: Adds a top layer for small items (sunglasses, mints, garage remote).
- Modular dividers: Useful for larger bins where everything mixes together.
- Anti-slip and sound-deadening liners: Reduce rattles and protect plastic surfaces.
- Dedicated cable routing: Short right-angle cables + adhesive clips to keep ports accessible and tidy.
Step-by-Step: Installing a Console Organizer System
- Clean first: Wipe the console bin with a mild interior cleaner; dust makes liners slide.
- Test-fit the organizer tray: Ensure the lid closes without resistance and the tray doesn?t bind.
- Add liner material: Place a cut-to-fit liner in the bottom bin and inside tray sections for silence.
- Create ?zones?:
- Front section: keys, badge, lip balm
- Middle: cable + adapter
- Rear: sunglasses case or microfiber cloth
- Secure loose accessories: Use adhesive hook-and-loop dots for small tools (tire gauge) so they don?t roll.
Product Recommendation: Universal vs. Vehicle-Specific Trays
- Vehicle-specific: Best fit, fewer rattles, cleaner look; ideal if you care about OEM appearance.
- Universal: Works if you?re on a budget, but measure carefully; expect more movement and compromises.
Step 3: Fix Door Pocket Storage (Without Making It Bulky)
Door pockets are great until they become a clutter chute. The goal is to keep essentials reachable while preventing noisy movement.
Smart Door Pocket Add-Ons
- Door pocket liners: A simple upgrade that reduces rattles from bottles and loose items.
- Slim organizers: Add vertical separation for napkins, small flashlight, hand sanitizer.
- Micro-trash container: Keeps wrappers and receipts contained (and out of cupholders).
Real-World Example: Commuter Setup
For a daily commuter, a clean door pocket layout might look like:
- Front door pocket: 20?24 oz bottle + pack of tissues
- Secondary slot: microfiber cloth for screens
- Nothing loose: no coins, no pens without caps (they leak and rattle)
Step 4: Glove Box and Document Storage That Doesn?t Explode
A glove box should open calmly?no manuals sliding out, no insurance papers folded into confetti. This is one of the easiest storage upgrades to make feel ?professional.?
Recommended Glove Box System
- Document wallet (accordion style): Holds registration, insurance, service records.
- Small medical kit pouch: Bandages, antiseptic wipes, allergy meds (if needed).
- Dedicated tech pouch: Spare charging cable, USB-A/USB-C adapters, small power bank.
Step-by-Step: Glove Box Reset
- Remove everything and throw out old receipts and expired items.
- Put manuals in a slim sleeve or move them to a trunk pocket if you use digital versions.
- Load the glove box in layers:
- Bottom: document wallet (flat)
- Middle: tech pouch
- Top: light items (spare masks, napkins)
- Do a ?one-hand test?: can you retrieve insurance paperwork quickly with one hand?
Step 5: Trunk Storage Upgrades for Real Life (Groceries, Gear, and Emergencies)
Trunk storage is where clutter quietly grows?until the day you need jumper cables and can?t find them. A professional approach separates daily cargo control from emergency readiness.
Best Trunk Storage Upgrades
- Collapsible trunk organizer with rigid walls: Better than soft bins for keeping shape.
- Anti-slip cargo mat: Prevents grocery bags from sliding and spilling.
- Seatback storage (SUV/hatch): Keeps small items accessible without digging under bags.
- Straps and cargo net: Great for lightweight items; not ideal for heavy tools.
- Dedicated emergency kit: Stored in a fixed location (side pocket or underfloor).
Step-by-Step: Build a Two-Module Trunk System
- Module 1: Daily control (near the trunk opening)
- Collapsible organizer with two compartments: groceries / car wash supplies
- Foldable tote or reusable bags
- Module 2: Emergency kit (out of the way, secured)
- Jumper cables or jump starter
- Tire inflator + sealant (if you don?t have a spare)
- Gloves, flashlight, reflective triangle
- Basic tool roll
- Anchor it: Use trunk hooks, tie-down points, or Velcro-backed organizer panels so it doesn?t slide.
Product Comparison: Trunk Organizer Types
- Hard-sided collapsible bins: Best all-around; stable and easy to clean.
- Soft fabric cubes: Cheap and flexible; can sag and spill when loaded.
- MOLLE-style panels (Velcro-backed): Great for enthusiasts; highly customizable, best on carpeted trunk walls.
Materials and Fitment: How to Choose Upgrades That Look Factory
Storage add-ons can either elevate your cabin or make it look like a discount aisle. Focus on texture, color match, and rattle control.
What to Look For
- Matte finishes: Reduce glare and look more OEM than glossy plastic.
- Soft-touch or flocked inserts: Premium feel; also reduces noise.
- Heat resistance: Important for dashboards and sun-exposed compartments.
- Secure fitment: A ?perfect fit? organizer should not rock or lift when you grab items.
Practical Tip: Test for Rattles Before You Commit
After installing an organizer, drive over rough pavement with the radio off. If you hear ticking or buzzing, add thin adhesive felt tape where plastic touches plastic.
Common Mistakes to Avoid
- Over-organizing the hot zone: Too many compartments slows you down. Keep daily storage simple.
- Buying universal organizers without measuring: ?Close enough? fit usually means rattles and shifting.
- Blocking ports and controls: Watch for organizers that cover USB ports, 12V outlets, seat heater switches, or console lid operation.
- Storing heavy items up high: Glass bottles, metal tools, or large flashlights should not live in door pockets or seatback organizers.
- Ignoring cleaning access: If an upgrade makes it hard to vacuum crumbs, you?ll hate it after a month.
- Forgetting passenger needs: A perfect driver setup that steals all space from the passenger side leads to clutter migration.
Pro Tips for a Cleaner, Quieter Cabin
- Use ?pouches inside compartments?: A small zip pouch beats loose items and makes transfer between cars easy.
- Standardize cables: Use one short USB-C and one short Lightning (if needed) in the car; keep spares in the glove box.
- Add a microfiber cloth station: One cloth in a small console section keeps screens and glossy trim looking new.
- Label hidden storage once: A small label under the trunk floor (?tools,? ?first aid?) helps family members find what they need.
FAQ: Storage Compartment Design Upgrades
What?s the best first upgrade if my interior always looks messy?
Start with a vehicle-specific center console organizer tray and a small trash solution (mini bin or liners). Those two changes eliminate the most visible clutter fast.
Do organizers cause rattles over time?
They can if the fit is loose or the plastic is hard-on-hard. Use anti-slip liners or thin felt tape at contact points, and avoid overloaded compartments.
Are seatback organizers safe?
They?re safe when used for light items (wipes, tissues, tablets in secure sleeves). Avoid storing hard, heavy objects that could become projectiles in a sudden stop.
How do I keep items from sliding in the trunk without permanent modifications?
Use an anti-slip cargo mat plus a collapsible hard-sided organizer anchored to factory tie-down points. If your trunk is carpeted, Velcro-backed organizer panels work well and remove cleanly.
Should I store valuables in the center console or glove box?
Neither is truly secure. If you must, use the most concealed option, keep items out of sight, and consider an aftermarket lockbox designed for your vehicle?s console or under-seat area.
What?s a good storage setup for families with kids?
Prioritize easy-to-clean solutions: door pocket liners, a seatback organizer for wipes/snacks (sealed), and a trunk module for spare clothes and a compact cleanup kit.
Next Steps: Build Your Own Storage Blueprint
Pick one hot zone and upgrade it completely before moving on. For most drivers, the best order is:
- Center console organizer + liners
- Glove box document system
- Trunk two-module setup
- Door pocket liners and a small trash solution
Once you?ve installed your upgrades, do a one-week test. If you?re still ?dumping? items into the wrong compartment, adjust the zones?not the habits. The right setup should feel natural after a few drives.
Want more practical interior upgrades? Browse the latest guides on carinteriormix.com for storage, cleaning, comfort, and OEM-style interior mods.