Airbag Cover Replacement: Professional Upgrade (2026)
Your steering wheel and dashboard are the most visible parts of your interior?and also some of the most safety-critical. When an airbag cover is cracked, warped, sticky, faded, or mismatched after a repair, it doesn?t just look off. It can affect resale value, distract you while driving, and raise questions about whether the vehicle was repaired correctly after a collision or airbag deployment.
Airbag covers are also more complicated than typical trim pieces. They?re designed to split open in a very specific way during deployment. That means ?upgrading? or replacing an airbag cover isn?t like swapping a shift knob. Done right, a replacement can restore a factory-fresh look and ensure proper fitment. Done wrong, it can create rattles, warning lights, or?worst case?interfere with deployment. This guide walks you through what?s involved, what?s safe for DIY, and when to call a pro.
Whether you?re refreshing a worn interior, correcting a previous repair, or bringing a project car back to OEM-level quality, here?s how to approach airbag cover replacement with a professional mindset.
What an ?Airbag Cover? Actually Is (and Why It Matters)
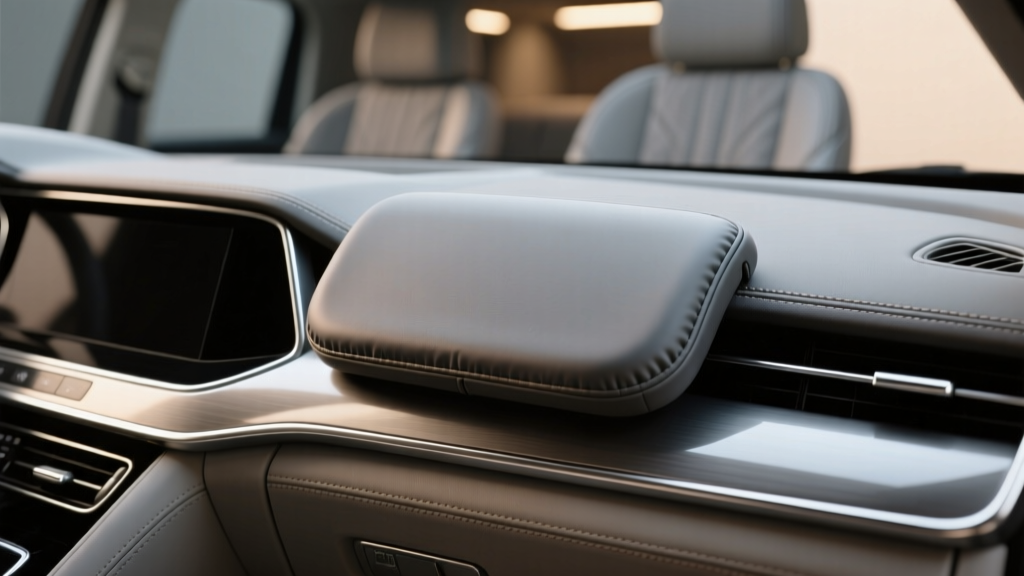
An airbag cover is the visible surface that hides the airbag module and directs how it opens during deployment. Depending on the vehicle, the ?cover? may be:
- Integrated into a larger part (common on passenger dash airbags where the cover is part of the entire dashboard top or dash panel).
- A separate trim piece (more common on some passenger airbag designs and a few steering wheel designs).
- Part of the airbag module assembly (typical on steering wheels?the ?cover? is often the airbag module?s face, not a standalone cap).
Airbag covers are engineered with:
- Tear seams that split at the right moment
- Specific plastic thickness and grain for controlled breakaway
- Attachment points designed to keep the module stable but allow proper release
That?s why appearance upgrades must never compromise the breakaway seam, mounting, or module integrity.
Safety First: Know the Risk Level Before You Touch Anything
If you remember one thing from this article, make it this: airbags are explosive safety devices. Even when the car is off, the system can store energy. If you?re not comfortable following safety procedures, let a qualified technician handle it.
When DIY Can Be Reasonable
- Replacing a non-airbag trim cover that surrounds the area (for example, steering wheel trim pieces that are not part of the module).
- Replacing dash panels on vehicles where the passenger airbag cover is a separate bolt-on piece (rare, but it exists).
- Cosmetic restoration on adjacent interior parts (dash cap, trim refinishing) that does not touch the airbag seam or module.
When You Should Use a Professional
- Any work involving the steering wheel airbag module
- Passenger airbag covers that are integrated into the dashboard
- Vehicles with recent collision repairs, airbag deployment, or SRS warning lights
- Retrofits, custom upholstery, or wraps that cross over the airbag door or seam
Planning Your Replacement or Upgrade
Step 1: Identify Which Airbag Cover You?re Dealing With
Start with the obvious: steering wheel (driver airbag), passenger dash airbag, knee airbag, seat-mounted side airbags, and curtain airbags. The ?cover? could be different materials and attachment types in each location.
Quick checks:
- Driver airbag: Usually a complete module with the face/cover attached. Many cars do not support a cover-only replacement.
- Passenger dash: Often a scored seam in the dash. Replacing the ?cover? may require replacing the entire dash assembly.
- Seat side airbag: Uses special tear seams in the seat upholstery?reupholstery must be airbag-compatible.
Step 2: Decide Your Goal: Cosmetic Refresh vs. Post-Deployment Repair
- Cosmetic refresh: Faded logo, sticky coating, cracked surface, mismatched color after interior swap.
- Post-deployment repair: Airbag has deployed, cover is blown open, dash is damaged, SRS system needs full reset and parts replacement.
If there?s been a deployment, a ?cover replacement? is never the full story. You may need:
- New airbag module(s)
- New clock spring (steering wheel spiral cable)
- Seat belt pretensioners
- SRS control module reset/replacement
- Impact sensors
- Dash replacement (for passenger deployment)
Step 3: Source the Correct Part (OEM vs. Aftermarket vs. Used)
Where most people go wrong is buying a part that ?looks right? but doesn?t match their exact trim, color code, or mounting style.
- OEM new: Best fit and correct seam engineering; usually the most expensive.
- OEM used (salvage): Can be a great value if undamaged and from a non-deployed vehicle; inspect carefully for cracks, sun damage, or repaired seams.
- Aftermarket: Quality varies widely. Some are fine for certain dash trim pieces, but be cautious when the part is directly responsible for airbag door operation.
Pro tip: Use your VIN to confirm part numbers. For interior colors, check the vehicle?s build sticker (often in the door jamb, glovebox, trunk, or under the spare tire cover).
Tools and Materials Checklist
Your exact tools depend on the vehicle, but a professional-style baseline includes:
- Trim removal tools (nylon pry tools)
- Torx and E-Torx set (common on steering wheel and dash fasteners)
- Socket set and extensions
- Torque wrench (especially for steering wheel and module fasteners)
- Panel clip assortment (dash clips often break during removal)
- Clean gloves and microfiber towels (avoid oils on airbag cover surfaces)
- Service information for your exact model (factory manual or trusted database)
If your project involves refinishing (not recommended on airbag doors themselves), you may also need interior-grade vinyl dye, adhesion promoter, and masking materials?but keep all coatings away from airbag seams and deployment paths.
Step-by-Step: Professional Workflow for Airbag Cover Replacement
The safest way to present instructions is as a high-level workflow. Exact steps, fastener locations, and torque specs vary by vehicle?always use model-specific service instructions.
1) Prepare the Vehicle and Work Area
- Park on a level surface, straighten the steering wheel, and remove the key.
- Open a window or keep a door unlocked (some cars auto-lock when the battery is disconnected).
- Record radio codes or settings if required.
2) Disable the SRS System Properly
- Disconnect the negative battery terminal.
- Wait the specified time for capacitor discharge (often 10?15 minutes, but follow your service manual).
- Do not use a test light or multimeter on airbag circuits unless the manual explicitly instructs it.
Real-world example: A common DIY mistake is disconnecting the battery and immediately unplugging an SRS connector. On some vehicles, residual energy can still trigger a fault code?or worse?create a safety hazard. Waiting the proper time is not optional.
3) Remove the Necessary Interior Panels
This is where most cosmetic damage happens. Work slowly and use trim tools.
- Remove surrounding trim first (A-pillar trim, glovebox, center stack side panels, knee bolsters) as needed.
- Bag and label fasteners by panel to avoid mismatched screws later.
- Inspect clips; replace broken ones instead of forcing panels back in place.
4) Access the Airbag Cover or Module
- Steering wheel: The ?cover? is typically the airbag module. Access is often through rear Torx bolts or spring clips. Handle the module carefully and store it facing upward on a stable surface.
- Passenger dash: Access may require glovebox removal and sometimes dash removal. If the cover is integrated into the dash, replacement may mean swapping the dash shell.
5) Replace With the Correct Part and Confirm Fitment
- Compare old vs. new part: mounting points, connector routing, clip locations, and surface grain.
- Install without forcing. If it doesn?t sit flush, something is misaligned or the part is wrong.
- Use proper torque specs where applicable. Over-torquing can warp plastic or damage brackets.
6) Reassemble and Perform a Post-Install Check
- Reinstall trim panels in reverse order, ensuring wiring isn?t pinched.
- Reconnect the battery.
- Turn the ignition on and verify the SRS/airbag light performs its normal self-test and turns off.
- Listen for rattles on a short test drive?dash work often introduces squeaks if clips aren?t seated.
If the SRS light stays on, do not ignore it. Scan for codes with a tool that can read airbag/SRS modules (many generic OBD readers cannot).
Upgrade Options: What?s Safe and What?s Not
OEM-Plus Upgrades Worth Considering
- New OEM airbag module (driver): If your steering wheel badge is worn or the surface is damaged, a factory module restores the original finish and fit.
- Matching interior color correction: Swapping to the correct color-coded OEM cover/dash panel avoids dye jobs near seams.
- Trim refresh around the airbag: Replacing scratched steering wheel trim pieces, dash vents, and bezels can make the airbag cover look new again.
Upgrades to Avoid
- Wrapping over airbag seams: Vinyl wrap can restrict deployment or change tear behavior.
- Filling, sanding, or repairing an airbag door seam: Any seam modification is a safety risk.
- Installing ?badge stickers? or thick emblems on the airbag module: Added mass and adhesive can affect how the cover breaks away.
- Unknown aftermarket ?airbag covers?: If the part?s origin and engineering aren?t clear, don?t gamble with SRS components.
Product Recommendations and Buying Tips
Rather than pushing one brand, here?s how to choose the right product category for your situation.
Best Choice for Most Owners: OEM Replacement
- Look for OEM part numbers and confirm compatibility by VIN.
- Buy from reputable dealer parts sites, established OEM wholesalers, or trusted dismantlers.
- Expect the best texture match and proper mounting tolerances.
Best Value: OEM Used (Salvage) With Careful Inspection
- Ask for close-up photos of the seam area, mounting tabs, and surface finish.
- Confirm airbags have not deployed and that the part is not repaired or re-skinned.
- Beware of sun-baked dashboards?UV damage can cause brittleness and future cracking.
When Aftermarket Might Make Sense
- Non-airbag trim pieces adjacent to the airbag cover
- Hardware kits (panel clips, screws) from a well-reviewed supplier
- Only consider aftermarket ?covers? if they are clearly designed for your vehicle and do not alter breakaway seams?and even then, OEM is the safer bet
Common Mistakes to Avoid
- Skipping the battery disconnect wait time: Rushing SRS work is how people get hurt and how fault codes get set.
- Buying the wrong variant: Same model, different year/trim can mean different seams, textures, and mounting points.
- Forcing misaligned panels: If a dash panel doesn?t sit flush, stop and find the obstruction?broken clips and squeaks are the ?best case? outcome.
- Using glue, filler, or heavy paint on an airbag door: Anything that changes the seam behavior is a safety issue.
- Ignoring the SRS light: If the light is on, the system may be disabled. Diagnose properly with an SRS-capable scanner.
- Not replacing one-time-use components after deployment: Post-accident ?patch jobs? are a red flag for safety and resale.
FAQ: Airbag Cover Replacement and Upgrades
Can I replace just the airbag cover on my steering wheel?
On many vehicles, no?the ?cover? is part of the airbag module assembly. Some designs allow a cover to be serviced separately, but it?s not common. Check your factory parts diagram by VIN to confirm what?s actually sold as a service part.
Will an airbag light turn on if I unplug the airbag?
Yes, it often will. Many vehicles store an SRS fault code when a connector is unplugged, even if you reconnect it later. That can require an SRS scan tool to clear. The right approach is to disable the system properly and follow the service procedure for your model.
Is it safe to wrap or paint an airbag cover to match my interior?
It?s risky if the wrap/paint crosses the airbag door seam or adds thickness that could affect deployment. For a clean look, a safer ?upgrade? is replacing the part with the correct OEM color/finish or refreshing nearby trim instead of coating the airbag door.
How do I tell if a dashboard has been replaced after airbag deployment?
Look for uneven panel gaps, mismatched texture or color, missing VIN tags (where applicable), non-OEM fasteners, or signs of trim removal. A pre-purchase inspection with an SRS scan can also reveal stored crash data or unusual module history.
Do I need to replace the whole dashboard to fix a passenger airbag cover?
Often, yes. Many passenger airbag ?covers? are molded into the dash top with a pre-scored seam. If that area is cracked, warped, or previously repaired poorly, replacing the dash assembly is typically the proper OEM-style fix.
What should I do if my airbag cover is sticky or peeling?
Sticky surfaces are common on soft-touch coatings as they age. If it?s on a true airbag door, avoid solvents and aggressive cleaners. Consider OEM replacement or consult a specialist for interior restoration options that won?t interfere with seams.
Conclusion: A Smart, Safe Path to a Cleaner Interior
A professional airbag cover replacement upgrade is less about ?customizing? and more about restoring the interior the right way: correct parts, correct fit, and zero compromise to safety. Start by identifying whether your vehicle uses a cover-only design or an integrated dash/module setup. Source OEM parts when possible, follow SRS safety procedures, and don?t hesitate to hand off the job if it involves steering wheel modules or dash removal.
Next steps you can take today:
- Look up your exact airbag cover/module part number using your VIN
- Inspect your interior for cracks, UV damage, or signs of prior repair
- Decide whether you?re doing a cosmetic refresh or correcting post-deployment damage
- If you proceed, use model-specific service instructions and an SRS-capable scan tool
Want more practical interior upgrades and repair guides? Explore the latest how-tos and product advice on carinteriormix.com.