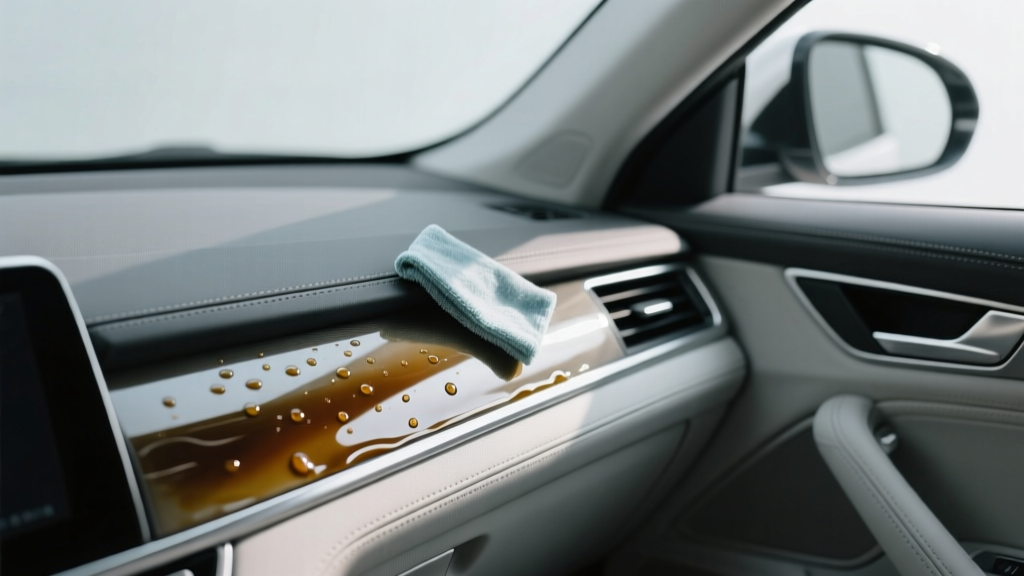
Plastic Restorer Application & Care (2026)
Faded interior plastics can make an otherwise well-kept car feel tired. Sunlight, skin oils, dust, and everyday abrasion slowly turn rich black trim into a chalky gray, and textured panels start looking blotchy. The good news: a quality plastic restorer can dramatically improve the look of dashboards, door cards, center consoles, and exterior trim?often in under an hour.
Where many car owners go wrong is treating plastic restorer like a one-and-done ?shiny spray.? The best results come from proper cleaning, controlled application, and ongoing maintenance that keeps the finish looking even?not greasy, streaky, or dust-attracting. This guide breaks down how to choose the right restorer, prep the surface correctly, apply it step by step, and maintain it so your trim stays deep and uniform for weeks or months.
Whether you?re refreshing a daily driver or detailing a weekend car, think of plastic restoration as a system: clean, restore, protect, and maintain. Get the system right and you?ll spend less time redoing work?and more time enjoying a cabin that looks cared for.
What a Plastic Restorer Does (and What It Doesn?t)
A plastic restorer is designed to rejuvenate dull or oxidized plastic and vinyl surfaces by replenishing oils, adding UV protection, and enhancing color. Some formulas primarily ?dress? the surface (temporary visual improvement), while others offer longer-lasting protection through polymers or ceramic-infused coatings.
Typical benefits
- Restores color to faded black/gray plastic trim
- Improves uniformity by reducing blotchy oxidation
- Adds UV resistance to slow future fading
- Leaves a chosen finish from matte to satin to glossy (depending on product)
What it won?t fix
- Deep scratches, gouges, or melted areas (those require repair, sanding, or replacement)
- Cracked dashboards (restorer may darken the area but won?t structurally repair it)
- Severely chalked plastics without proper prep (you may need multiple cleaning passes or a more durable coating)
Choosing the Right Plastic Restorer for Your Needs
Not all plastic restorers behave the same. The ?best? choice depends on where you?re using it (interior vs. exterior), the finish you want (OEM matte vs. glossy), and how long you want it to last.
Interior vs. exterior restorers
- Interior plastic restorer/dressing: Typically lower gloss, less oily, and formulated to reduce glare on dashboards.
- Exterior trim restorer: Usually more durable and UV-focused. Some are too glossy or strong-smelling for interior use.
Finish options: matte, satin, gloss
- Matte: Closest to factory look on many modern interiors. Great for dashboards and door tops.
- Satin: A ?fresh but not shiny? look. Ideal for center consoles and lower door panels.
- Gloss: Can look dramatic on exterior trim, but inside it often reads as greasy and attracts dust.
Product types and real-world behavior
- Water-based dressings: Easier to level, typically less sling/grease, good for interiors. Durability is moderate.
- Solvent-based restorers: Can darken trim fast and last longer, but can streak if overapplied and may be too glossy for cabins.
- Coating-style trim restorers (ceramic/SiO2-type): Longer-lasting, more prep-sensitive, and less forgiving if applied unevenly.
Tools and Supplies You?ll Want on Hand
Using the right tools makes the difference between a clean, even factory-style finish and a patchy dashboard with shiny fingerprints.
- Vacuum with soft brush attachment
- Microfiber towels (at least 4?6; separate ?cleaning? and ?buffing? towels)
- Soft detailing brushes (boar?s hair or soft nylon)
- Interior cleaner or APC (all-purpose cleaner) diluted appropriately
- Isopropyl alcohol (IPA) 10?20% mix for final wipe on stubborn residues (optional)
- Foam or microfiber applicator pads
- Nitrile gloves (especially for solvent-based products)
- Painter?s tape (for protecting infotainment screens, gauge clusters, suede/Alcantara, or fabric)
Preparation: The Step Most People Rush (and Regret)
If you apply plastic restorer over dust, sunscreen residue, or old dressing, you?ll seal in grime and create streaks. Prep is where the clean, uniform ?restored? look is built.
Step-by-step: clean and prep interior plastics
- Vacuum first. Use a soft brush attachment around seams, buttons, vents, and cupholders. This prevents grit from scratching plastic during wiping.
- Use a dedicated interior cleaner. Mist cleaner onto a microfiber towel (not directly onto electronics or screens), then wipe the surface.
- Agitate textured areas with a soft brush. Work in small sections: scrub lightly, then wipe residue with a clean towel.
- Remove old greasy dressings. If the surface feels slippery or smears easily, do a second pass with cleaner or a lightly damp towel. For stubborn residue, a diluted IPA wipe can help?test first in an inconspicuous spot.
- Dry completely. Restorers bond and level better on dry surfaces. Wait 10?15 minutes with doors open if needed.
Exterior trim prep (if you?re restoring outside plastics too)
- Wash the vehicle and dry the trim thoroughly.
- Use an APC or trim-safe degreaser to remove old wax, road film, and oily residues.
- For heavily oxidized trim, consider a dedicated trim prep or IPA wipe (spot test).
Real-world example: If your center console looks ?cloudy? around the shifter, that?s often hand lotion and cleaner residue. A second cleaning pass plus a dry towel buff before applying restorer prevents that cloudy halo from showing through the finish.
How to Apply Plastic Restorer (Step-by-Step)
Always read the label on your chosen product?some are wipe-on/wipe-off, others require curing time. The process below fits most interior plastic restorers and dressings.
Step-by-step application for interior plastics
- Work in the shade with a cool surface. Heat makes products flash faster, increasing streak risk.
- Test a small hidden spot. Check sheen and color change (especially on light gray plastics).
- Apply to the applicator, not the panel. Put a small amount on a foam pad or microfiber applicator to control spread and avoid overspray on glass or screens.
- Spread thin and even. Use overlapping passes. For textured plastic, gently work it into the grain.
- Let it sit briefly. Many products level best after 1?5 minutes. If the label specifies longer, follow that.
- Buff to the desired finish. Use a clean, dry microfiber to remove excess and even out sheen. This is how you get an OEM matte/satin look instead of a greasy shine.
- Inspect from multiple angles. Use natural light or a flashlight to catch streaks on dashboards and door panels.
Second coat: when it helps
- Yes for severely faded plastics or uneven coloration
- Yes when the first coat absorbs quickly and looks patchy after drying
- No when the surface already looks uniform (layering can increase gloss and dust attraction)
Exterior trim restorer application tips
- Use painter?s tape to protect adjacent paint if your product can stain or darken porous surfaces unevenly.
- Apply sparingly and wipe any excess off paint immediately.
- Allow proper cure time before washing?some coating-style restorers need 12?24 hours without water.
Product Recommendations and Comparisons (What to Look For)
Carinteriormix.com readers often ask for a ?best plastic restorer.? The better approach is matching the product type to your goals and driving habits.
If you want an OEM interior look (matte/satin, low glare)
- Look for: water-based interior dressing, ?non-greasy,? ?anti-static,? ?low gloss,? UV protection
- Best for: dashboards, door tops, center stack, lower panels
- Why it works: easier leveling and buffing; less dust magnet behavior
If you want maximum durability (especially for exterior trim)
- Look for: trim coating or ceramic-infused trim restorer, longer claimed durability (months), strong UV resistance
- Best for: cowl panels, mirror bases, bumper trim, exterior pillars
- Trade-off: prep is less forgiving; high spots can look streaky if not leveled
If your plastics are heavily faded or chalky
- Look for: restorers known for deep darkening, or a two-step approach (deep clean + coating-style product)
- Tip: avoid ultra-gloss products inside?heavy darkening plus high shine can look artificial on interiors
Simple comparison checklist:
- Finish control: Can you buff it down to matte?
- Dust behavior: Does it claim anti-static properties?
- UV protection: Especially critical for dashboards and exterior trim
- Application style: spray/wipe vs. coating with cure time
- Compatibility: safe for vinyl, rubber, and textured plastics (check label)
Care and Maintenance: Keeping the Restored Look
The biggest ?secret? to long-lasting results is gentle maintenance. Harsh cleaners and frequent scrubbing remove dressings quickly and can reintroduce blotchiness.
Weekly or bi-weekly maintenance routine
- Dust with a dry microfiber or interior duster to prevent abrasion.
- Spot clean fingerprints with a slightly damp microfiber or interior cleaner sprayed onto the towel.
- Lightly buff high-touch areas (steering column plastics, door pulls) to keep sheen consistent.
When to reapply plastic restorer
- Interior: typically every 4?8 weeks depending on sun exposure and how often you clean
- Exterior trim: varies widely?2?8+ weeks for dressings, several months for coating-style restorers
Real-world tip: If you park outside and your dashboard gets direct sun, you?ll notice fading returns faster near the windshield line. Focus reapplication on that upper strip rather than redoing the entire dash every time.
Common Mistakes to Avoid
- Applying restorer on dirty plastic: traps grime, causes streaks, and creates a ?muddy? finish.
- Overapplying product: leads to greasy feel, shiny patches, and dust attraction?especially on dashboards.
- Spraying directly onto panels: overspray lands on glass, screens, gauge lenses, and headliners.
- Skipping the buff step: most interior dressings look better and last more evenly when excess is removed.
- Using strong APC at high concentration for maintenance: strips protection and dries plastics over time.
- Not testing first: some products darken unevenly on already-blotchy trim or light-colored plastics.
- Using glossy exterior trim gels on interior dashboards: increases glare and can look oily.
Troubleshooting: Fixing Streaks, Blotches, and Sticky Feel
If it looks streaky
- Buff with a clean, dry microfiber using light pressure.
- If streaks remain, lightly dampen a towel with interior cleaner, wipe the area, let it dry, then reapply a thinner coat.
If it feels sticky or attracts dust
- You likely used too much product. Wipe down with a slightly damp microfiber, then buff dry.
- Next time, use half as much and focus on even distribution.
If the trim is blotchy after drying
- Clean again to remove embedded oils or old dressing residue.
- Apply a second thin coat after the first has fully leveled.
- Consider a more durable, coating-style restorer for severely oxidized exterior plastics.
FAQ: Plastic Restorer Application, Care, and Cleaning
1) Can I use plastic restorer on vinyl and rubber?
Many interior plastic restorers are safe on vinyl and rubber, but always check the label. Rubber door seals often do better with a rubber protectant to prevent swelling or slickness. When in doubt, test a small area first.
2) Will plastic restorer make my dashboard shiny and cause glare?
Only if you choose a glossier product or apply too much. For a factory look, pick a matte or satin interior dressing and buff thoroughly after a short dwell time. That buff step is what removes excess oils and controls shine.
3) How long should I wait before touching surfaces after application?
For most interior products, 10?20 minutes is enough for light use once buffed. For coating-style trim restorers (more common on exterior plastics), follow the cure time on the label?often 12?24 hours before water exposure.
4) Can plastic restorer fix sun-faded exterior trim permanently?
?Permanent? is a stretch because UV exposure continues. A coating-style trim restorer can last months and outlast standard dressings, but it still needs maintenance. If trim is severely oxidized, prep quality matters as much as product choice.
5) Should I use a degreaser or APC before applying restorer?
Yes, but use it intelligently. A dedicated interior cleaner is usually safest inside. APC can work well at the right dilution for stubborn grime, but overly strong mixtures can dry plastics and strip protection too aggressively.
6) Why does my trim look good at night but streaky in daylight?
Daylight reveals uneven product distribution. Re-buff with a clean microfiber, then reassess. If it?s still uneven, wipe the area with a mild cleaner, let it dry, and reapply a thinner, more controlled layer.
Actionable Next Steps
- Pick the right product type: matte/satin interior dressing for cabin plastics; coating-style restorer for long-lasting exterior trim results.
- Do a proper prep clean: vacuum, wipe, agitate texture, and fully dry before applying anything.
- Apply thin, then buff: a controlled, even coat plus a final buff delivers the most OEM-looking finish.
- Maintain gently: dust regularly and avoid harsh cleaners that strip your restored finish.
If you want more practical detailing walk-throughs, product-type breakdowns, and interior care routines, explore the rest of our guides on carinteriormix.com.