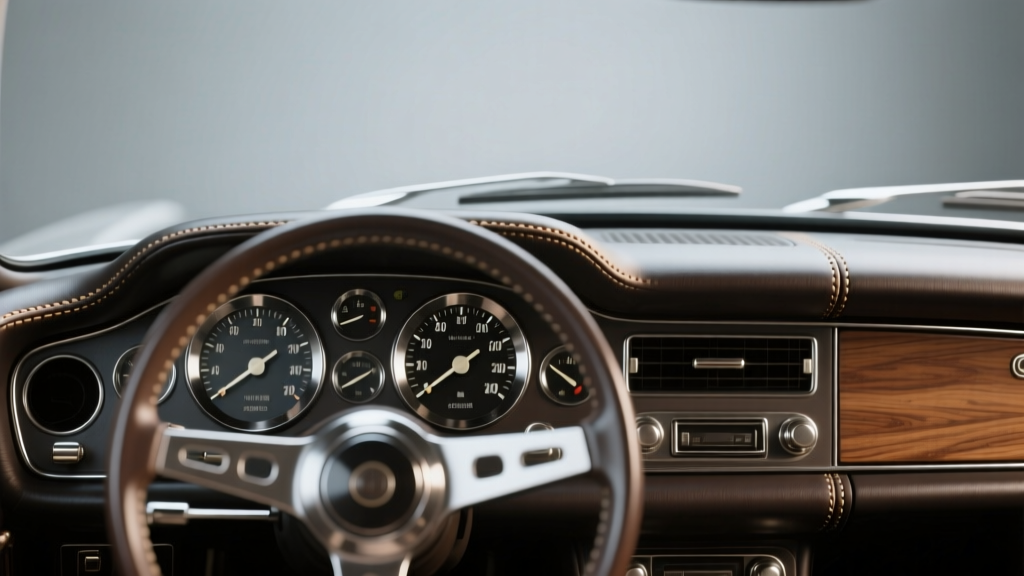
Instrument Panel Restoration: 2026 Guide
The instrument panel (often called the dash or dashboard) is one of the most used and most visible parts of your car?s interior. It?s where you read your speed, check warning lights, adjust climate controls, and interact with infotainment?so when it?s faded, cracked, sticky, or peeling, the whole cabin feels older than it should. A restored instrument panel doesn?t just look better; it can improve nighttime visibility, reduce glare, and help preserve resale value.
Instrument panel restoration also matters for safety and comfort. A cracked dash can create sharp edges, missing trim can interfere with airbag covers, and failing gauge lighting can make it harder to read vital info. The challenge is that ?dash restoration? can mean anything from a quick cosmetic touch-up to a full tear-down with vinyl repair, repainting, and component replacement. This guide breaks down what to buy, what to avoid, and how to choose the right level of restoration for your car and budget.
Whether you?re refreshing a daily driver, bringing a classic back to life, or prepping a vehicle for sale, you?ll find practical buying advice, real-world examples, and step-by-step guidance below.
What Counts as Instrument Panel Restoration?
Instrument panel restoration covers the visible dash surface and the components mounted in or on it. Depending on your vehicle, this can include:
- Dash pad/vinyl surface (cracks, fading, sticky coatings, warping)
- Gauge cluster lens and bezel (hazing, scratches, peeling coatings)
- Buttons, knobs, and switchgear (worn icons, sticky plastics)
- HVAC vents (broken louvers, discoloration)
- Trim pieces (woodgrain, brushed aluminum, painted accents)
- Backlighting and bulbs/LEDs (dim or uneven illumination)
- Airbag covers and seams (cosmetic concerns must remain safe and intact)
Restoration can be cosmetic (clean, repair, refinish) or functional (repair electronics, replace bulbs, restore gauge movement). Your ?buying list? will change based on which of these areas needs attention.
Assess Damage First: A Quick Inspection Checklist
Before buying anything, do a 10-minute inspection in good light. This prevents the common mistake of buying a dye kit when you really need filler, or buying filler when the dash pad is structurally warped.
Dash Surface
- Cracks: Hairline vs. deep splits; check around defroster vents and corners near the windshield.
- Fading/chalking: Surface looks gray, dusty, or blotchy.
- Sticky/soft-touch failure: Common on late-90s to 2010s interiors; feels tacky and attracts dust.
- Warping/lifting: Often heat-related; look for raised bubbles near vents.
Cluster Lens and Trim
- Lens haze: Fine scratches or fogging that reduces clarity.
- Peeling coatings: Anti-glare or soft-touch layers flaking off.
- Broken tabs: Bezel clips that won?t hold tight (causes rattles).
Lighting and Electronics
- Dim spots: Dead bulbs/LEDs behind the cluster or HVAC controls.
- Flicker: Could be loose connectors, failing dimmer switch, or cluster solder issues.
- Warning lights: Don?t ?restore away? a check engine light with tape?fix the cause.
Real-world example: A 2000s SUV with a sticky dash often needs coating removal and refinishing, not just a cleaner. If you apply a dressing or dye over a failing soft-touch layer, it may stay tacky and peel again within weeks.
Restoration Options: Choose the Right Level for Your Car
Option 1: Clean and Protect (Best for Light Wear)
If your dash is just dusty, lightly faded, or has minor scuffs, start here. The right interior cleaner and UV protectant can dramatically improve appearance and slow future damage.
Buy if you see: light fading, mild grime, no cracks.
Option 2: Spot Repair + Refinish (Best for Cracks, Scratches, Faded Areas)
This is the sweet spot for most owners: fill cracks, texture-match, and recolor. You?ll buy a repair kit (filler/adhesive), texture pads (if needed), and interior coating/dye.
Buy if you see: hairline to moderate cracking, gouges, worn color, peeling paint on trim.
Option 3: Dash Cap / Overlay (Best for Deep Cracks on a Budget)
Dash caps are molded covers that glue over the existing dash. They?re popular for older vehicles where the original dash has multiple cracks.
Buy if you see: widespread cracking but you don?t want to remove the dashboard.
Option 4: Full Dash Replacement or Professional Restoration (Best for Severe Warping or Show Cars)
If the dash is warped, collapsing, or previously repaired poorly, replacement may be the only long-term fix. For classics, a pro can re-skin the dash pad and restore trim to factory texture.
Buy if you see: major warping, foam deterioration, structural damage, airbag cover issues.
What to Buy: Tools and Materials That Make a Difference
Essential Cleaning and Prep Supplies
- pH-balanced interior cleaner: Removes skin oils without drying plastics.
- Isopropyl alcohol (IPA) 70?90%: For final wipe-down before coatings (test first).
- Plastic-safe scuff pads: Helps coatings adhere; avoid aggressive sanding on textured vinyl.
- Microfiber towels: Lint-free drying and buffing.
- Masking tape and masking paper: Clean lines around vents, cluster hood, and trim.
Repair Materials (Cracks, Gouges, Texture)
- Flexible vinyl/plastic repair compound: Choose a product rated for dashboards (heat and flexibility).
- Reinforcing mesh (for deeper splits): Prevents cracks from reopening.
- Texture pads or grain papers: Helps match factory dash texture.
- Plastic adhesion promoter: Especially useful on hard plastics and tricky OEM coatings.
Recoloring and Finishing Products
- Interior dye/coating (aerosol or spray-gun): Look for UV stability and OEM-style sheen (matte/satin).
- Trim paint for bezels: Choose ?interior trim? specific coatings for durability.
- UV protectant (non-greasy): Keeps the finish looking natural while reducing fade.
Cluster Lens Restoration Supplies
- Plastic polish kit: Multi-step polish for hazy gauge lenses.
- Fine finishing pads: For deeper scratches (use cautiously?too aggressive can distort the lens).
- Anti-static cleaner: Helps reduce dust attraction behind clear lenses.
Product Recommendations and Comparisons (What to Look For)
Rather than chasing hype, focus on product type and compatibility. Use these comparisons to narrow choices.
Interior Dye/Coating: Aerosol vs. Spray Gun
- Aerosol coatings are ideal for DIY users:
- Pros: minimal equipment, good for small/medium areas, faster setup
- Cons: harder to blend large sections perfectly, can build too thick if rushed
- Spray-gun coatings suit larger restorations:
- Pros: smoother, more even finish; easier color control and blending
- Cons: requires equipment, practice, and more masking/ventilation
Vinyl/Plastic Repair Kits: What Separates Good from Frustrating
- Heat resistance: Dash surfaces get hot. Avoid generic ?plastic filler? not rated for automotive interiors.
- Flexibility: The repair should flex without cracking as the dash expands in heat.
- Texture matching: Kits that include grain pads or allow imprinting help avoid a smooth ?patch? look.
Dash Caps: When They?re Worth It
- Best use case: Older daily drivers with multiple cracks where you want a clean look without a full dash removal.
- What to check before buying:
- Vehicle-specific fitment (year, trim level, sensor locations)
- Defroster vent alignment
- Material finish (matte is usually more OEM-like than glossy)
Tip: If your goal is an OEM-correct restoration for a collector car, a dash cap is usually a compromise. For a commuter you plan to keep for years, it can be a practical win.
Step-by-Step: DIY Instrument Panel Restoration Workflow
This process assumes cosmetic restoration (clean, repair, refinish). Adjust based on your vehicle and products.
Step 1: Plan the Work Area and Safety
- Park in a shaded, ventilated area (garage with door open is ideal).
- Disconnect the battery if you?re removing trim near airbags or cluster wiring.
- Use gloves and a respirator if spraying coatings.
Step 2: Deep Clean and Degrease
- Vacuum seams and vents with a soft brush attachment.
- Clean with an interior cleaner and microfiber towels.
- Do a final wipe with IPA or a prep solvent recommended by your coating brand.
Step 3: Mask Precisely
- Mask the windshield edge, vents, buttons, and any adjacent panels.
- Use a plastic trim tool to tuck tape cleanly into panel gaps.
- Cover seats and steering wheel to avoid overspray.
Step 4: Repair Cracks and Gouges
- If a crack is deep, slightly open it with a plastic-safe tool so filler bonds inside, not just on top.
- Add reinforcing mesh if the crack is long or in a stress area (corners, near vents).
- Apply flexible repair compound in thin layers; allow proper cure time.
- Texture-match using a grain pad if needed.
Step 5: Apply Adhesion Promoter (When Needed)
- Use on hard plastics, repaired areas, or slick factory coatings.
- Follow flash times exactly?too soon or too late can affect bonding.
Step 6: Recolor/Refinish the Surface
- Shake the coating thoroughly (most failures come from poor mixing).
- Spray light coats, building coverage gradually to preserve texture.
- Keep consistent distance and overlap passes for uniform sheen.
- Allow full cure before reinstalling trim or cleaning the surface.
Step 7: Restore the Cluster Lens (Optional)
- Remove the lens if possible; polishing in place risks hitting surrounding trim.
- Start with the least aggressive polish and pad.
- Finish with a fine polish and clean with anti-static cleaner to reduce dust attraction.
Step 8: Protect the Finish
- After curing, apply a non-greasy UV protectant.
- Use a sunshade regularly to reduce heat cycling and future cracking.
Buying Guide: How to Choose the Right Products for Your Dash
Match the Material: Vinyl, Hard Plastic, or Soft-Touch
- Vinyl dash pads: Need flexible repair compounds and coatings that won?t crack when the pad expands.
- Hard plastic trim: Usually benefits from adhesion promoter and trim-specific paint.
- Soft-touch surfaces: Often require removing the failing coating first. If the surface is breaking down, coating over it typically fails.
Pick the Right Sheen
- Matte: Helps reduce windshield glare; often closest to modern OEM finishes.
- Satin: Good middle ground, especially for older interiors with a mild sheen.
- Gloss: Rarely correct for dashboards and can increase glare?use cautiously.
Color Matching Tips
- Use your VIN/trim code when ordering matched interior dye where available.
- Expect sun-faded interiors to differ from factory color; blending may be better than ?spot painting.?
- Test spray on a hidden area (inside glovebox trim, lower panel edge) before committing.
Common Mistakes to Avoid
- Skipping prep: Silicone dressings and skin oils are the #1 cause of fisheyes and peeling coatings.
- Using household cleaners: Ammonia or harsh degreasers can haze plastics and dry out vinyl.
- Applying thick coats: Heavy spraying can fill in grain texture and look ?painted.? Build slowly.
- Ignoring heat and cure time: A dash gets hot fast. If the coating isn?t fully cured, it can imprint or soften.
- Repairing over active cracking: If the dash is warped or the foam is failing, filler may crack again. Consider a dash cap or replacement.
- Messing with airbag seams: Don?t glue, stitch, or coat over airbag deployment seams. If the cover is damaged, consult a professional.
When to DIY vs. Hire a Pro
DIY works well for cleaning, minor repairs, refinishing, and lens polishing?especially if you?re patient and prep carefully. Professional help is usually worth it when:
- The dash is severely warped or foam is deteriorating
- You need upholstery-level re-skinning for a classic or show build
- Airbag covers or seams are compromised
- Electronics issues involve cluster soldering or stepper motors
Budget reality: A DIY refinish may cost the price of supplies and a weekend. Professional dash restoration can run much higher, but it can also deliver factory-correct texture and longevity on high-value cars.
FAQ: Instrument Panel Restoration
How long does a dashboard refinish last?
With proper prep and quality interior coating, a refinish can last years. Longevity depends on sun exposure, heat cycling, and cleaning habits. Using a windshield sunshade and a UV protectant extends life significantly.
Can I restore a cracked dash without removing it?
Yes?many cracks can be repaired in place with flexible filler and refinishing. If cracks are widespread or the dash is lifting/warped near the windshield, a dash cap overlay or replacement is often more reliable.
What?s the best way to fix a sticky dashboard?
Sticky dashes are usually caused by failing soft-touch coatings. The effective fix is to remove the degraded layer (carefully, with compatible solvents and gentle abrasion), then recoat with an interior-grade finish. Simply cleaning or dressing the surface rarely solves it long-term.
Is it safe to paint around airbags on the dash?
You should avoid coating or filling across airbag seams or covers. If you must refinish nearby trim, mask the seam carefully and keep coatings away from deployment areas. When in doubt, have a professional assess it.
Can I use vinyl wrap on the instrument panel?
Wrap can work on simpler, flatter sections, but dashboards often have complex curves, vents, and high-heat exposure that make wrap lifting more likely. For a factory-like look, interior coatings or a dash cap typically hold up better.
Why does my gauge cluster lens look hazy even after cleaning?
Many lenses are scratched or have degraded coatings that ?fog? over time. A plastic polish kit can restore clarity, but deep scratches may require more aggressive correction or lens replacement.
Actionable Next Steps
- Inspect your dash and cluster using the checklist above and decide your restoration ?level? (clean/protect, spot repair, dash cap, or replacement).
- Buy products that match your materials (vinyl vs. hard plastic vs. soft-touch) and aim for an OEM-like sheen (usually matte or satin).
- Prioritize prep: deep cleaning, degreasing, and careful masking are what make a restoration look professional.
- If your dash has major warping or airbag cover damage, consider professional restoration for safety and durability.
If you want more practical interior tips?cleaning routines, trim restoration, upholstery care, and long-term cabin protection?explore more guides on carinteriormix.com.