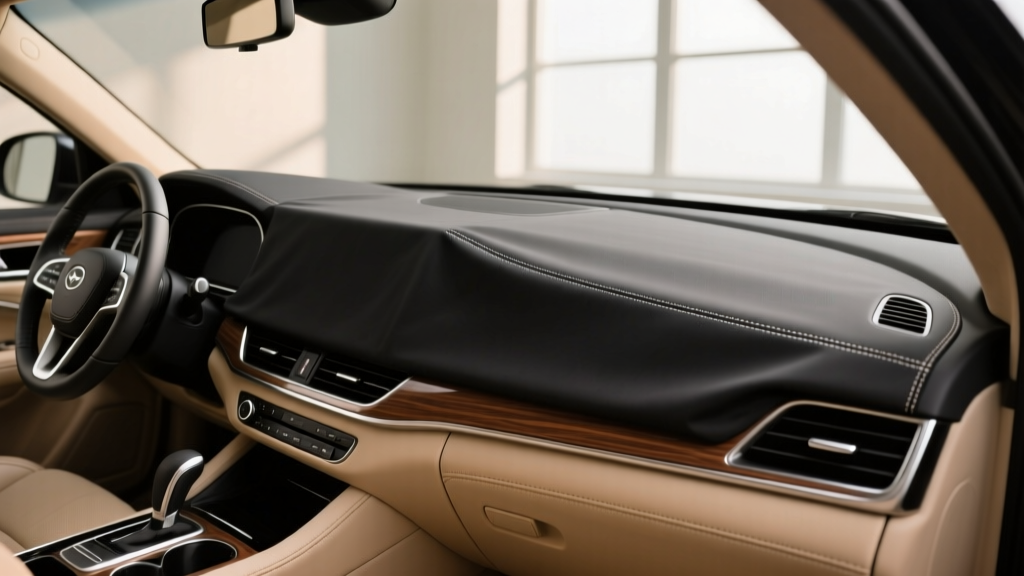
How to Choose the Right Dashboard Cover Installation for Your Vehicle - Part 2 - CarInteriorMix
A dashboard cover can be a surprisingly high-impact upgrade. Done right, it protects your dash from UV damage, hides existing cracks, reduces glare, and gives the cabin a cleaner, more finished look. Done wrong, it can look bulky, shift around on hot days, block sensors, or even become a safety issue if it interferes with airbags.
Part 1 focused on selecting the right dashboard cover style and materials. Part 2 is all about installation choices?because the same cover can look ?factory? in one car and sloppy in another depending on how it?s mounted, prepped, and finished. If you?ve ever seen a dash mat that curls at the edges or lifts around vents, you already know why installation matters.
Below, you?ll learn how to choose the best installation method for your vehicle and driving habits, plus step-by-step instructions, practical tips, product comparisons, and common mistakes to avoid.
Installation Options: Which Method Fits Your Vehicle and Goals?
Most dashboard covers fall into three installation categories. The ?right? choice depends on climate, surface condition, how often you remove the cover, and how clean a look you want.
1) Non-adhesive (lay-on) installation
This is the simplest method: the cover sits on the dash using its shape and some friction. Many carpet-style dash mats are designed for lay-on placement.
- Best for: leased vehicles, frequent removal, mild climates, drivers who want zero residue risk.
- Pros: fastest install, no glue/tape, easy to reposition.
- Cons: can shift with heat or aggressive cornering; edges may lift over time; less ?OEM? finish.
2) Hook-and-loop (Velcro-style) anchors
Hook-and-loop dots or strips secure key areas while still allowing removal later.
- Best for: drivers who want a cleaner look than lay-on but still want removability.
- Pros: more stable; easier to align than full adhesive; serviceable.
- Cons: adhesive-backed loop strips may leave residue; can weaken in extreme heat if the wrong grade is used.
3) Tape or adhesive-backed installation (semi-permanent)
Typically uses automotive-grade double-sided tape (like 3M) or the tape supplied with a molded cover. This is common with formed carpet covers and many molded dash caps.
- Best for: hot climates, heavily cracked dashboards, and drivers who want maximum stability and a tight fit.
- Pros: least movement; best edge control; most ?finished? appearance.
- Cons: requires careful prep; harder to reposition; risk of residue or surface damage on removal.
How to Pick the Right Installation Method (Decision Checklist)
Use this quick checklist to match an installation approach to your vehicle and usage.
- Your climate:
- Hot/sunny (Arizona, Texas summers): favor tape/adhesive or high-temp Velcro.
- Moderate climate: lay-on can be sufficient if fit is good.
- Cold winters: adhesives can be less tacky during install?plan to warm the cabin and surfaces first.
- Dash condition:
- Severely cracked/warped: consider a molded dash cap or tape-assisted cover for better bridging.
- Clean, intact dash: lay-on or light anchoring is usually enough.
- Interior sensitivity:
- Soft-touch coatings (some European cars): avoid aggressive adhesives; test in a hidden area first.
- Older hard plastics: generally more adhesive-friendly.
- Need to remove it often?
- Yes: lay-on or Velcro anchors.
- No: tape/adhesive for maximum stability.
Pre-Installation Prep: The Step People Skip (and Then Regret)
A dashboard cover installation is only as good as the surface beneath it. Dust, silicone-based interior dressing, and heat-softened plastics are the biggest reasons covers slip or adhesives fail.
Step-by-step prep
- Remove everything from the dash: phone mounts, dash cams routed across the dash, parking permits, microfiber towels?anything that can interfere with fit.
- Vacuum and brush out vents and seams: use a soft detailing brush to pull debris from creases and speaker grilles.
- Degrease the mounting zones:
- Use a mild interior cleaner first.
- Follow with a 50/50 mix of isopropyl alcohol and water on a microfiber (or a dedicated prep wipe) for areas where tape/Velcro will stick.
- Avoid soaking; you?re wiping, not flooding.
- Remove ?shiny? dressings: if your dash has a slick, glossy protectant, it can prevent adhesion. Clean until the surface feels dry and squeak-free.
- Test fit the cover: place it on the dash and confirm alignment around:
- defrost vents
- A-pillars
- instrument cluster hood
- center speaker grilles
- HUD cutouts (if equipped)
- passenger airbag seams
Step-by-Step: Installing a Dash Mat (Carpet or Fabric Cover)
Dash mats are popular because they?re affordable, reduce glare, and provide UV protection. The downside is that they can look ?floated? if they?re not installed carefully.
Option A: Lay-on installation (fastest)
- Warm the cover: leave it in the sun for 10?15 minutes or run the heater. This helps it relax and conform to contours.
- Center it first: align the instrument hood and center vents before worrying about corners.
- Work outward: smooth from the center toward the A-pillars and windshield edge.
- Check visibility and reflections: sit in the driver?s seat and confirm the mat doesn?t intrude into sight lines or cluster visibility.
- Road test: drive a few miles. If it shifts, upgrade to Velcro anchors on strategic points.
Option B: Velcro anchor installation (best balance)
- Identify anchor points: typically near the corners, around the instrument hood area, and near the center vents.
- Clean those spots with alcohol: the adhesive backing needs a clean, oil-free surface.
- Apply the loop (soft) side to the dash: press firmly for 30?60 seconds per piece.
- Attach the hook side to the mat: align carefully so the mat doesn?t ?pull? crooked when pressed down.
- Press and set: place the mat, align, then press down across the anchors.
Real-world example: If you drive a pickup that spends all day in direct sun, a lay-on mat may curl at the windshield edge by mid-summer. Adding 6?10 anchor points (instead of just two) usually fixes edge lift without making the cover ?permanent.?
Step-by-Step: Installing a Molded Dashboard Cover (Dash Cap Style)
Molded dashboard covers (often called dash caps) are rigid or semi-rigid shells designed to sit over the existing dash. They?re commonly used to cover cracks and missing chunks where a soft mat would telegraph imperfections.
What you?ll need
- automotive-grade double-sided tape and/or the included adhesive
- isopropyl alcohol prep wipes
- masking tape (for temporary positioning)
- microfiber towels
Installation steps
- Do a complete test fit: check clearance around vents, speaker grilles, and pillar trim.
- Mark reference points: use small pieces of masking tape to mark where edges should land. This makes final placement much easier.
- Prep contact zones: wipe down with alcohol where tape will stick.
- Apply tape strategically:
- Focus on edges and high spots that tend to lift.
- Avoid blocking vent openings or placing tape where it could distort fit.
- Peel backing gradually: don?t remove all tape backing at once. Start with a few sections so you can still adjust alignment.
- Set the cover from center outward: align the center features first, then lay it down toward corners.
- Press and hold: apply firm pressure along taped areas for a few minutes.
- Allow cure time: keep the cabin warm and avoid harsh temperature swings for 24 hours if possible.
Tip: If the dash cap wants to ?spring? at the edges, a warm interior helps. Park in the sun (or run the heater) before installation to make materials more cooperative.
Product Recommendations: Tapes, Anchors, and Kits That Actually Hold Up
The difference between a cover that lasts two summers and one that lasts five often comes down to the adhesive grade.
Best use cases (quick comparisons)
- High-heat double-sided tape (automotive-grade): ideal for hot climates and molded covers. Look for tapes rated for exterior/automotive trim use.
- 3M-style VHB tape: great holding power for rigid caps and edge control, but requires very clean prep and careful placement (it bonds aggressively).
- Industrial hook-and-loop with high-temp adhesive backing: best for removable mats that still need stability.
- Adhesion promoter (optional): helpful on difficult plastics, but use sparingly and only on small zones?especially if you may remove the cover later.
Practical rule: If your car lives outdoors in strong sun, spend a little more on automotive-grade tape. Household double-sided tape often fails when the dash surface gets hot and slightly oily.
Safety and Fit Considerations (Airbags, Sensors, and Vents)
A dashboard cover should never compromise safety systems or airflow. Before you commit to any installation method, confirm these points:
- Passenger airbag zone: Many vehicles have a seam or deployment door on the passenger side. Your cover must be designed for your exact model and must not be taped across a deployment seam in a way that restricts it.
- Defrost vents: A mat that partially blocks defrost vents can reduce windshield clearing in winter and foggy weather.
- Sunlight sensors: Some cars use dash-top sensors for auto headlights or climate control. Ensure cutouts align and the sensor isn?t shaded.
- HUD (head-up display): If equipped, make sure the cover has a correct opening and doesn?t create reflections.
Common Mistakes to Avoid
- Skipping surface prep: Dressing residue is the #1 reason tapes and Velcro peel off.
- Using too little anchoring: Two tiny Velcro dots won?t stop edge curl in summer heat. Use multiple anchor points in high-lift areas.
- Overusing tape near vents or seams: Tape can distort fit or interfere with airflow?and it?s a bad idea near airbag deployment areas.
- Installing cold: Cold materials are stiff and adhesives don?t bond well. Warm the cabin and the cover first.
- Misaligning the center features: If the instrument hood and center vents aren?t lined up, everything else will look ?off? even if the corners seem fine.
- Expecting a mat to hide deep damage: If the dash is heavily warped or missing chunks, a molded dash cap is often a better solution than a soft mat.
FAQ: Dashboard Cover Installation
Will a dashboard cover damage my dash when I remove it?
A lay-on mat typically won?t. Adhesive tapes and Velcro can leave residue, and on soft-touch or older brittle plastics, removal can pull at the surface. If you might remove it later, use minimal tape, choose removable anchor methods, and test a small area first.
How do I stop my dash mat from sliding around?
Start with a proper test fit and warm the mat so it conforms. If it still moves, add hook-and-loop anchors at corners and along the windshield edge. Also make sure the dash is free of silicone-based shine products.
Can I install a dashboard cover over cracks?
Yes. For light cracking, a fabric dash mat can visually downplay it. For heavy cracking, missing pieces, or warping, a molded dash cap with automotive-grade tape usually looks cleaner and stays more stable.
Do dashboard covers reduce windshield glare?
Many do?especially darker carpet or low-sheen fabrics that absorb light. Smooth vinyl-like finishes can sometimes increase reflections, so if glare reduction is your main goal, choose a matte surface and install it flat with minimal ripples.
How long should adhesive tape cure before driving?
You can usually drive right away, but for best bond strength, avoid extreme heat/cold swings and don?t tug or reposition the cover for about 24 hours. If the cabin is warm, bonding typically improves faster.
What if my cover doesn?t fit perfectly around vents or sensors?
Don?t force it with extra tape. Re-check that the cover is for your exact year/make/model and trim. Small fit issues can sometimes be corrected by warming and re-seating, but major misalignment usually means the wrong part.
Next Steps: Get a Clean, Secure Install That Lasts
To choose the right dashboard cover installation for your vehicle, start with your climate and how permanent you want the result to be. If you want quick and removable, go lay-on or use a few high-temp Velcro anchors. If you want a tight, stable fit?especially on a cracked dash?use automotive-grade tape and take your time with prep and alignment.
- Pick an install method: lay-on, Velcro anchors, or tape/adhesive.
- Prep properly: vacuum, clean, and remove dressing residue.
- Test fit, then secure from the center outward.
- Double-check airbags, sensors, and defrost vent clearance.
If you?re ready to keep upgrading your cabin, explore more interior guides and practical how-tos on carinteriormix.com.