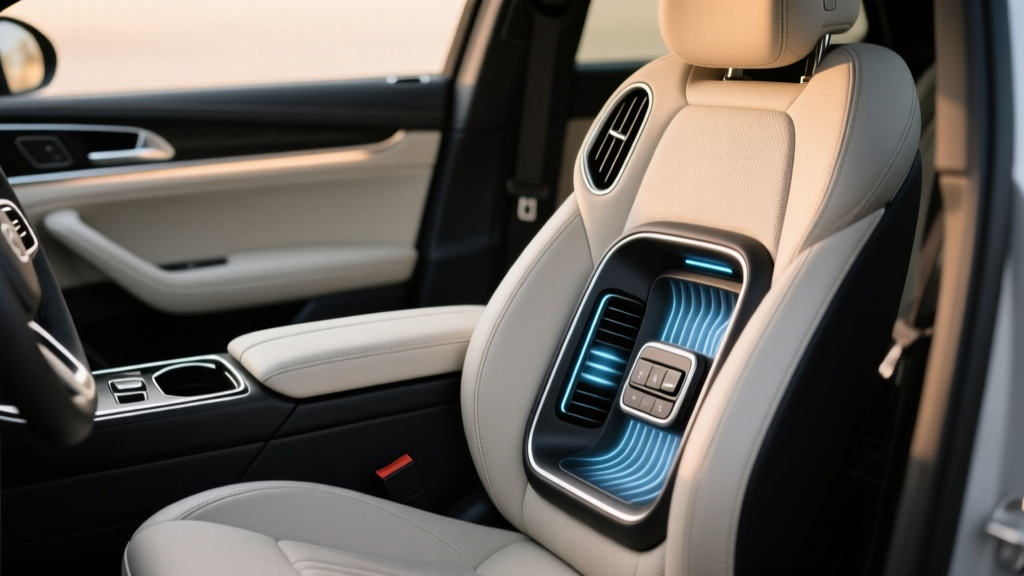
Cooled Seat Installation for Your Vehicle (2026)
Few upgrades change how a car feels day-to-day like cooled seats. If you live in a hot climate, park outside, wear business attire, or spend long hours commuting, ventilated (often called ?cooled?) seating can turn sweaty drives into comfortable ones. It?s not just a luxury feature anymore?aftermarket options have made it realistic for many vehicles that didn?t come with factory ventilation.
That said, ?cooled seat installation? can mean very different things. Some kits are true ventilated systems with fans pushing air through perforated upholstery. Others are cooling pads that sit on top of the seat, and a smaller segment use thermoelectric (Peltier) modules to actively cool air. Your budget, seat material, vehicle electrical system, and your willingness to modify upholstery all determine which approach actually makes sense.
This guide breaks down the main installation types, how to match them to your vehicle, what the install process looks like, and the mistakes that lead to weak airflow, noisy fans, and premature failures.
What ?Cooled Seats? Really Means (and Why It Matters)
Most ?cooled seats? are ventilated seats: small fans pull cabin air through the seat cushion and backrest, moving it across your body to evaporate heat and moisture. They don?t necessarily blow cold air?but they feel dramatically cooler because they reduce clamminess.
A smaller number of systems actively cool air using thermoelectric (Peltier) devices. These can feel colder, but they?re more complex, draw more power, and require careful heat management.
When choosing a cooled seat installation, aim for the best match between:
- Cooling expectation: ventilation vs. true cold air
- Seat construction: foam type, side airbags, occupancy sensors
- Upholstery: perforated leather, vinyl, cloth, or non-perforated leather
- Budget and permanence: removable pad vs. integrated kit
- Noise tolerance: fan quality and mounting matter
3 Main Cooled Seat Installation Options
1) Integrated Ventilated Seat Kit (Best Overall for OEM-like Results)
This is the most common ?real? cooled seat retrofit. A kit is installed under the upholstery with one or more fans, airflow channels, and a switch/control module.
Pros
- Most OEM-like look and feel
- Good long-term comfort for daily driving
- Cleaner appearance than a seat topper
Cons
- Requires removing upholstery and possibly modifying foam
- Works best with perforated seat surfaces (or adding perforation)
- Install quality strongly affects performance
Best for: Owners who plan to keep the vehicle, want a tidy factory-style setup, and are comfortable with an upholstery shop or a careful DIY.
2) Seat Cooling/Ventilation Pad (Best Budget and Zero-Commitment Option)
These are add-on cushions that plug into 12V and sit on top of the seat. Some use fans, others use air channels.
Pros
- Quick install?usually under 5 minutes
- Moves between vehicles easily
- No upholstery removal and no airbag/sensor risk
Cons
- Bulkier look and may shift during driving
- Less effective than integrated ventilation on many seats
- Wires can clutter the cabin
Best for: Leasing, occasional use, rideshare drivers swapping vehicles, or anyone testing the concept before committing to a permanent retrofit.
3) Thermoelectric (Peltier) ?True Cooling? Retrofit (Niche, Highest Complexity)
These setups use a thermoelectric module to cool air (or a plate) and then direct cooled airflow into the seat. They can feel colder than basic ventilation but create heat on the hot side of the module that must be dissipated.
Pros
- Potentially colder sensation than fan-only ventilation
- Can be effective in high-humidity climates
Cons
- Complex installation and heat management requirements
- Higher electrical draw; may require relays and heavier wiring
- More parts = more points of failure
Best for: Enthusiasts with a strong electrical/installation skill set, or those working with a specialist shop.
How to Match a Cooled Seat Installation to Your Vehicle
Check Your Seat Type: Airbags, Sensors, and Seat Design
Modern seats aren?t just cushions?they contain safety and comfort electronics. Before choosing a kit, identify:
- Side airbags in the seat: Common in many vehicles. Upholstery removal must be done carefully to avoid damaging the airbag seam.
- Occupant detection sensor (passenger seat): A mat or module that determines airbag deployment. It must not be pinched, relocated incorrectly, or exposed to heat sources.
- Seat heaters: Many retrofits can coexist with heaters, but spacing and wiring routing matters.
- Seat foam shape: Aggressive bolsters can limit space for fan placement and ducts.
Real-world example: A sporty seat with deep bolsters may feel less ?cooled? after a retrofit because airflow is concentrated in the center panel only. A flatter touring seat often delivers more consistent ventilation across your back and thighs.
Upholstery Material: Perforated vs. Non-Perforated
Ventilated seats work best when air can pass through the surface facing your body.
- Perforated leather/pleather: Ideal for integrated kits.
- Cloth: Often works well because it?s naturally breathable, though thicker cloth can reduce airflow.
- Non-perforated leather/vinyl: A common reason retrofits disappoint. Air has nowhere to go, so you feel minimal cooling.
If your vehicle has non-perforated leather, you have three realistic paths:
- Choose a seat pad with built-in channels that contact your body.
- Have an upholstery shop add perforated panels (or replace inserts) for a factory-like result.
- Accept reduced performance with an integrated kit (not recommended if you?re paying for labor).
Set a Budget That Matches Your Expectations
Costs vary widely depending on installation type and whether you need upholstery work:
- Seat cooling pad: Typically the lowest cost and DIY-friendly.
- Integrated ventilated kit: Mid-range for parts, but labor can be significant due to upholstery removal.
- Thermoelectric retrofit: Highest cost once you factor in wiring, relays, heat sinks, and troubleshooting.
Decide: DIY vs. Professional Installation
If your seat has airbags and occupancy sensors, professional installation is often the safer choice. DIY can still be successful if you?re comfortable with:
- Disconnecting the battery and waiting before unplugging seat connectors
- Removing seats without damaging trim or wiring
- Hog rings or upholstery clips (and reattaching them correctly)
- Routing wiring cleanly with proper fusing and relays
Step-by-Step: Planning a Proper Cooled Seat Retrofit
This planning process helps you avoid buying a kit that won?t perform well in your specific interior.
Step 1: Identify Your Seat Surface and Insert Area
- Look for perforation in the center panels (backrest and cushion).
- Measure the insert width and height where airflow will matter most.
- Check for tight areas where fans may not fit under the foam.
Step 2: Inspect Under-Seat Clearance
- Slide the seat fully forward/backward and check moving parts.
- Locate factory wiring harness paths?avoid routing new wires near tracks and gears.
- Confirm space for a control module if the kit uses one.
Step 3: Choose the Control Style You?ll Actually Use
Controls range from simple toggle switches to multi-speed OEM-style buttons. Consider:
- Switch location: Center console blanks, seat side panel, or under-dash.
- Number of levels: 2?3 speeds are usually enough; more levels can add complexity without real benefit.
- Ignition behavior: Prefer a setup that turns off with the key to prevent battery drain.
Step 4: Confirm Electrical Requirements
A quality install includes:
- An inline fuse sized for the kit
- A relay or ignition-switched trigger (recommended for most integrated kits)
- Clean ground points (no loose self-tapping screws into painted metal)
- Proper wire gauge for the current draw
Step 5: Decide on Fan Placement and Airflow Path
Integrated kits work best when air has a clear path:
- Fans pulling air from under the seat should not be blocked by carpet or sound deadening.
- Foam channels must be smooth and not collapse when you sit.
- Backrest airflow should target mid-back where heat builds up on long drives.
Product Types and What to Look for (Practical Comparisons)
Integrated Ventilated Kits: Key Features
- Multiple fans vs. single fan: Multi-fan systems often distribute airflow better and reduce the ?hot spot? effect.
- Low-noise fan design: Look for ball-bearing or quality brushless fans and vibration isolation.
- Ducting/channels included: Kits with proper air distribution layers tend to perform more consistently.
- Warranty and parts availability: Fans are wear items; replaceable components are a plus.
Seat Cooling Pads: What Separates Good from Annoying
- Secure anchoring: Straps that keep the pad from sliding during entry/exit.
- Comfort: Too stiff and you?ll hate it on long trips; too thick and it raises seating position.
- Noise level: Cheap fans can whine at highway speeds.
- 12V plug quality: A solid plug and cord strain relief prevents intermittent power.
Thermoelectric Systems: Minimum Requirements
- Serious heat dissipation: Heat sinks and airflow on the hot side are not optional.
- Condensation awareness: If you cool below dew point, moisture can accumulate?bad for foam and electronics.
- Robust wiring: Expect higher draw; undersized wiring leads to voltage drop and weak performance.
Common Mistakes to Avoid
- Installing ventilation under non-perforated leather and expecting ?AC-level? cooling. Air needs an exit path to reach your body.
- Skipping an ignition-switched relay. Fans left on can drain a battery faster than many owners expect.
- Routing wires near seat rails. Seat movement can pinch or cut wiring, causing shorts or intermittent operation.
- Blocking the fan intake. If the fan is pressed against carpet or foam with no clearance, airflow drops dramatically.
- Forgetting about passenger occupancy sensors. Disturbing the sensor mat can trigger airbag lights or unsafe operation.
- Using cheap connectors and poor grounds. Many ?weak fan? complaints are actually voltage drop issues.
- Expecting silent operation at max speed. Even good systems produce some noise?aim for ?low hum,? not ?inaudible.?
Practical Tips for Better Cooling Performance
- Remote start + ventilation is a killer combo: Start the vehicle, let cabin temps drop, then use seat ventilation to manage moisture.
- Keep the cabin air filter fresh: Better HVAC airflow supports seat ventilation effectiveness because you?re circulating cooler, drier air.
- Clean intake areas: Coins, wrappers, and floor mats can block under-seat airflow.
- Use the right expectations: Ventilated seats excel at reducing sweat; they won?t replace a working AC system.
- Consider tinting: If your cabin heat load is extreme, quality window tint often makes cooled seats feel stronger.
When to Choose Professional Installation
DIY is tempting, but professional help is usually the smarter play if:
- Your seats have side airbags and you?re not familiar with upholstery seams and safe handling
- You have passenger occupancy detection and want to avoid airbag warning lights
- Your upholstery is non-perforated leather and you want perforated inserts added cleanly
- You want switches integrated into factory-style panels without cutting mistakes
When shopping for an installer, ask direct questions:
- Have you installed ventilated seat kits on this vehicle generation before?
- How do you handle occupancy sensors and side airbags?
- Will you use an ignition-switched relay and dedicated fuse?
- Can you show examples of switch placement and finished upholstery?
FAQ: Cooled Seat Installation Questions
Do cooled seats work with leather seats?
Yes?perforated leather works very well. Non-perforated leather usually limits performance unless you add perforated inserts or use a cooling pad that channels air at the surface.
Will installing cooled seats affect my seat airbags?
It can if done incorrectly. Seats with side airbags require careful upholstery handling and routing to avoid interfering with airbag seams or wiring. If you?re unsure, use a professional installer experienced with airbag-equipped seats.
Can I install ventilation and keep my factory heated seats?
Often yes, but it depends on space and routing. The best results come from keeping heater elements flat and ensuring fan/duct components don?t create pressure points. A clean wiring plan prevents electrical noise and voltage drop.
How much power do ventilated seat kits use?
Fan-based ventilation is usually modest, but draw varies by kit and speed. The safest setup uses a fused power feed and a relay triggered by ignition so the system can?t be left on accidentally.
Why do some cooled seat retrofits feel weak?
The most common reasons are:
- No perforation or restricted airflow through the upholstery
- Fan intake blocked under the seat
- Collapsed or poorly cut foam channels
- Voltage drop from weak grounds or undersized wiring
Is a seat cooling pad worth it?
For many drivers, yes?especially if you want a quick, low-cost solution or you?re leasing. It?s also a smart ?trial run? before investing in an integrated retrofit.
Conclusion: Choose the Right Setup and Get the Results You?re Paying For
The best cooled seat installation is the one that matches your seat material, your comfort expectations, and your willingness to modify upholstery. If you want a factory-like experience, an integrated ventilated kit paired with perforated inserts is usually the sweet spot. If you need a fast, reversible upgrade, a quality cooling pad delivers immediate relief with minimal risk. And if you?re chasing true cold air, be prepared for the complexity of thermoelectric systems.
Your next steps:
- Check whether your seat surfaces are perforated and identify any seat airbags or occupancy sensors.
- Decide between a removable pad vs. integrated retrofit based on budget and how long you?ll keep the vehicle.
- If going integrated, plan power (fuse/relay), switch placement, and airflow path before buying parts.
- Get quotes from an upholstery or car audio shop that has experience with ventilated seat installs.
For more interior upgrade how-tos, maintenance tips, and buyer guides, explore the latest articles on carinteriormix.com.