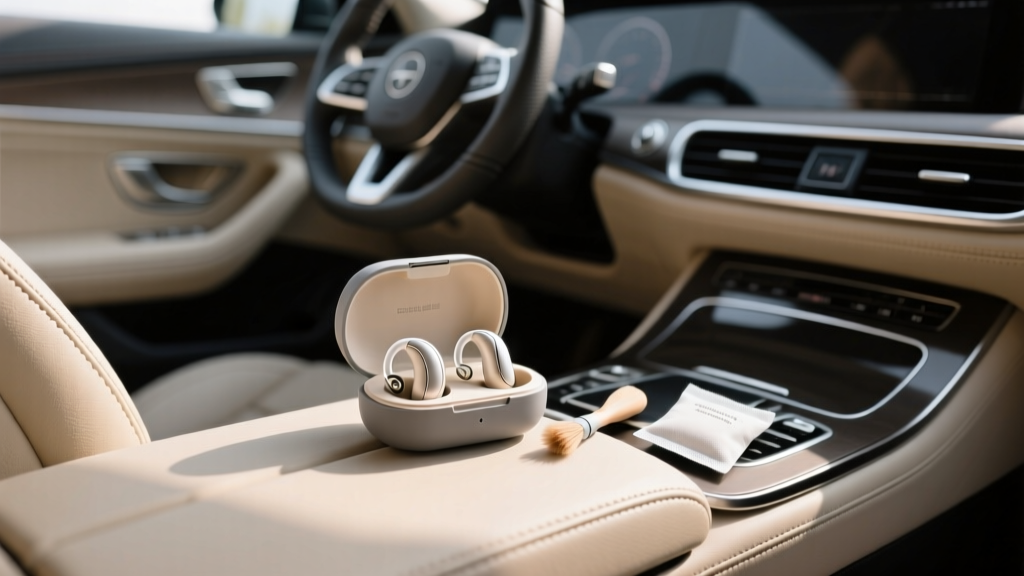
Hearing Aid Storage Care and Cleaning Guide - CarInteriorMix
If you wear hearing aids, you already know they?re small, expensive, and easy to forget about?until they squeal with feedback, sound muffled, or stop working at the worst possible time. For many drivers, that ?worst possible time? is in the car: on a freeway merge, during a Bluetooth call, or while listening for sirens and road noise cues. Proper hearing aid storage, care, and cleaning isn?t just about protecting a device?it?s about protecting your comfort, awareness, and safety behind the wheel.
Car owners and enthusiasts also live in a world of heat, dust, vibration, and sudden weather changes. Those conditions are tough on car interiors, and they?re tough on hearing aids too. A hearing aid left in a center console on a sunny day can be exposed to temperatures that degrade batteries, warp plastics, and push moisture deeper into microphones and receivers. The good news: with a simple routine and a few smart accessories, you can dramatically extend hearing aid life and improve day-to-day sound quality?especially when you?re on the road.
Why Cars Are Hard on Hearing Aids (And What That Means for Care)
Your vehicle is basically a rolling microclimate. Even if your cabin feels comfortable, small storage spots can run hotter, colder, and more humid than you think.
- Heat spikes: Parked cars can exceed 120�F (49�C) inside. Glove boxes and center consoles trap heat longer than open areas.
- Condensation: Going from cold outside air to a heated cabin (or from AC to humid outdoors) can create moisture inside hearing aids?especially around microphone ports.
- Dust and debris: Air vents, cupholders, and pockets collect lint and grit. That material can clog wax guards and microphone covers.
- Vibration and drops: A hearing aid can tumble from a lap to floor mats, under seats, or into seat tracks?where it can be crushed.
- Chemicals: Interior cleaners, air fresheners, and sunscreen residue can degrade plastics and clog components.
Real-world example: a driver tosses their hearing aids into the center console before a gym stop. Sweat residue and humid air get sealed inside. By the next morning, sound is weak and crackly. Often that?s not ?a broken aid??it?s moisture and debris that a proper drying and cleaning routine would prevent.
Daily, Weekly, and Monthly Hearing Aid Care Routine
Daily Routine (3?5 minutes)
- Wipe hearing aids with a clean, dry microfiber cloth.
- Brush around microphone ports and receiver openings with a soft hearing-aid brush.
- Check and clear wax buildup from domes or earmolds.
- Store in a dry case (ideally with a drying option) overnight.
Weekly Routine (10?15 minutes)
- Replace wax guards if they look discolored, clogged, or performance drops.
- Inspect domes/tips for tears, stiffness, or discoloration; replace if worn.
- Clean earmolds (if you have detachable molds) more thoroughly.
Monthly Routine (15?20 minutes)
- Deep clean with approved tools (no household solvents).
- Check battery doors and charging contacts for residue.
- Confirm your storage setup in the car is heat-safe and drop-safe.
Step-by-Step: Safe Cleaning for Most Hearing Aids
Always follow your manufacturer?s instructions. The steps below are widely compatible with common BTE (behind-the-ear), RIC (receiver-in-canal), and ITE (in-the-ear) styles, but details vary.
Step 1: Wash and dry your hands
Lotions, sunscreen, and interior detailing products transfer easily. Dry hands prevent moisture from entering ports.
Step 2: Power down or remove hearing aids
- Rechargeable models: Turn off if your model supports it, then remove from ears.
- Battery models: Open the battery door to turn off (and ventilate).
Step 3: Wipe the exterior
- Use a dry microfiber cloth or hearing-aid wipe (alcohol-free if your brand recommends it).
- Pay attention to areas that touch skin: behind-ear curves, shell edges, and earmold surfaces.
Step 4: Brush debris from openings
- Use the small brush (often included with hearing aids) to gently sweep around microphone ports.
- Hold the hearing aid so debris falls out, not deeper into the device (openings facing down).
Step 5: Clean domes/earmolds appropriately
For silicone domes: Wipe with a dry cloth. If your audiologist approves, you can use a lightly damp cloth, then dry completely before reattaching.
For detachable earmolds:
- Detach the earmold from the tubing (if applicable).
- Wash the earmold in mild soap and lukewarm water.
- Rinse thoroughly and dry completely (water left inside can travel into electronics).
- Use an earmold air blower to clear moisture from tubing.
Step 6: Replace wax guards or filters when needed
If sound becomes muffled, wax guards are a top suspect. Follow the guard kit instructions for your model. If you?re unsure, ask your hearing care professional for a quick demo?doing it wrong can damage the receiver.
Step 7: Dry and store properly
Place hearing aids in a drying case or dehumidifier overnight. For drivers in humid climates or anyone who sweats heavily, this step is the difference between ?constant repairs? and ?years of reliable use.?
Best Practices for Hearing Aid Storage (At Home and In the Car)
At-home storage rules
- Use a dedicated case: Prevent drops, pet damage, and ?lost on the nightstand? moments.
- Keep away from bathrooms: Showers and sinks add humidity and accident risk.
- Ventilation matters: For battery models, storing with the battery door open helps moisture escape (unless your manufacturer says otherwise).
- Dry nightly: A dehumidifier or drying system is a strong upgrade for longevity.
Car storage rules (the interior-friendly approach)
If you remove hearing aids while driving (some people do for headphones, comfort, or when using over-ear hearing protection), plan storage like you would for sunglasses or a key fob: protected, cool, and consistent.
- Never leave hearing aids in a parked car long-term: Heat is the fastest way to shorten battery and component life.
- Avoid center consoles and glove boxes in summer: They become mini ovens.
- Use a small insulated case: Store in a case that cushions against vibration and reduces temperature swings.
- Pick a ?one spot? habit: Example: a dedicated case in a door pocket (while driving) that goes with you when parked.
- Keep away from interior cleaners: Don?t store next to sprays or wipes that can leak or off-gas chemicals.
Real-world tip: If you already keep a sunglasses case in your car, don?t mix hearing aids and sunglasses loosely. A sunglass hinge can scratch the shell or snag a receiver wire. Give hearing aids their own padded case.
Product Recommendations: What?s Worth Buying?
Exact brand choices vary, but these categories make a noticeable difference. Look for accessories compatible with your hearing aid model and confirm with your audiologist if you?re unsure.
1) Hearing aid dehumidifiers and dryers
- Passive drying jars (desiccant): Affordable, no power required. Great for travel and mild moisture exposure.
- Electric drying boxes: Use gentle heat and/or airflow. Good for daily use in humid regions.
- UV + drying systems: Combine drying with UV sanitation. Helpful if you?re prone to ear infections or want extra hygiene support.
Quick comparison: Passive jars are simple and cheap; electric and UV systems cost more but tend to provide more consistent overnight results?especially for heavy sweating or high humidity.
2) Cleaning tools and supplies
- Soft brush + loop pick: For wax and debris around domes and openings.
- Wax guard kits: Must match your hearing aid receiver type.
- Microfiber cloths: Keep a few: one at home, one in your travel kit.
- Alcohol-free hearing aid wipes: Convenient for car and travel; avoid random household wipes unless approved.
3) Travel and car-friendly storage
- Hard-shell hearing aid case: Crush-resistant with a soft interior.
- Small insulated pouch: Helps reduce rapid temperature swings (still don?t leave in a hot car).
- Keychain case (with caution): Handy, but avoid tossing it with keys that can scratch devices.
Common Mistakes to Avoid (Especially for Drivers)
- Using canned air or shop air: High pressure can force debris deeper and damage microphones. Use the correct brush instead.
- Cleaning with rubbing alcohol, glass cleaner, or interior detail sprays: These can degrade plastics, seals, and coatings. Use manufacturer-approved products.
- Leaving hearing aids on the dashboard, console, or in cupholders: Heat + sun exposure + spills = quick failure.
- Storing hearing aids loose in pockets or door bins: Lint clogs ports; devices get crushed by seat belts or items shifting while driving.
- Skipping wax guard changes: Many ?my hearing aid is broken? moments are just clogged filters.
- Trying to dry hearing aids with a hair dryer: Too hot, too fast, and risky for adhesives and delicate components.
- Charging issues from dirty contacts: If rechargeable aids don?t charge reliably, check for residue on charging contacts and clean gently per your brand?s guidance.
Road-Trip Ready: A Simple Hearing Aid Kit for Your Car
Think of this like a mini interior-care kit?but for your hearing aids. Keep it in a small zip pouch that you take with you when you leave the car.
- Hard case for hearing aids
- Microfiber cloth
- Small brush tool
- Spare domes/tips
- Wax guards/filters
- For battery models: spare batteries in a protective caddy
- For rechargeable models: charging cable or compact charger (if your brand supports travel charging)
Practical scenario: You?re on a weekend drive, stop for food, and one hearing aid starts sounding muffled. With a brush and wax guard in your kit, you can fix it in minutes instead of driving home half-hearing road noise and navigation prompts.
FAQ: Hearing Aid Care, Cleaning, and Storage
How often should I clean my hearing aids?
A quick wipe and brush daily is ideal. Do deeper maintenance weekly (wax guards, dome checks) and a more thorough inspection monthly. If you sweat heavily or drive with windows down a lot, you may need more frequent cleaning.
Can I store hearing aids in my car while I run errands?
It?s better not to. Even short stops can expose hearing aids to heat spikes, especially in summer. If you must, keep them in a hard case, out of direct sun, and take them with you whenever possible.
What should I do if my hearing aids get sweaty or damp after driving?
Wipe them dry, brush any visible debris, and place them in a drying system overnight. If sound becomes intermittent or weak, replace wax guards and let them dry again. If problems persist, schedule service?moisture can affect receivers and microphones.
Are UV cleaners safe for hearing aids?
Many are designed specifically for hearing aids and are safe when used as directed. Choose a hearing-aid-specific UV dryer (not a random UV gadget) and follow your manufacturer?s recommendations, especially for rechargeable models.
Why do my hearing aids sound muffled even after cleaning the outside?
The most common causes are clogged wax guards/filters, blocked receiver openings, or moisture inside the device. Replace the wax guard, check domes, and use a dryer overnight. If there?s still muffling, your hearing care professional can test the receiver and microphones.
Is it okay to use household disinfecting wipes?
Usually no. Many contain alcohols or chemicals that can damage finishes, seals, and plastics. Use hearing-aid-approved wipes or a slightly damp cloth only if your manufacturer allows it.
Actionable Next Steps
- Set up a daily 3-minute routine: wipe, brush, store dry.
- Choose a proper drying solution (passive jar or electric/UV dryer) based on your climate and lifestyle.
- Build a small road kit so you?re not stuck with muffled sound mid-drive.
- Stop storing hearing aids in hot spots like dashboards, glove boxes, and center consoles?treat them like electronics, not loose accessories.
Your hearing aids work hard in the same environments your car interior faces: heat, dust, and daily wear. A consistent storage and cleaning routine keeps them performing like they should?clear sound, fewer repairs, and less stress on the road.
For more practical ownership tips and interior-focused guides, explore the latest articles on carinteriormix.com.