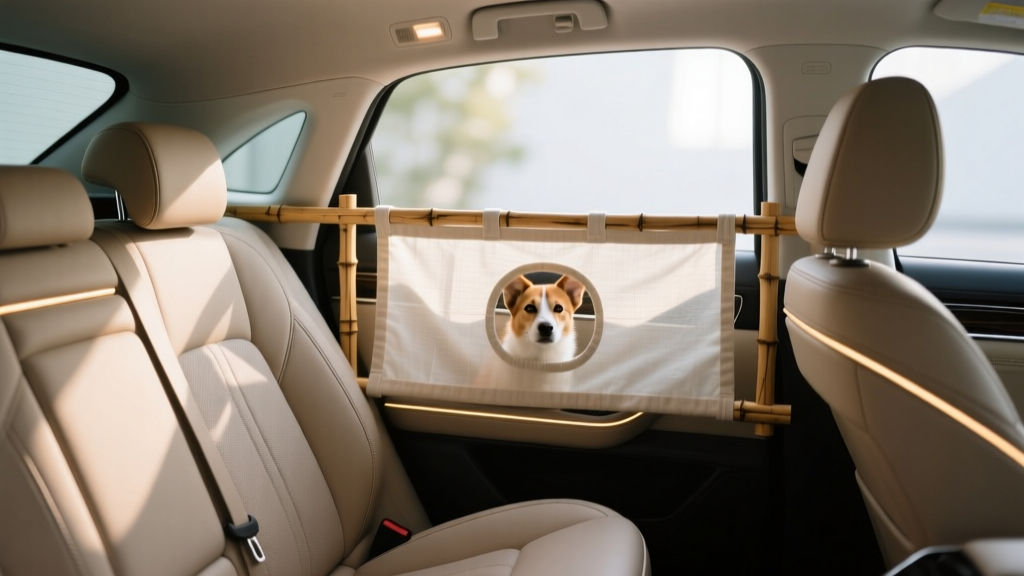
Eco-Friendly Pet Barriers for Cars | CarInteriorMix
Driving with a dog (or any adventurous pet) is one of the best parts of car ownership?until muddy paws, flying fur, and sudden ?helpful? visits to the front seats turn a calm trip into a distraction. A properly installed pet barrier protects your interior, keeps you focused on the road, and gives your pet a safer, defined space. The challenge is that many common barrier setups rely on disposable plastics, single-use adhesives, and cheap components that break quickly and end up in the trash.
Eco-friendly pet barrier installation alternatives solve the same safety and cleanliness problems while reducing waste and harmful materials. That can mean choosing recycled or renewable materials, using modular systems that last longer, selecting low-VOC components, and installing them in ways that don?t damage trim or require permanent modifications. If you?re a car enthusiast who cares about fit and finish, you?ll also appreciate that many greener approaches look cleaner and more OEM than bargain barriers that rattle, sag, or scuff panels.
This guide walks through practical, real-world options?ranging from no-drill barriers and cargo-area solutions to custom DIY panels using sustainable materials?plus step-by-step installation tips, product comparisons, and mistakes that can ruin both your interior and your pet?s comfort.
What Makes a Pet Barrier ?Eco-Friendly??
?Eco-friendly? isn?t just a label. For pet barriers, it usually comes down to materials, lifespan, and install method.
- Long service life: A durable barrier used for years is greener than a cheaper one replaced every few months.
- Recycled or renewable materials: Recycled steel/aluminum, responsibly sourced wood/bamboo, recycled polyester webbing.
- Low-tox materials: Low-VOC coatings, fewer plasticizers, no strong chemical odors (especially important for pets).
- Minimal interior damage: No drilling into trim, fewer adhesives, and protective contact points reduce the chance you?ll replace panels later.
- Repairable and modular: Parts can be swapped instead of discarding the whole unit.
Quick Tip: Start With Your Pet and Your Vehicle Layout
Before choosing a barrier style, identify where your pet will ride:
- Wagon/SUV/hatchback: Cargo-area barrier behind the second row is often best.
- Sedan: Back-seat barrier or hammock + seatbelt harness typically works better than cargo solutions.
- Small crossovers: Choose systems with adjustable width/height to prevent rattles and gaps.
Eco-Friendly Installation Alternatives (With Pros, Cons, and Best Use)
1) No-Drill Tension-Mount Barriers (Metal Over Plastic)
Tension-mounted barriers expand between the floor and headliner (or between side panels), using padded feet rather than screws. Look for powder-coated steel or aluminum options with replaceable pads and minimal plastic.
- Why it?s greener: Long lifespan, no permanent modifications, fewer disposable fasteners.
- Best for: SUVs and hatchbacks; owners who lease or frequently change vehicles.
- Watch for: Cheap foam pads that crumble; choose silicone/rubber pads that can be replaced.
2) Headrest-Post Grid Barriers (Modular, Low-Waste)
These attach to rear-seat headrest posts and sometimes add lower anchors. Many are simple metal grids with adjustable straps.
- Why it?s greener: Lightweight, minimal material use, easy to remove and reuse.
- Best for: Sedans and crossovers where a full cargo barrier isn?t needed.
- Watch for: Barriers that allow climbing around the sides; choose a wider grid with side wings or pair with a cargo liner.
3) Cargo Divider + Crate Strategy (Recycled Fabric + Reusable Hardware)
If your dog is crate-trained, a crash-tested crate secured in the cargo area can be the cleanest long-term solution. Pair it with a divider panel to keep gear separate.
- Why it?s greener: One durable crate can last many years; fewer interior repairs from scratches.
- Best for: Medium/large dogs; owners who do road trips; muddy trail days.
- Watch for: Proper anchoring?loose crates are dangerous. Use factory cargo tie-down points.
4) DIY Barrier Panel Using FSC Plywood or Bamboo + Reused Hardware
For enthusiasts who enjoy a custom fit, a DIY barrier panel can be made from FSC-certified plywood or bamboo board and mounted with existing cargo points. When designed well, it looks tidy and stops pet movement without squeaks.
- Why it?s greener: Renewable materials, repairable, tailored to the vehicle so it lasts.
- Best for: Wagons/SUVs; owners comfortable measuring and fabricating.
- Watch for: Sharp edges and splinters?finish and seal surfaces properly with low-VOC products.
5) ?Soft Barrier? Alternatives: Recycled-Polyester Hammocks + Harness Tethers
Not every setup needs a rigid divider. A high-quality seat hammock made with recycled polyester (rPET) plus a crash-tested harness can limit forward movement while protecting seats from hair and claws.
- Why it?s greener: Less material than a full barrier; washable and reusable; protects upholstery.
- Best for: Sedans and smaller dogs; families who keep the cargo area open.
- Watch for: Cheap stitching and plastic buckles?these fail and create waste. Choose reinforced seams and metal hardware.
Step-by-Step: Install a No-Drill Tension-Mount Pet Barrier (Eco-Friendly Method)
Tools and Materials
- Tension-mount barrier (preferably metal grid)
- Microfiber towels
- Isopropyl alcohol (for cleaning contact points)
- Optional: thin rubber/silicone anti-slip pads (replaceable)
- Measuring tape
Installation Steps
- Clean the contact areas. Wipe the floor and headliner contact spots with a damp microfiber, then a small amount of alcohol. This improves grip and reduces scuffing from trapped grit.
- Test-fit with seats in their normal position. Set your second-row seats to the angle you actually use. A barrier that fits with seats upright may rattle once you recline them.
- Center the barrier. Measure the width of the opening and align the barrier so the grid blocks the largest gaps (often near the center console line).
- Add reusable pads if needed. If the included pads are thin foam, consider adding replaceable silicone pads to reduce compression marks and improve stability.
- Expand tension gradually. Tighten each side a little at a time to keep it square. Over-tightening one side can twist the frame and create noise.
- Shake test. Push and pull the barrier firmly. It should not slide, squeak, or tilt. If it moves, re-center and increase tension slightly.
- Check sightlines and airbags. Make sure the barrier doesn?t obstruct the rearview mirror visibility more than expected and doesn?t interfere with side curtain airbag deployment zones.
- Short drive validation. Take a 5?10 minute drive on a rougher road. Listen for rattles and watch for shifting. Adjust tension or pad placement as needed.
Real-World Example
On a compact SUV with a sloped headliner, a tension barrier can creep over time if the top pads sit on textured fabric. Adding thin silicone pads and cleaning the area first usually fixes the issue without adhesives or drilling.
Step-by-Step: DIY Eco-Friendly Cargo Barrier Panel (Using Existing Mount Points)
This approach works best when your vehicle has cargo tie-down rings, seatback latch points, or accessory mounting holes you can reuse.
Materials
- FSC plywood (9?12 mm) or bamboo panel
- Low-VOC water-based polyurethane or natural hardwax oil for sealing
- Sandpaper (120 and 220 grit)
- Corner guards or edge trim (rubber is preferable to brittle plastic)
- Reusable hardware: stainless eyelets, turnbuckles, or webbing straps (recycled polyester if possible)
Build and Install Steps
- Measure the opening. Use cardboard to create a template of the cargo opening behind the second row. This reduces waste by preventing wrong cuts.
- Cut and sand. Transfer template to wood, cut, and round corners. Sand smooth to prevent splinters and protect your pet?s coat.
- Seal the panel. Apply a low-VOC finish. Two thin coats are typically stronger and lower-odor than one thick coat. Let it fully cure before installing.
- Add edge protection. Install rubber edge trim to prevent scuffs to interior panels and reduce vibration noise.
- Mount using existing points. Use straps or turnbuckles to connect the panel to factory cargo rings. Avoid drilling into trim or metal unless you?re confident and accept the permanence.
- Check for gaps. Pets are creative. If there?s a side gap, add a small ?wing? extension panel rather than overtightening mounts.
- Rattle-proof. Add small rubber bumpers at contact points where the panel meets plastic trim.
Practical Tip
If you haul gear and your dog together, cut a small access hatch in the panel for leashes or a water bottle?less rummaging means fewer scratches and less mess.
Product Recommendations and Comparisons (What to Look For)
Rather than chasing ?green? labels, evaluate barriers by durability, material quality, and how they install. Here?s a quick comparison of popular eco-friendlier directions to consider.
Metal Grid Barriers (Best Overall Longevity)
- Look for: Powder-coated steel/aluminum, replaceable rubber feet, adjustable width/height, minimal plastic joints.
- Skip if: The frame flexes easily or uses brittle plastic clamps?these fail and can gouge trim.
- Best for: Frequent pet travel; bigger dogs that lean on the barrier.
Recycled-Polyester (rPET) Hammocks (Best for Back Seat Protection)
- Look for: rPET fabric, double-stitched seams, metal buckles, washable coating, non-slip underside.
- Skip if: The hammock relies on thin plastic clips or has poor side coverage.
- Best for: Dogs that ride calmly but shed heavily; families protecting leather seats.
Crash-Tested Harness + Short Tether (Best Safety Upgrade)
- Look for: Independent crash-testing claims (not just ?crash-rated? marketing), durable webbing, replaceable parts.
- Skip if: The tether is too long (lets the dog reach the front seats) or clips are plastic.
- Best for: Anyone prioritizing safety; pairs well with soft barriers.
Common Mistakes to Avoid
- Relying on suction cups or weak adhesives. They fail with temperature swings and leave residue. Eco-friendly installs favor mechanical mounting and reusable pads.
- Blocking side curtain airbags. Don?t strap barriers across airbag deployment zones along the roofline or pillars.
- Ignoring pet behavior. A barrier for a calm senior dog may not work for a young dog that paws and climbs. Choose the right strength level.
- Over-tightening tension bars. This can dent headliners, warp trim, and create squeaks. Tighten only to the point of stability.
- Choosing the wrong mesh size. Wide grid gaps can snag collars or let small paws through. For small pets, choose tighter spacing.
- Not protecting contact points. A clean surface and rubber pads prevent scuffs?especially on soft-touch plastics.
- Skipping a test drive. A barrier that seems solid in the driveway can rattle loose on rough roads.
Comfort and Cleanliness Tips That Reduce Waste
- Use washable liners. A durable cargo liner or hammock reduces the need for disposable seat covers.
- Keep a ?pet kit? in the car. Microfiber towel, small brush, and a reusable lint roller reduce cleaning product waste.
- Trim nails before road trips. Less scratching means fewer interior repairs and less need to replace covers.
- Ventilation matters. Lower-odor materials are better for pets; let new gear air out before installing.
FAQ: Eco-Friendly Pet Barrier Installation Alternatives
Are eco-friendly pet barriers as strong as traditional ones?
They can be stronger. Many ?eco-friendly? choices are simply higher-quality materials (metal grids, durable webbing, replaceable pads) that outlast cheaper plastic barriers. Strength depends more on construction and mounting method than on marketing claims.
Can I install a barrier without drilling or damaging my interior?
Yes. Tension-mount barriers, headrest-post grids, and DIY panels anchored to factory cargo tie-downs are all no-drill approaches. Clean contact points and use reusable rubber pads to prevent scuffs.
What?s the greenest option: barrier, hammock, or crate?
For many owners, a long-lasting crate secured to factory tie-downs is the lowest-waste option over time. If a crate isn?t practical, a durable metal barrier is usually greener than replacing multiple low-cost plastic barriers.
Will a barrier stop dog hair from getting everywhere?
A barrier helps keep hair localized but won?t fully contain it. Pair the barrier with a cargo liner or hammock, and use washable materials. A quick brush-out before rides also makes a noticeable difference.
How do I prevent rattles in a pet barrier?
Rattles usually come from uneven tension, hard contact points, or loose adjustment knobs. Re-center the barrier, tighten evenly, add rubber bumpers where it touches trim, and confirm your seats are locked in place.
Is a pet barrier enough for safety, or do I need a harness too?
A barrier primarily prevents forward movement and driver distraction. For better crash protection, pair a barrier with a crash-tested harness and a properly sized tether, or use a secured crate in the cargo area.
Next Steps: Choose the Right Eco-Friendly Setup for Your Car
Start by deciding where your pet should ride (back seat vs. cargo area), then match the solution to your vehicle and your pet?s size and energy level. If you want the best blend of sustainability and durability, prioritize metal grid barriers with no-drill mounting or a secured crate using factory tie-down points. If you?re mostly protecting upholstery, a recycled-fabric hammock plus a crash-tested harness is a simple, low-waste upgrade.
- This week: Measure your cargo opening or back-seat width and identify factory anchor points.
- This weekend: Install your chosen barrier and do a rattle-check drive.
- Ongoing: Keep pads clean, re-tighten seasonally, and replace only worn components instead of the whole system.
Want more practical interior how-tos and gear guidance? Explore more guides on carinteriormix.com and keep your cabin cleaner, safer, and ready for every ride with your co-pilot.