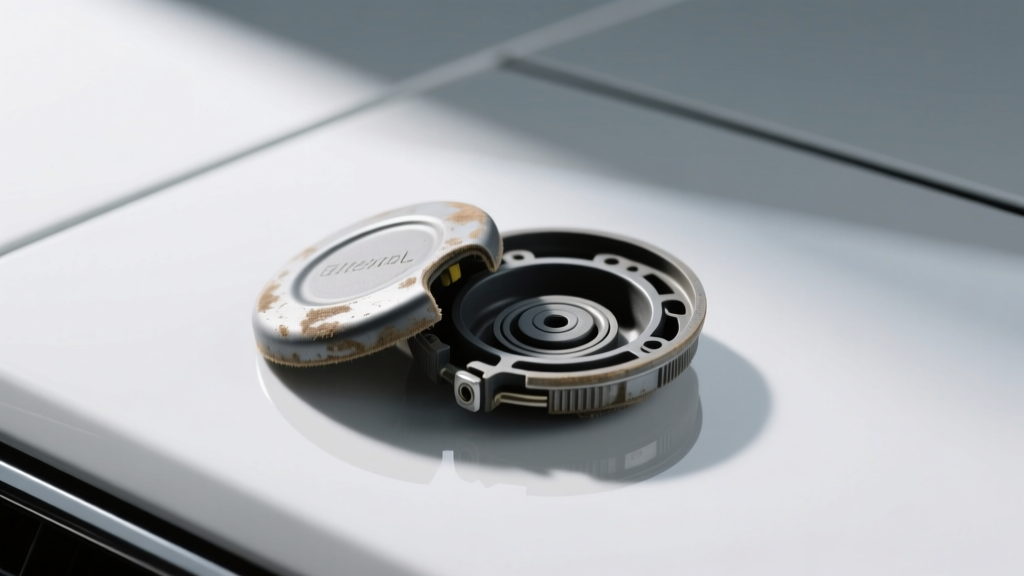
Dust Cap Repair Troubleshooting Guide - CarInteriorMix
A dented, loose, or missing dust cap might seem like a minor annoyance?until your speaker starts buzzing, your steering wheel develops play, or you notice grime building up where it shouldn?t. ?Dust cap? is one of those terms that pops up in different parts of the car, and the fixes vary depending on what you?re dealing with. Inside the cabin, the most common dust caps are speaker dust caps (the dome in the center of a speaker cone). On the chassis side, you?ll also hear ?dust cap? used for wheel bearing/grease caps and some joint/boot-related caps that help keep contaminants out.
This guide is written for car owners and enthusiasts who want practical, no-nonsense troubleshooting. You?ll learn how to identify which dust cap you have, what symptoms mean, and how to repair it correctly?without creating new problems like rubbing voice coils, trapped moisture, or premature bearing wear. If you care about a clean interior sound system and long-term reliability, dust cap repairs are worth getting right.
What ?Dust Cap? Are We Talking About?
Before you grab glue or a pry tool, confirm what part you?re repairing. The word ?dust cap? commonly refers to:
- Speaker dust cap (interior audio): The dome in the middle of a speaker cone. Its job is to keep dust out of the voice coil gap and help with cone rigidity and response.
- Wheel bearing dust/grease cap (exterior, hubs): A metal or plastic cap pressed into the wheel hub to protect bearing grease from water and grit.
- Miscellaneous protective caps (varies): Caps used on some linkages, joints, or service ports to keep debris out. These are less common in everyday DIY ?dust cap repair? searches, but they exist.
If your issue is inside the cabin and involves sound quality, buzzing, or a visibly dented dome on the door speakers, you?re dealing with a speaker dust cap. If your issue is grease, play in the wheel, or a missing cap at the center of a hub, you?re dealing with a wheel bearing dust cap.
Quick Symptom Checklist: Find the Right Fix
Speaker Dust Cap Symptoms
- Dented or pushed-in dome (often from fingers, cargo, or an overzealous cleaning brush)
- Buzzing/rattling at certain bass notes
- Visible separation where the dust cap meets the cone
- Dust/debris inside the speaker (especially if the cap is torn)
Wheel Bearing Dust/Grease Cap Symptoms
- Missing cap at the hub center (common after service or off-road impacts)
- Grease sling on the wheel?s inner barrel or around the hub
- Water intrusion signs after deep puddles or pressure washing
- Noise or roughness from a bearing (advanced symptom?may indicate contamination already happened)
Tools & Supplies You?ll Actually Use
For Speaker Dust Cap Repair
- Low-tack painter?s tape
- Hot glue gun or PVA speaker glue (water-based) or flexible contact adhesive (sparingly)
- Thin cardstock or plastic shim (for gentle lifting support if needed)
- Isopropyl alcohol (70?90%) and lint-free cloth
- Small artist brush or cotton swabs
- Vacuum with soft brush attachment (carefully used)
For Wheel Bearing Dust/Grease Cap Repair
- Jack and jack stands, wheel chocks
- Hammer and block of wood or proper cap driver
- Pliers (only for removal?avoid mangling the hub)
- Brake cleaner and shop towels
- High-temp wheel bearing grease (if repacking is needed)
- Replacement dust/grease cap (correct diameter)
Speaker Dust Cap Repair: Troubleshooting & Step-by-Step Fixes
Step 1: Confirm the Dust Cap Is the Problem
A speaker can buzz for reasons unrelated to the dust cap, like a loose door panel clip or a wire tapping the cone. Do this quick check:
- Play a bass-heavy test track at moderate volume.
- Lightly press around the speaker trim and door panel edges. If the noise changes, it may be trim rattle, not the dust cap.
- With the speaker off, gently press the cone evenly with two fingers near the dust cap (not on the surround). If you feel scraping, the voice coil may be rubbing?this is a bigger issue than a dented cap.
Step 2: Decide Whether to Pop the Dent or Replace the Cap
Choose the least invasive fix that restores function:
- Minor dent, no tear, no separation: Try a gentle ?pop-out? method.
- Creased dent that won?t hold shape: Consider replacement for best cosmetics and sound consistency.
- Torn cap or edge lifting: Re-glue or replace?leaks can let dust into the voice coil gap.
Fix A: Pop Out a Dented Dust Cap (Tape Method)
- Clean the dust cap surface lightly with a dry microfiber cloth. Avoid pushing more debris toward the edge.
- Use a small piece of low-tack painter?s tape. Press it onto the dent gently?don?t mash it into the cap.
- Pull the tape straight back with steady force. Repeat with fresh tape if needed.
- Stop once the dome shape is mostly restored. Perfect isn?t always necessary for sound.
Real-world tip: This works best on paper and poly dust caps. On fabric caps, tape may not grab well. On glossy caps, use a slightly larger piece of tape for better adhesion?but keep it low-tack to avoid delaminating coatings.
Fix B: Pop Out a Dented Dust Cap (Hot Glue Pull Method)
Use this when tape won?t pull the dent and the cap material can handle gentle heat.
- Warm the cabin slightly (room temp is fine). Cold dust caps can crack or crease.
- Place a small bead of hot glue on the end of a wooden skewer or Q-tip stick (not directly on the speaker first).
- Touch the glue to the center of the dent and let it set for 10?20 seconds.
- Pull straight out slowly to lift the dent.
- Peel off the glue carefully. If residue remains, roll it off gently with your fingers?avoid solvents on speaker coatings unless you?re sure they?re safe.
When to skip hot glue: If the dust cap is thin mylar or has a delicate finish, hot glue can pull the surface layer or leave marks. Use tape or replacement instead.
Fix C: Re-Glue a Loose Dust Cap Edge
If the edge is lifting, you?ll often hear a fluttering buzz at certain frequencies.
- Disconnect power to the speaker (unplug the harness if accessible).
- Lift the loose edge slightly using a thin plastic shim. Don?t crease the cone.
- Apply a thin bead of speaker-safe PVA glue under the edge using a small brush.
- Press the dust cap edge down and hold for a minute.
- Let it cure fully (often 4?24 hours depending on glue) before playing loud audio.
Pro tip: Less glue is better. Excess glue adds mass and can change the speaker?s response, especially on smaller door speakers.
Fix D: Replace the Dust Cap (Best for Tears or Ugly Dents)
Dust cap replacement is more involved, but it?s the cleanest solution when the cap is torn or permanently deformed.
- Remove the speaker from the door/dash so you can work on a stable surface.
- Mark the original cap position with light pencil dots around the perimeter (if the cone is paper and you can do so lightly).
- Carefully cut around the dust cap edge with a sharp blade, keeping the blade shallow to avoid nicking the cone.
- Clean old adhesive gently from the cone using a fingernail or a soft tool?avoid soaking the cone.
- Dry-fit the new dust cap to confirm size and coverage.
- Apply a thin ring of speaker glue and set the new cap in place.
- Allow full cure before reinstalling and testing.
Real-world example: If a door speaker got poked during a detail and the cap is torn, popping it out won?t restore sealing. Replacing the cap prevents fine dust from entering the voice coil gap?one of the most common reasons speakers develop scratchy sounds months later.
Wheel Bearing Dust/Grease Cap Repair: Troubleshooting & Step-by-Step Fixes
Step 1: Identify the Cap Type and Size
Wheel bearing dust caps come in different diameters and depths. The correct fit is critical?too loose and it leaks; too tight and it can deform.
- Measure the hub bore where the cap presses in (calipers help).
- Match the replacement cap by vehicle fitment or exact measurement.
- If you see a rubber plug in the center, that may be an access plug (varies by design). Don?t confuse it with the main cap.
Step 2: Remove the Damaged Cap (If Still Present)
- Safely lift the vehicle and support it on jack stands.
- Remove the wheel for access.
- Use pliers to wiggle the cap out, or gently pry around the perimeter. Work evenly to avoid gouging the hub.
Step 3: Inspect for Contamination
If the cap was missing, assume dirt or water may have gotten in.
- Look for milky grease (water contamination).
- Look for gritty grease or rust staining.
- Spin the hub by hand (as applicable) and listen/feel for roughness.
If contamination is present, you may need to clean and repack bearings or replace a sealed hub unit depending on your vehicle design.
Step 4: Install the New Cap Correctly
- Clean the hub bore and the cap seat with brake cleaner and a towel.
- Align the cap squarely by hand first.
- Tap the cap in using a cap driver or a block of wood and a hammer. Work in a circular pattern to keep it even.
- Confirm the cap is fully seated and flush.
Practical tip: If you dent a thin metal cap while installing, replace it. Dents can prevent proper sealing and can also interfere with some axle nut setups.
Product Recommendations & Smart Comparisons
Speaker Dust Cap Adhesives
- Water-based PVA speaker glue: Best all-around for paper cones and fabric dust caps. Dries flexible and is easier to control.
- Rubberized/flexible contact adhesive: Strong and flexible, but easy to over-apply. Use only a thin film.
- Hot glue: Useful for dent pulling (temporary contact) but not ideal as a permanent dust cap adhesive on performance speakers due to mass and stiffness.
Replacement Speaker Dust Caps
- Paper caps: Light and common on OEM speakers. Good for maintaining original sound character.
- Poly/mylar caps: More moisture resistant. Good for door locations where humidity varies.
- Fabric caps: Often found on higher-end drivers. Can be forgiving cosmetically but harder to ?pop? dents.
Wheel Bearing Dust/Grease Caps
- OEM-style stamped metal caps: Common and affordable; install carefully to avoid deformation.
- Heavier-duty caps (aftermarket): Better for off-road or frequent service, often thicker and less prone to denting.
- Cap driver tool vs. hammer-only: A cap driver is the cleaner, more reliable method and reduces the chance of an uneven seal.
Common Mistakes to Avoid
- Using super glue on speaker dust caps: Cyanoacrylate can wick into the cone, turn brittle, and create new buzzes.
- Over-applying adhesive: Excess glue adds weight and can change speaker response or create imbalance.
- Pressing the speaker cone aggressively: You can deform the voice coil former or crease the cone permanently.
- Ignoring the real source of rattles: Many ?speaker problems? are actually door panel clips, loose screws, or wiring harnesses tapping the speaker basket.
- Hammering a wheel bearing dust cap in crooked: A skewed cap leaks and can get knocked out more easily.
- Replacing the cap but skipping inspection: If the cap was missing, contamination may already be present?catch it early to prevent bearing failure.
FAQ: Dust Cap Repair Questions Car Owners Ask
Can a dented speaker dust cap affect sound quality?
Sometimes. A small dent may be mostly cosmetic, but a sharp crease or a partially detached cap can cause buzzing or alter high-frequency response. If you hear a rattle at specific bass notes, the dust cap edge is a prime suspect.
Do I have to remove the speaker to fix a dust cap dent?
Not always. Tape or hot-glue pull methods can be done with the speaker installed if you have clear access. For re-gluing or replacing the dust cap, removing the speaker is safer and cleaner.
What if the speaker still buzzes after repairing the dust cap?
Check for door panel rattles, loose mounting screws, foam gasket gaps, and wires touching the cone. If you feel scraping when gently moving the cone evenly, the voice coil may be rubbing?often requiring speaker replacement.
Is a missing wheel bearing dust/grease cap an emergency?
It can be. If the cap is missing, water and grit can contaminate grease quickly?especially in rain, snow, or off-road conditions. Replace the cap as soon as possible and inspect the grease/bearing condition.
Why does my new wheel dust cap keep popping off?
Common causes include the wrong diameter cap, a damaged/oval hub bore, installing it unevenly, or pressure changes from heat if the cap isn?t seated fully. Measure the hub and use a proper driver to install it square.
Conclusion: Next Steps for a Clean, Quiet, Reliable Ride
Dust cap repairs are one of those ?small jobs? that pay off when done carefully. For interior speaker dust caps, start with the least invasive approach?tape pull for dents, then re-glue if the edge is lifting, and replace the cap when there?s a tear or permanent deformation. For wheel bearing dust/grease caps, correct sizing and clean, square installation are everything, and missing caps deserve immediate attention to prevent contamination.
Your next steps:
- Identify which dust cap you?re dealing with (speaker vs. wheel hub).
- Match the repair method to the symptom?don?t jump straight to aggressive fixes.
- Use the right adhesive or installation tool to avoid repeat failures.
- Test after curing/installing: audio sweep for speakers, and a short drive plus recheck for hubs.
For more practical DIY interior tips?audio troubleshooting, trim rattle fixes, cleaning routines, and upgrade guides?explore the latest how-tos on carinteriormix.com.