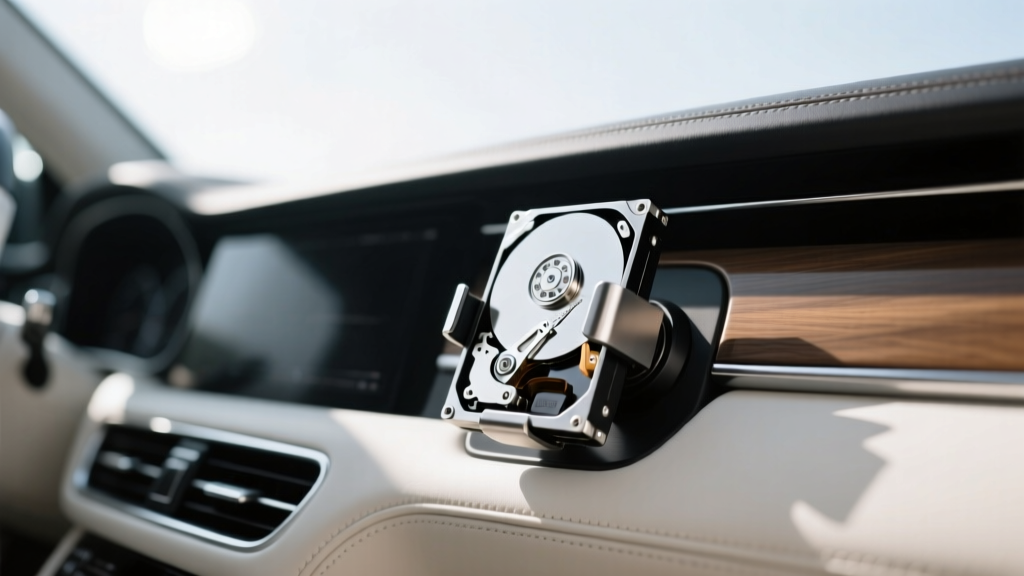
DIY Hard Drive Mount Replacement Tutorial - CarInteriorMix
If you?ve ever upgraded your car?s infotainment storage, installed a dash cam DVR, built a discreet in-car media PC, or added a portable hard drive for music libraries and maps, you already know one thing: the mount matters as much as the drive. A hard drive (or SSD) rattling inside a glovebox, center console, or under-seat compartment isn?t just annoying?it can lead to skipped playback, corrupted files, broken connectors, and premature hardware failure.
Car interiors are a harsh environment for electronics. Heat cycles, vibration, quick stops, and the constant micro-movement of driving punish weak brackets and tired grommets. The good news: replacing a hard drive mount is a very doable DIY job. With the right approach, you can secure your storage cleanly, reduce noise, protect your data, and keep your interior looking factory-fresh.
This guide walks you through diagnosing a failing mount, choosing the right replacement, and installing it properly?whether you?re working in a center console, trunk side panel, under-seat area, or behind the dashboard.
What ?Hard Drive Mount? Means in a Car Interior Context
A ?hard drive mount? in a vehicle can refer to a few different setups. The most common scenarios include:
- Aftermarket head unit storage (USB hard drive/SSD tucked into a glovebox or console)
- CarPC or media server builds (2.5-inch or 3.5-inch drive mounted under a seat or in a trunk cubby)
- Dash cam/NVR systems (SSD/HDD in a DVR enclosure mounted under seat or in trunk)
- DIY audio setups (music libraries for DSP units or standalone players)
Mount types you may run into:
- Metal brackets (L-brackets, cage brackets, universal drive trays)
- Rubber-isolated mounts (grommets, bushings, anti-vibration standoffs)
- Velcro or adhesive pads (common for SSDs and small enclosures)
- 3D-printed cradles (custom-fit mounts for odd interior spaces)
Signs Your Hard Drive Mount Needs Replacement
Some failures are obvious, others show up as ?weird? electronic behavior that seems unrelated. Watch for:
- Rattling or tapping noises from the glovebox, console, or under-seat area over bumps
- Intermittent disconnections (USB drive drops, media stops, ?device not recognized? messages)
- Visible sagging of a bracket or enclosure, or loose fasteners
- Cracked rubber grommets or hardened bushings that no longer isolate vibration
- Heat stress (adhesive pads peeling, warped plastic trays)
- File corruption or playback stutter?especially on spinning HDDs
Real-world example: A common DIY scenario is a 2.5-inch HDD stuck to the console wall with aging hook-and-loop tape. After a hot summer, the adhesive softens, the drive shifts, and the USB connector gets strained. You?ll often see intermittent disconnects long before the drive ?dies.? Fixing the mount and cable strain relief early can save the drive.
HDD vs. SSD: Why Mounting Strategy Changes
Spinning HDDs (2.5? or 3.5?)
- More sensitive to vibration and shock
- Benefit from rubber isolation and a rigid bracket
- Should be mounted so the drive can?t bounce or flex
SSDs
- Much more resistant to vibration
- Can be mounted with quality adhesive or Velcro if temperature is controlled
- Still need secure placement to protect connectors and wiring
If you?re running a media library in a daily driver, an SSD is usually the best interior-friendly option. If you must use an HDD (capacity-per-dollar), prioritize isolation and avoid mounting it in high-heat or high-vibration locations.
Tools and Supplies You?ll Need
Exact tools depend on where the mount is located, but this list covers most installs:
- Trim removal tools (plastic pry tools to protect panels)
- Phillips and flathead screwdrivers
- Socket set (commonly 8mm, 10mm, 12mm for interior fasteners)
- Torx bits (T20/T25 are common)
- Needle-nose pliers
- Isopropyl alcohol (70?90%) and microfiber cloth (for cleaning surfaces)
- Zip ties and adhesive zip tie anchors (for cable management)
- Thread locker (medium strength) for metal-to-metal fasteners if needed
- Replacement mount hardware: screws, rubber grommets, foam tape
Safety note: If you?re working near airbags (dash/glovebox areas) or power distribution wiring, disconnect the negative battery terminal and wait a few minutes before removing panels.
Choosing the Right Replacement Mount (Product Recommendations)
You don?t need a brand-name ?car hard drive kit? to do this right. You need a mount that matches the drive size, location, and vibration level.
Option A: Universal 2.5?/3.5? Drive Brackets (Best for sturdy installs)
- Pros: Solid, reliable, easy to bolt to a metal surface; works well under seats or in trunk side panels
- Cons: Can transmit vibration if you don?t add rubber isolation
Look for: slotted holes (easier alignment), corrosion-resistant finish, compatibility with standard drive screw patterns.
Option B: Rubber-Isolated Mounting Kits (Best for HDDs)
- Pros: Cuts vibration and reduces noise; protects spinning drives
- Cons: Slightly more setup time; rubber can age over years
Look for: silicone or quality rubber grommets, included standoffs, and hardware that won?t back out.
Option C: Industrial Hook-and-Loop + Tether (Best for SSDs and small enclosures)
- Pros: Fast install, no drilling, easy to remove for service
- Cons: Adhesive can fail in heat; not ideal for heavy enclosures
Pro tip: If you use adhesive mounting, add a secondary retention method (a small strap, zip-tie tether, or bracket lip) so the drive can?t fall if the adhesive softens.
Option D: Foam-Isolated Enclosure Mount (Best for glovebox/console installs)
- Pros: Quiet, protects from minor knocks, looks tidy
- Cons: Needs airflow consideration if the device runs warm
Step-by-Step: DIY Hard Drive Mount Replacement
The steps below assume a typical interior install (console, glovebox, under-seat, or trunk cubby) with either a bracketed drive or an enclosure.
Step 1: Confirm the Problem and Locate the Mount
- Play media or access files while the car is parked.
- Gently tap near the suspected mount location and watch for disconnects or playback drops.
- Drive over a mildly bumpy road (safely) and listen for rattles.
- Identify whether the issue is mount movement, connector strain, or cable routing.
Step 2: Power Down and Protect the Interior
- Turn the ignition off and remove the key/fob from proximity if applicable.
- Disconnect the negative battery terminal if you?ll be removing dash panels or working near airbag zones.
- Place a towel over trim edges to prevent scratches while you work.
Step 3: Remove Panels Carefully
- Use plastic trim tools to release clips?avoid metal screwdrivers on visible trim.
- Keep screws and clips organized in a small tray.
- If a panel resists, stop and check for hidden screws (common in consoles and gloveboxes).
Practical tip: Take quick photos as you go. Reassembly is faster when you know where each clip and fastener came from.
Step 4: Disconnect the Drive and Inspect the Setup
- Unplug power and data connections (USB/SATA) with a straight pull?don?t yank the cable.
- Inspect connectors for bent pins, looseness, or cracked housings.
- Check for cable tension. If the cable is taut, it will keep stressing the port even after a new mount.
Step 5: Remove the Old Mount
- Unscrew the bracket or release adhesive pads/Velcro.
- If adhesive is stubborn, warm it gently (a hair dryer on low works) and peel slowly.
- Remove old foam tape and residue using isopropyl alcohol.
Step 6: Test-Fit the New Mount and Choose the Best Orientation
- Hold the mount in place and confirm clearance for cables and panel reinstallation.
- Aim for a location with minimal heat and minimal direct vibration.
- Plan for serviceability: you should be able to remove the drive without dismantling half the interior.
Orientation tip: For external drives/enclosures, position ports so cables route naturally without sharp bends. A gentle loop reduces connector stress and improves long-term reliability.
Step 7: Install Vibration Isolation (Especially for HDDs)
- Add rubber grommets or bushings between the bracket and the mounting surface.
- Use thin closed-cell foam tape where plastic touches plastic to prevent squeaks.
- Avoid over-tightening rubber-isolated hardware?compressing rubber too much defeats the purpose.
Step 8: Secure the Mount Properly
- For metal brackets: bolt to a sturdy structure (seat frame bolt locations, trunk metal supports, or an existing accessory mounting point).
- For console/glovebox plastic: consider using existing screw bosses; avoid self-tapping into thin plastic unless necessary.
- If using adhesive: clean the surface thoroughly and let it dry before applying. Press firmly and allow curing time per manufacturer guidance.
Step 9: Manage Cables Like a Pro
- Create strain relief: leave a small service loop and anchor the cable with a zip tie mount nearby.
- Keep cables away from moving parts (seat tracks), sharp edges, and HVAC ducts.
- Use cloth automotive tape or split loom for a factory-like finish and rattle prevention.
Real-world example: Under-seat installs fail most often because a USB cable gets pinched by the seat track. A $3 adhesive cable anchor placed 4?6 inches from the drive can prevent repeat failures.
Step 10: Reconnect, Test, and Reassemble
- Reconnect the drive and power up the system before reassembling panels.
- Test playback/file access while gently shaking the mounted area by hand.
- Take a short drive and listen for rattles.
- Reinstall panels carefully, ensuring no clips are misaligned and no wires are trapped.
Common Mistakes to Avoid
- Mounting an HDD with no isolation: Metal-to-metal mounting amplifies vibration and can shorten drive life.
- Relying on cheap adhesive in hot areas: The inside of a parked car can get extremely hot. Use automotive-grade adhesive solutions or a bracket.
- Over-tightening fasteners: Stripped plastic bosses and crushed rubber grommets are common DIY setbacks.
- No cable strain relief: Loose mounts get blamed when the real problem is a stressed connector.
- Mounting near moisture sources: Avoid floor areas where wet shoes, condensation, or spills can reach the device.
- Blocking airflow: Some enclosures and DVRs run warm. Don?t bury them in foam without leaving ventilation space.
Quick Comparison: Best Mounting Approach by Location
- Glovebox: Foam-isolated enclosure mount or bracket to an inner support; prioritize quiet operation and easy access.
- Center console: Compact bracket plus cable anchors; avoid areas exposed to drink spills.
- Under seat: Rigid bracket with rubber isolation; route cables away from seat tracks and moving rails.
- Trunk side panel/cubby: Bracketed tray with isolation; great for larger enclosures or CarPC gear.
FAQ
Can I use Velcro to mount a hard drive in my car?
Yes for SSDs and lightweight enclosures, especially in cooler areas. For spinning HDDs, Velcro alone is risky because vibration and heat can cause movement. If you use Velcro, add a secondary tether or strap and build in cable strain relief.
Is it better to upgrade to an SSD instead of replacing the mount?
If you?re currently using an HDD for in-car media storage, moving to an SSD is often a reliability upgrade because SSDs handle vibration better. You?ll still want a solid mount to protect connectors and prevent rattles, but the setup becomes more forgiving.
Do I need to disconnect the battery for this job?
If you?re only working in a trunk cubby with no airbag wiring nearby, you can often leave the battery connected (while the car is off). If you?re removing dash panels, working near the glovebox airbag area, or accessing power wiring, disconnecting the negative terminal is the safer choice.
Why does my drive disconnect only when I hit bumps?
Usually it?s one of three things: a loose mount letting the drive shift, a stressed connector (no strain relief), or a marginal USB/power cable. A new mount plus proper cable anchoring typically fixes it.
What fasteners should I use so screws don?t loosen over time?
Use the correct screw length, add a lock washer where appropriate, and consider a small amount of medium-strength thread locker for metal-to-metal fasteners. Avoid thread locker in plastic screw bosses?use the correct torque and don?t over-tighten.
Where should I avoid mounting a drive inside the cabin?
Avoid areas with heat and moisture: directly above HVAC ducts that blow hot air, low on the floor where water can reach, and near cupholders or drink pathways. Also avoid any spot where passengers may kick or crush the enclosure.
Conclusion: Your Next Steps
A hard drive mount replacement is one of those upgrades that pays off every time you drive?less noise, fewer disconnects, and better long-term reliability for your in-car tech. Start by choosing the right mount type for your drive (HDD vs. SSD), plan for vibration isolation, and treat cable management as part of the install?not an afterthought.
- Inspect your current mount and cables for movement and strain.
- Pick a replacement bracket or isolation kit that matches your location and drive type.
- Install with secure fasteners, add strain relief, and test before reassembling trim.
For more practical DIY interior guides?clean wiring tips, rattle fixes, trim removal best practices, and storage-friendly upgrades?explore the latest tutorials on carinteriormix.com.