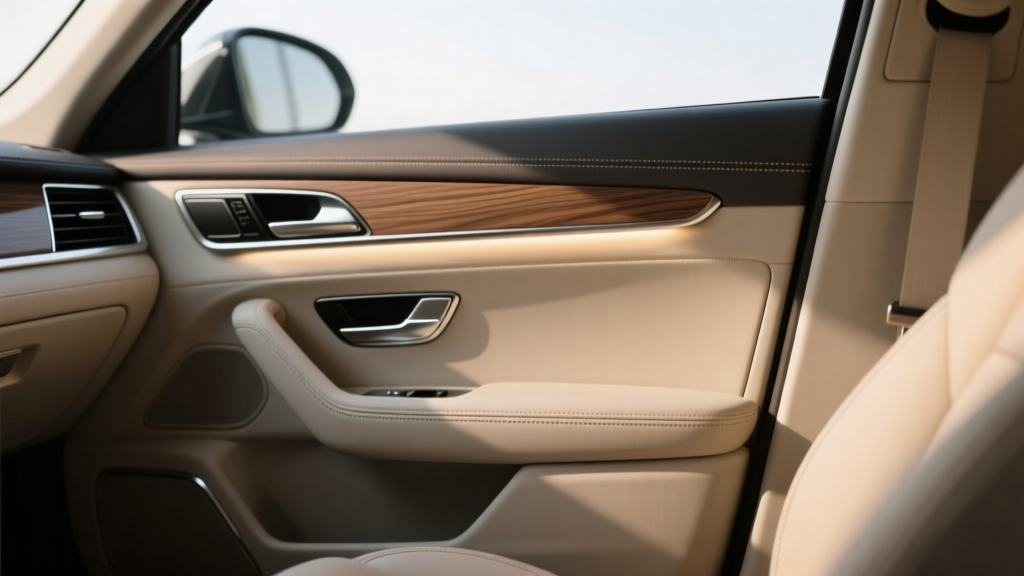
DIY Door Panel Refurbishment: Step-by-Step (2026)
If you?ve ever closed your car door and heard a buzz, a rattle, or that hollow ?something?s loose? sound, your door panel is usually the culprit. Door panels take daily abuse: elbows, shoes, sun exposure, spilled drinks, moisture from wet weather, and constant vibration. Over time, clips loosen, fabric separates, foam degrades, and handles get sloppy. The good news is that a tired door panel isn?t a life sentence for your interior?or your wallet.
Part 1 covered safe removal basics and prep. Part 2 is where the real transformation happens: repairing the panel structure, restoring coverings, replacing clips, fixing rattles, and reinstalling everything so it feels factory-tight again. This guide focuses on the details that separate a ?good enough? refresh from a professional-looking refurbishment that lasts.
Whether you?re refreshing an older daily driver or tightening up a weekend project car, these steps will help you get clean fitment, eliminate squeaks, and improve the look and feel of your door cards.
What You?ll Accomplish in Part 2
- Repair broken mounting points and cracked panel backs
- Replace worn clips and hardware for a snug fit
- Restore vinyl, fabric, or leather surfaces (or re-wrap them)
- Fix common rattles using foam and felt where it matters
- Reinstall the door panel cleanly and verify everything works
Tools and Materials Checklist (What You Actually Need)
You don?t need a full upholstery shop, but you do need the right basics. Pick the path that matches your goal: quick refresh, full re-wrap, or full replacement.
Core Tools
- Trim removal tools (plastic pry set)
- Phillips and flathead screwdrivers
- Torx bits (common sizes: T20, T25, T30)
- 8mm/10mm socket set
- Heat gun or hair dryer (controlled heat)
- Utility knife + fresh blades
- Marker, masking tape, and a small ruler
Repair and Anti-Rattle Materials
- Replacement door panel clips (vehicle-specific)
- Felt tape (anti-squeak) and closed-cell foam tape
- Butyl rope/tape (for re-sealing moisture barriers)
- Plastic epoxy or plastic welder staples (for cracked backing)
- Sandpaper (80/120/220 grit)
Surface Refurb Supplies (Choose Your Finish)
- Interior cleaner/degreaser (plastic-safe)
- Isopropyl alcohol (wipe-down before adhesive)
- Spray adhesive rated for high heat (headliner/upholstery type)
- Vinyl wrap, upholstery fabric, or automotive-grade leatherette
- Optional: new foam (1/8??1/4?) for padding
Step-by-Step: Refurbish the Door Panel (Repair, Rewrap, Reinstall)
Step 1: Inspect the Panel Like a Technician
Lay the panel on a clean towel with the backside facing up. Use bright light and check every clip area and mounting boss. Most ?door panel feels loose? complaints come from broken clip towers or missing clips?not the panel itself.
- Look for: cracked plastic around clip sockets, torn fiberboard edges, separated fabric, and broken tabs at the top edge.
- Check the hardware: screws stripped, handle bezels loose, switch trim cracked.
- Test the fit: dry-fit the panel against the door (no clips) to spot warping or misalignment.
Real-world example: If your panel ?pops? away near the lower front corner, the most common cause is a broken clip mount on the panel or a missing clip left in the door shell during removal. Fixing that one point can eliminate multiple rattles.
Step 2: Replace Clips and Any One-Time Fasteners
Don?t reuse questionable clips. A clip that looks ?fine? but feels soft or bent will loosen quickly once the panel is back on.
- Match your old clips to new ones by shape and stem length.
- Remove old clips from the panel with trim pliers (or gently twist/pull).
- Check the door for clips stuck in the metal. Remove them and install new ones on the panel.
- If your car uses foam-backed ?Christmas tree? clips, replace them in sets for consistent tension.
Step 3: Repair Broken Clip Mounts and Cracked Backing
This is the part most DIYers skip?and then the door panel never fits right again. Fixing mounting points restores factory-like pressure against the door shell.
Option A: Two-Part Plastic Epoxy (Most Accessible)
- Roughen the area with 80?120 grit sandpaper.
- Clean with isopropyl alcohol and let dry.
- Rebuild the broken boss area using epoxy; embed a small piece of plastic mesh if needed for strength.
- Let fully cure before reinstalling clips (follow cure time, not just ?dry to touch?).
Option B: Hot Staple Plastic Repair (Strongest for Cracks)
- Align the cracked plastic and tack it in place.
- Melt hot staples across the crack from the backside.
- Grind/sand any high points and add epoxy over the staples for a smooth, reinforced finish.
Tip: If the panel is fiberboard (common on older vehicles), use wood glue for delaminated sections and reinforce torn edges with thin ABS plastic strips bonded with adhesive.
Step 4: Refresh the Surface (Clean, Dye, or Re-Wrap)
Your best approach depends on the material and damage level.
Path 1: Deep Clean + Protect (Fastest, Best for Light Wear)
- Vacuum seams and crevices.
- Clean with a plastic-safe interior cleaner and a soft brush.
- Wipe with a damp microfiber, then dry.
- Apply a UV protectant to vinyl/plastic sections.
Path 2: Re-Dye Vinyl/Leatherette (Good for Fading and Scuffs)
- Use a dedicated interior vinyl/leather dye system designed for automotive heat.
- Prep is everything: degrease, lightly scuff with 320?400 grit if recommended, then apply thin coats.
- Let it cure before handling; fingerprints and pressure marks happen when you rush.
Path 3: Re-Wrap Inserts or Full Panel (Best Visual Upgrade)
- Remove the insert if your panel design allows it (clips/screws from the backside).
- Strip old fabric and scrape off degraded foam until the substrate is smooth.
- Repair the base (cracks, warped areas) before you add new material.
- Cut new fabric/vinyl with 1?2 inches of extra overlap on all sides.
- Spray adhesive on both surfaces (panel + material), wait until tacky, then lay from center outward.
- Use a roller or your palm to press into contours; use gentle heat for curves.
- Wrap edges cleanly and trim excess on the backside.
Practical tip: For door inserts with deep recesses, use relief cuts on the backside overlap (small V-shaped cuts) so the material doesn?t bunch up at corners.
Anti-Rattle and Noise Fixes That Make a Big Difference
A refurbished panel should feel solid. Rattles usually come from plastic-on-metal contact, loose wiring, or missing foam pads.
Where to Add Felt Tape
- Around the perimeter where the panel meets the door (light contact areas)
- Behind switch bezels and trim rings that squeak over bumps
- On any plastic tabs that slide into metal slots
Where to Add Closed-Cell Foam
- Behind the armrest contact zone if you hear creaks when leaning
- Near the speaker grille edges if bass causes buzzing
- Where harnesses rest against the door skin or panel backside
Secure Wiring and Linkages
- Inspect wiring for slack that can slap the door skin.
- Use cloth harness tape or zip ties (avoid sharp edges).
- Make sure connectors fully seat and lock?half-seated plugs can rattle.
Real-world example: If you upgraded speakers and now the door buzzes at certain frequencies, the culprit is often the speaker wiring connector touching the metal door. A small foam pad or felt wrap can fix it immediately.
Moisture Barrier: Don?t Skip This Step
Your door panel isn?t supposed to be waterproof. The moisture barrier (plastic sheet with butyl) is what keeps water from soaking your panel and ruining adhesives and fabric.
- Inspect the barrier for tears and gaps.
- Re-seal using butyl rope/tape (preferred over household tape).
- Make sure drain paths at the bottom of the door remain clear.
Reinstallation: Get Factory Fitment and Avoid Broken Clips
Most clip damage happens during reinstall when the panel isn?t aligned. Take your time here.
- Reconnect everything first: switches, courtesy lights, and any cables (door handle latch cable).
- Hang the panel: align the top edge into the window channel lip (if your design uses one).
- Align clips visually: press lightly to locate clip positions before pushing hard.
- Press clips in: use firm palm pressure near each clip point, working around the panel.
- Reinstall screws: start all screws by hand to prevent cross-threading, then snug?not gorilla-tight.
- Reinstall trim covers: make sure they sit flush and don?t pinch wiring.
Quick Function Check Before You Button Everything Up
- Window up/down and auto function
- Door lock switch and handle operation (inside and outside)
- Mirror controls
- Speaker output (no buzzing)
- Courtesy light and puddle light
Product Recommendations and Smart Comparisons
You don?t need luxury tools, but a few upgrades prevent redo work.
Adhesives: What Works in Real Heat
- High-heat upholstery spray adhesive: Best for fabric and foam-backed materials. Choose a formula rated for automotive interiors to avoid peeling in summer.
- Contact cement (brush-on): Strong bond for vinyl edges and corners; less forgiving and messier, but excellent for high-stress wrap areas.
Clip Kits: OEM vs Aftermarket
- OEM clips: Best fit consistency and correct plastic hardness; higher cost but often worth it for newer vehicles.
- Aftermarket assortments: Great for older cars and budget builds, but verify stem length and head diameter to avoid loose panels.
Felt Tape vs Foam Tape
- Felt tape: Stops squeaks where parts rub.
- Closed-cell foam: Stops buzz/rattle by adding pressure and cushioning.
Common Mistakes to Avoid (And How to Prevent Them)
- Reusing weak clips: If the panel doesn?t ?snap? in positively, you?ll chase rattles later.
- Skipping the moisture barrier reseal: Water intrusion ruins fabric, causes odors, and can damage electronics.
- Using low-temp craft adhesive: It will let go when the cabin heats up. Always use high-heat automotive-rated adhesive.
- Forcing the panel into place: Misalignment breaks tabs and clip towers. Align first, then press.
- Over-tightening screws: Strips plastic bosses and creates permanent looseness.
- Not cleaning off degraded foam: New fabric won?t sit flat, and adhesive won?t bond reliably.
FAQ: DIY Door Panel Refurbishment
1) Why does my door panel feel loose even after I put it back on?
Usually it?s missing/broken clips or a cracked clip mount on the panel. Check for clips left in the door shell and inspect the panel?s clip towers for damage. Replace clips as a set for even tension.
2) Can I re-wrap just the insert instead of the entire door panel?
Yes, and it?s often the best DIY-friendly option. Many door cards have removable inserts secured from the backside. Re-wrapping the insert gives a big visual upgrade with less risk of wrinkles on complex edges.
3) What?s the best material for a daily driver: fabric, vinyl, or leatherette?
For durability and easy cleaning, automotive vinyl or quality leatherette is hard to beat. Fabric can look great but shows stains more easily. If your car sits in the sun, prioritize UV-resistant materials and high-heat adhesive.
4) My door panel rattles only when music hits bass notes. What should I check?
Start with the speaker area: loose screws, buzzing grille edges, or wiring tapping the door skin. Add small foam pads behind contact points and secure the harness with cloth tape.
5) Do I need to replace the moisture barrier if it?s ripped?
If the plastic sheet is torn badly, replace it with similar plastic sheeting and seal it with butyl tape. If it?s mostly intact, patch small tears and re-seal the perimeter. The goal is directing water down to the door drains, not into the cabin.
Wrap-Up: Your Next Steps
To finish your DIY door panel refurbishment like it came from the factory, focus on three things: solid mounting points, fresh clips, and clean surface prep before any adhesive work. Once the panel is back on, do a quick road test over a rough street with the radio off?if it?s quiet there, it?ll be quiet everywhere.
- Make a checklist of broken clips and trim pieces before your next parts order
- Address moisture barriers and anti-rattle padding while the panel is off
- If you?re re-wrapping, practice on an insert or a small section first
Want more step-by-step interior DIYs, trim fixes, and material guides? Browse the latest tutorials and upgrades on carinteriormix.com and keep your cabin looking sharp.