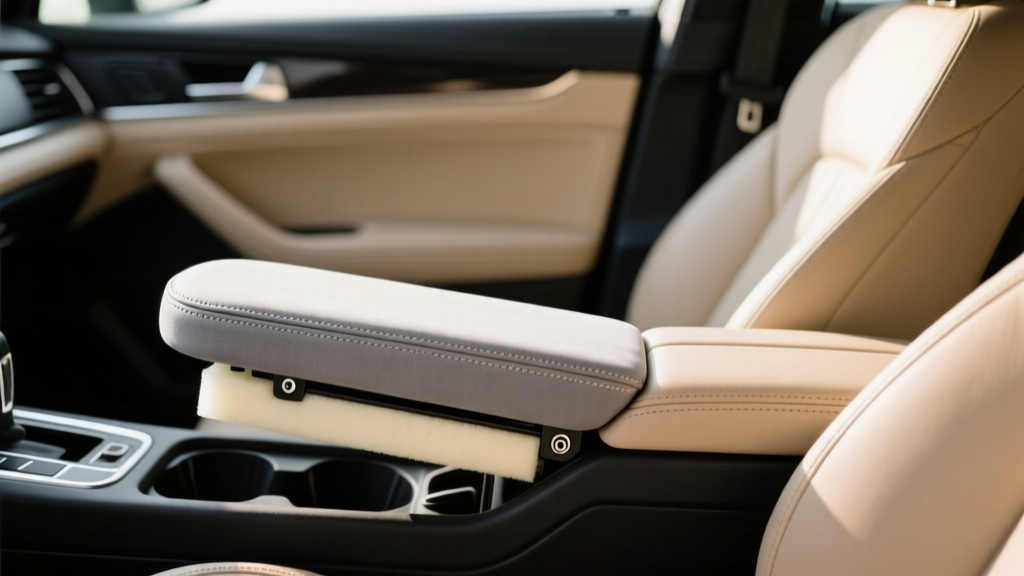
DIY Armrest Pad Replacement: Car Interior Mix (2026)
Most drivers don?t realize how much they rely on the center console armrest until it starts falling apart. A split seam, flattened foam, sticky vinyl, or a cracked lid edge can turn a comfortable cabin into a daily irritation?especially on long commutes. The good news: replacing (or rebuilding) the armrest pad is one of the most satisfying DIY car interior upgrades because you feel the difference every time you drive.
Part 1 usually covers removal of the console lid/armrest assembly and basic disassembly. This Part 2 guide picks up where the real quality is decided: rebuilding the pad, selecting materials, wrapping, stapling, aligning, and reinstalling so it looks factory?not ?close enough.? If you want a clean, tight finish and a pad that lasts through heat, cold, and constant use, the details below will save you time and frustration.
Along the way, you?ll see practical tips from real-world installs, product recommendations, and the most common mistakes that cause wrinkles, loose covers, or squeaks after reassembly.
What You?ll Accomplish in Part 2
- Inspect and repair the armrest lid base (plastic, MDF, or metal frame)
- Replace or upgrade the foam for better comfort and durability
- Install a new cover (OEM-style skin, vinyl, leather, or fabric)
- Achieve tight corners and smooth surfaces without wrinkles
- Reinstall the armrest pad and confirm proper latch/hinge operation
Tools and Materials Checklist (Refresher + Upgrades)
Tools
- Staple gun: Manual heavy-duty stapler or electric stapler (helps a lot on thick plastics)
- Staples: Common sizes are 1/4" (6mm) and 5/16" (8mm)
- Heat gun (preferred) or hair dryer for stretching vinyl
- Trim tools or plastic pry tools (avoid gouging interior panels)
- Utility knife with fresh blades
- Scissors for trimming cover material
- Marker/chalk for alignment marks
- Small clamps or binder clips to hold material while test-fitting
- Torx/Phillips bits depending on your lid hardware
Materials
- Foam: High-density upholstery foam (1/2"?1" typical)
- Optional comfort layer: 1/4" scrim foam, quilt batting, or closed-cell foam
- Adhesive: High-heat spray adhesive for automotive interiors
- Cover material: Automotive vinyl, leather, Alcantara-style suede, or OEM replacement skin
- Reinforcement: Thin plastic sheet or fabric backing for weak staple areas
Step-by-Step: Rebuilding the Armrest Pad (Professional Finish)
Step 1: Inspect the Lid Base and Repair Weak Points
Before you lay foam or install a new cover, confirm the armrest lid base is structurally sound. Many lids fail at staple rails, hinge mounts, or the latch receiver. If the base flexes, the new cover will loosen over time.
- Check staple rails: If the plastic edge is cracked where staples bite, reinforce it with:
- Two-part plastic epoxy, or
- A thin strip of ABS/plastic glued along the inside edge
- Check hinge screw holes: Stripped holes can be repaired using plastic epoxy and re-drilling, or a threaded insert if the design allows.
- Clean the surface: Remove old adhesive and foam dust. A clean base helps new adhesive bond evenly.
Real-world example: On many older SUVs and trucks, the lid base plastic becomes brittle from UV and heat cycles. Reinforcing the staple edge before re-covering prevents that frustrating ?staple pops out? problem later.
Step 2: Choose the Right Foam (Comfort vs. Factory Feel)
Foam choice is where your DIY armrest pad replacement can surpass OEM. Factory pads often use medium-density foam that compresses quickly. Upgrading to high-density foam keeps the shape longer and feels better on long drives.
Foam options (quick comparison)
- High-density polyurethane upholstery foam (recommended): Balanced comfort, long life, easy to shape.
- Closed-cell foam: More water-resistant, firmer feel, can be ?boardy? if too thick.
- Memory foam layer: Comfortable but can feel warm and may soften too much in heat; best as a thin top layer only.
Tip: If your armrest originally had a ?crowned? shape, recreate it with slightly thicker foam in the center or by adding a thin top comfort layer over the base foam.
Step 3: Cut and Shape the Foam
- Trace the lid top: Place the lid base on the foam and trace the outline. Add a small margin (about 1/8"?1/4") if the original foam wrapped slightly over edges.
- Cut cleanly: Use a sharp utility knife. Multiple light passes often cut cleaner than one heavy pass.
- Test-fit: Place foam on the lid and confirm it doesn?t interfere with hinges, latch hardware, or perimeter trim features.
- Soften edges: Slightly bevel the foam edges for a smoother wrapped finish and fewer ?hard lines? under vinyl/leather.
Pro-level detail: Wrinkles often come from square foam edges. A 45-degree bevel around the perimeter makes the cover roll naturally.
Step 4: Bond the Foam to the Base (High-Heat Adhesive Matters)
- Mask off latch or hinge areas if overspray could cause problems.
- Apply high-temperature spray adhesive to both surfaces (foam and lid base) per the adhesive instructions.
- Let it tack up (usually 30?90 seconds depending on product and temperature).
- Align carefully and press from center outward to avoid trapped bubbles.
Tip: Automotive interiors get hot. General-purpose craft spray adhesives can soften and let foam shift, creating lumps later. Use an interior-grade, high-heat adhesive.
Step 5: Prepare the New Cover and Plan Staple Zones
Lay your cover material face-down on a clean surface. Place the lid (foam side down) on top and confirm you have enough material to wrap and staple underneath.
- Leave enough excess: Typically 1.5"?2.5" of wrap material beyond the underside edge.
- Mark centers: Use a small chalk mark at the front center and rear center of both the lid and the cover. This prevents a ?crooked? grain pattern or seam placement.
- Identify corners: Rounded corners need relief cuts or careful stretching (more on that below).
Step 6: Stretch and Staple the Cover (No Wrinkles Method)
This is the step that separates a professional-looking armrest pad replacement from a ?good enough? job. Work slowly, alternate sides, and keep tension even.
- Start with two anchor staples: Staple the cover at the front center underside and rear center underside.
- Move to the sides: Pull the cover snug (not over-stretched) at the left center and staple. Repeat at the right center.
- Work outward in a cross pattern: Add staples moving from center toward the corners:
- Front left, rear right
- Front right, rear left
- Use heat sparingly: Warm vinyl slightly with a heat gun to help it conform. Keep the heat moving; you want pliable, not shiny or scorched.
- Check the top often: Flip the lid over repeatedly and inspect for ripples before committing to more staples.
Practical tip: If you see a wrinkle starting, don?t ?staple through it.? Remove the last one or two staples, re-tension the material, and re-staple. Fixing it now is faster than living with it later.
Step 7: Clean Corner Work (Relief Cuts and Folding Techniques)
Corners are where most DIY re-covers go wrong. The goal is a smooth top surface and a neat underside without bulky folds that interfere with lid fitment.
- Rounded corners (most common): Use small relief cuts on the underside wrap area?never cut too close to the visible edge. Cut a little at a time.
- Squared corners: Use a ?hospital corner? style fold: pull one side tight, fold the other over it, and staple in layers.
- Thick leather: Skive (thin) the underside edge if possible or keep folds minimal. Leather can build bulk quickly.
Rule of thumb: Make relief cuts only on the underside, and keep at least 1/2" clearance from the visible edge so the cut never telegraphs to the top.
Step 8: Trim Excess Material and Finalize the Staple Line
- Trim excess wrap material, leaving roughly 1/2"?3/4" beyond the staple line.
- Add staples where spacing looks wide. Even spacing looks more ?OEM.?
- Press down any sharp staple legs and re-staple if a staple didn?t fully seat.
Squeak prevention tip: If your lid has plastic-on-plastic contact points, add thin felt tape to contact areas during reassembly. It?s a small step that makes your interior feel newer.
Step 9: Reinstall the Armrest Pad and Verify Operation
Reassemble in the reverse order of removal (from Part 1). Before you fully tighten everything, check alignment.
- Latch check: Lid should close easily and latch securely without slamming.
- Hinge travel: Open/close fully. No binding, no rubbing on the console trim.
- Height and gap: Confirm even gaps around the lid perimeter.
- Torque gently: Overtightening can crack older plastic or strip holes.
Product Recommendations: What?s Worth Buying?
You can complete a DIY armrest pad replacement with basic supplies, but the right materials make the result last longer and look more factory-correct.
Cover material options
- OEM replacement armrest skin: Best for factory texture match and seams; often the easiest to fit.
- Automotive-grade vinyl: Great durability, budget-friendly, easy to clean; choose UV-stable and heat-rated vinyl.
- Leather (genuine): Premium feel and aging; more challenging to wrap tightly and can require stronger stapling tools.
- Microsuede/Alcantara-style: Sporty look and grip, but shows dirt and oils; consider for weekend cars or cleaner daily use.
Foam recommendations
- High-density upholstery foam (medium-firm): Best all-around for daily drivers.
- Add a thin comfort layer: A 1/4" scrim foam layer under vinyl can smooth minor imperfections and give a more upscale feel.
Stapler choice
- Manual heavy-duty stapler: Works for many lids, especially wood/MDF bases.
- Electric stapler: Helpful for thick plastics and dense materials; reduces hand fatigue and improves staple seating consistency.
Common Mistakes to Avoid
- Using low-heat adhesive: The foam can shift after a few hot days, creating lumps.
- Over-stretching vinyl: It may look tight initially but can thin out, split at corners, or ?pull back? later.
- Skipping center alignment marks: Grain patterns and seams end up crooked, especially noticeable on leather/vinyl textures.
- Cutting relief cuts too deep: A cut too close to the visible edge can show on the top surface over time.
- Stapling too close to the edge: Weak plastic edges crack and staples pop out.
- Not checking latch/hinge clearance: Bulky folds can interfere with closing, causing misalignment or squeaks.
Extra Practical Tips for a Factory-Like Result
- Work at room temperature: Cold vinyl fights you; hot vinyl can over-stretch.
- Use temporary clamps: Binder clips help hold tension while you confirm the top is smooth.
- Take reference photos: If you?re mirroring OEM folds or staple locations, photos save guesswork.
- Test fit before final trimming: Don?t cut excess material until you?re satisfied with the surface finish.
- Match interior sheen: A glossy vinyl can look out of place next to matte factory plastics. Choose a similar grain and sheen for an OEM vibe.
FAQ: DIY Armrest Pad Replacement
1) Can I replace just the armrest pad without removing the entire center console?
Often yes. Many vehicles allow the lid/armrest assembly to come off with a few screws from inside the storage compartment. Some designs require partial console trim removal for hinge access. If you can access hinge bolts and disconnect any wiring (USB/12V lights), you can usually avoid removing the entire console.
2) What?s the best material for a daily driver armrest?
Automotive-grade vinyl is the best balance of durability, easy cleaning, and cost. If you want a premium feel, leather is great?just expect a little more effort on corners and stapling.
3) My new cover has wrinkles on the top. Do I need to start over?
Not always. Wrinkles typically mean uneven tension or the cover wasn?t warmed evenly. Remove a few nearby staples, reheat the area lightly, pull tension in the opposite direction of the wrinkle, and restaple. Small waves can also relax after the material settles, especially with vinyl.
4) What staples should I use for an armrest lid?
For many lids, 1/4" (6mm) staples work well. If the base is thicker or you?re using thicker leather, 5/16" (8mm) may hold better. The key is full seating?if staples don?t sink flush, switch staplers or staple size.
5) How do I prevent the armrest from squeaking after reinstall?
Add thin felt tape on plastic contact points and ensure hardware is snug (not over-tight). Also confirm the cover isn?t bunched up near hinge areas, which can create rubbing noises when the lid moves.
6) Should I add extra padding for comfort?
Yes, within reason. A modest upgrade?like high-density foam plus a thin comfort layer?feels excellent. Too much thickness can affect latch alignment and cause the lid to sit high or rub console trim.
Your Next Steps
If you?ve finished Part 2, you should have a smooth, tight armrest pad with solid foam support and clean corner work. Next, take a few minutes to:
- Recheck latch alignment after a short drive (things settle)
- Clean the new surface with an interior-safe cleaner appropriate for your material
- Address any related wear items?console side trims, shift boot, or cupholder inserts?to refresh the whole area
Want more interior DIYs that make your cabin feel brand new? Explore more guides and tutorials on carinteriormix.com.