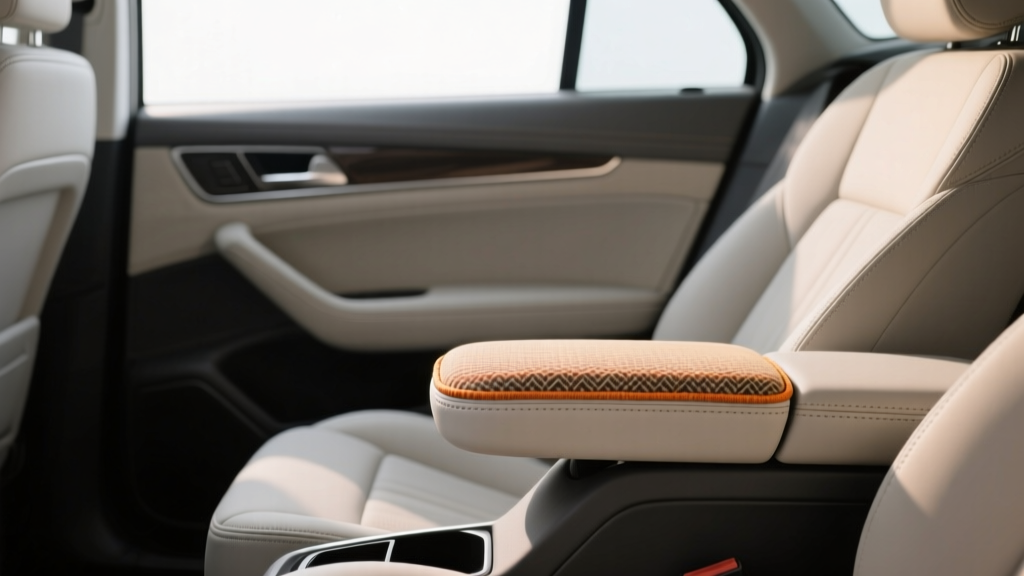
DIY Armrest Pad Replacement: Car Interior Mix (2026)
A worn, cracked, or sticky armrest pad can make an otherwise clean cabin feel tired fast. You touch it every drive?resting your elbow at stoplights, leaning in during long highway stretches, and bracing yourself during quick turns. When that surface starts peeling or collapsing, it?s not just an eyesore; it?s a daily annoyance.
The good news: replacing an armrest pad is one of the most satisfying DIY car interior upgrades you can do at home. In many vehicles, the pad is a separate, replaceable piece held on with hidden screws, clips, or staples. With the right approach, you can restore factory comfort (or upgrade it) in an afternoon, usually for far less than the cost of a shop visit.
This guide walks you through how to identify your armrest type, choose the right replacement, remove the old pad without damaging interior trim, and install a new pad that feels solid and looks OEM. You?ll also find product options, common mistakes, and a quick FAQ at the end.
Know Your Armrest Type (Before You Buy Anything)
?Armrest? can mean a few different things depending on your vehicle. Identifying what you?re working with helps you order the right part and avoid taking apart the wrong panels.
Common armrest pad locations
- Center console lid pad: The most common?an upholstered or vinyl pad on top of the console lid.
- Door armrest pad: The soft section on the door panel where your elbow rests.
- Third-row or captain?s chair armrest pad: Often a bolt-on pad on the seat arm.
- Fold-down armrest (rear seat): Usually integrated, but some have replaceable pads.
How the pad is typically attached
- Screws from underneath (common for center console lids)
- Clips and tabs (often on door panels)
- Staples (frequent on older vehicles and some aftermarket reupholstery jobs)
- Bolts (seat-mounted armrests)
If you?re not sure, take a flashlight and look for fasteners under the console lid or around the underside seam. A quick peek can save you ordering the wrong style of replacement.
Tools and Supplies Checklist
You don?t need a full garage setup, but having the right trim tools makes this job cleaner and prevents broken clips.
Basic tools (most DIYers will use these)
- Plastic trim removal tools (a small kit is enough)
- Phillips and flathead screwdrivers
- Torx drivers (T20/T25 are common in interiors)
- 10mm socket and ratchet (varies by vehicle)
- Needle-nose pliers (for clips and staples)
- Magnetic tray or small container for screws
Optional but very helpful
- Heat gun or hair dryer (softens adhesive and vinyl for easier removal)
- Upholstery stapler and 1/4" staples (if your pad is stapled)
- Spray adhesive (3M Headliner & Fabric or 3M Super 77, depending on materials)
- Isopropyl alcohol (70%+) and microfiber towels for cleanup
- Painter?s tape to protect surrounding trim
Choosing the Right Replacement Armrest Pad
There are three main routes: OEM, direct-fit aftermarket, or a reupholstery kit. Your best option depends on budget, how long you plan to keep the car, and how perfect you want the match to be.
Option 1: OEM replacement pad (best fit and finish)
- Pros: Factory texture and color match, correct foam density, direct fit.
- Cons: Higher cost, may be discontinued for older models.
Best for: Newer cars, lease returns, or anyone who wants an OEM look with minimal fuss.
Option 2: Direct-fit aftermarket pad (best value for most drivers)
- Pros: Usually affordable, widely available online, often ?plug-and-play.?
- Cons: Color and grain may be slightly off; foam firmness varies by brand.
Real-world example: Many owners replace a cracked center console lid pad on a high-mileage SUV with a direct-fit aftermarket lid cover. It won?t always be a perfect grain match, but it restores comfort and looks clean from normal viewing distance.
Option 3: Reupholstery cover/kit (best for custom upgrades)
- Pros: Lets you upgrade to leather, add contrast stitching, or improve padding.
- Cons: More labor; results depend on your technique.
Best for: Enthusiasts doing an interior refresh, custom builds, or older vehicles with limited OEM parts availability.
What to check before ordering
- Vehicle compatibility: Verify year/make/model/trim. Console lids can differ between trims.
- Color code: ?Black? can mean several shades (ebony, charcoal, jet black). If possible, match by interior trim code.
- Return policy: Especially important for aftermarket pads where color match is uncertain.
- Included hardware: Some pads include new clips/screws; many do not.
Step-by-Step: Center Console Armrest Pad Replacement
This is the most common DIY armrest pad replacement. Your console lid may vary, but the workflow is similar across many cars and trucks.
Step 1: Prep the workspace
- Park on a level surface and set the parking brake.
- Move seats to give yourself room around the console.
- Place a towel over glossy trim to avoid scratches.
- If your console lid has wiring (heated armrest, USB hub, lighting), disconnect the negative battery terminal to be safe.
Step 2: Access the underside fasteners
- Open the console lid fully.
- Use a flashlight to locate screws around the inner perimeter.
- Check for hidden screws under rubber mats, liners, or small plastic caps.
Tip: Some lids use Torx screws and two different screw lengths. Lay them out in order so reassembly is painless.
Step 3: Remove the lid (if needed)
On many vehicles, you can replace the pad with the lid still attached. If access is tight, removing the lid makes the job easier.
- Locate hinge bolts or screws at the rear of the lid.
- Support the lid as you remove fasteners so it doesn?t drop and crack trim.
- If there are electrical connectors, unplug them gently?don?t pull on the wires.
Step 4: Separate the old pad from the lid
How you do this depends on the attachment style:
- Screwed-on pad: Remove screws and lift the pad straight off.
- Clipped pad: Use a plastic trim tool to release tabs evenly around the perimeter.
- Stapled upholstery: Pull staples with needle-nose pliers. Work slowly to avoid tearing the backing board.
- Adhesive-backed cover: Warm gently with a hair dryer and peel carefully. Clean residue with isopropyl alcohol.
Step 5: Inspect and prep the base
- Check the lid structure for cracks, broken tabs, or warped plastic.
- Remove loose foam and debris.
- Test-fit the new pad before applying adhesive or reinstalling screws.
Practical tip: If your console lid squeaks, add thin felt tape at contact points while everything is apart. It?s a small upgrade that makes the cabin feel newer.
Step 6: Install the new pad
- Align the pad carefully with screw holes or locating pins.
- If screws are used, start them by hand to avoid cross-threading.
- Tighten evenly, alternating sides to seat the pad flat.
- If using adhesive, apply a light, even coat and follow the product?s tack time before bonding.
Don?t over-tighten: Stripped plastic threads are a common DIY headache. Snug is usually enough.
Step 7: Reinstall the lid and function-check
- Reattach the lid to the hinge and reconnect any wiring.
- Close and open the console several times, checking alignment and latch operation.
- Wipe the new pad with a clean microfiber towel to remove fingerprints.
Step-by-Step: Door Armrest Pad Replacement (Common Variations)
Door armrest pads can be simple or time-consuming depending on whether the pad is separate or molded into the door panel.
Scenario A: Pad is a separate bolt-on or screw-on piece
- Remove the door pull trim cover (often hides screws).
- Remove screws in the armrest handle area and behind trim caps.
- Use trim tools to release the door panel clips around the edges.
- Lift the door panel upward to unhook it from the window channel.
- Disconnect window/lock switches and courtesy light connectors.
- Unbolt or unscrew the armrest pad from the backside of the door panel.
- Install the new pad and reassemble in reverse order.
Scenario B: Pad is integrated into the door panel
If the ?pad? is molded in, you typically have two options:
- Install a fitted armrest cover (fast and cost-effective)
- Reupholster the armrest section (more work, best results)
Real-world example: Many older sedans have door armrests that crack at the top edge from sun exposure. A quality fitted cover can hide the damage and restore comfort without replacing the full door panel.
Product Recommendations and Comparisons (What?s Worth Buying)
Exact fit depends on your vehicle, so treat these as categories to shop for rather than one-size-fits-all picks.
Best for OEM-like results
- OEM armrest pad or complete console lid assembly: Higher price, best match, usually quickest install.
Best budget-friendly upgrade
- Direct-fit aftermarket replacement pad: Look for reviews mentioning ?color match,? ?foam firmness,? and ?clip alignment.?
Best comfort upgrade
- Memory-foam armrest topper (strap-on or adhesive): Great for long commutes and vehicles with firm factory padding.
Best for DIY upholstery enthusiasts
- Stitched replacement cover kit (vinyl or leather): Choose UV-resistant materials and strong thread for durability.
Buying tip: If you live in a hot climate, prioritize UV resistance and heat-stable materials. Cheap vinyl can warp, shine up, or get tacky over time.
Common Mistakes to Avoid
- Skipping the test-fit: Always test-fit the pad before peeling adhesive backing or tightening everything down.
- Forcing trim clips: If something won?t release, you probably missed a hidden screw. Forcing it can crack the panel.
- Mixing up screws: Different lengths in the wrong place can dimple the pad or punch through plastic.
- Over-tightening into plastic: This strips threads and creates a loose, creaky lid later.
- Not cleaning adhesive residue: New covers won?t sit flat over old glue, leading to lumps and early peeling.
- Ignoring alignment: A slightly crooked pad can cause latch issues or uneven wear.
Practical Tips for a Factory-Clean Finish
- Warm the interior first: If you?re installing an adhesive-backed cover, doing it in a warm garage helps it conform smoothly.
- Use painter?s tape guides: Mark centerlines or edges so the new pad sits straight on the first try.
- Refresh surrounding surfaces: Clean the console sides and cupholder trim while the lid is off?small effort, big visual payoff.
- Condition vinyl/leather properly: Use an interior-safe protectant (non-greasy) to reduce UV damage and cracking.
- Address squeaks now: Felt tape at contact points can eliminate future rattles.
FAQ: DIY Armrest Pad Replacement
How long does an armrest pad replacement take?
Most center console armrest pad replacements take 30?90 minutes. Door armrest pads can take 1?3 hours depending on whether you need to remove the full door panel and deal with clips, wiring connectors, and hidden fasteners.
Do I need to disconnect the battery?
If you?re working on a door panel with airbags, electrical connectors, or you?ll be unplugging switches, disconnecting the negative terminal is a smart safety step. For a simple console lid with no wiring, it?s usually not necessary.
What if my replacement pad doesn?t match the interior color?
This happens with some aftermarket parts. If the mismatch is minor, many owners accept it because the comfort improvement is immediate. If it bothers you, look for OEM parts using your interior trim code or consider a full console lid assembly that?s known to match your trim.
Can I reupholster the armrest pad instead of replacing it?
Yes. If the base is solid and only the surface is damaged, reupholstery can look excellent. You?ll need the right material, adhesive or staples (depending on design), and patience to avoid wrinkles?especially around corners.
Why does my new armrest pad feel too firm or too soft?
Foam density varies widely between OEM and aftermarket pads. If you want a factory feel, OEM is usually closest. If comfort is the priority, consider a pad with thicker foam or add a slim memory-foam topper designed for automotive interiors.
My console lid won?t latch after replacing the pad?what went wrong?
Most often the pad is slightly misaligned, screws are unevenly tightened, or a clip isn?t seated. Loosen fasteners, re-center the pad, and tighten evenly. Also confirm no wiring or trim is pinched near the latch area.
Next Steps: Make the Upgrade Stick
Once your new armrest pad is installed, keep it looking fresh by cleaning it regularly with an interior-safe cleaner and protecting it from UV exposure. If your vehicle lives outside, a windshield sunshade can make a noticeable difference in how long vinyl and leather surfaces last.
If you?re planning a bigger cabin refresh, consider pairing your armrest pad replacement with a shift boot upgrade, seat gap fillers, new floor mats, or a deep interior detail for that ?new car? feel without the new car payment.
For more hands-on interior DIYs, fitment tips, and upgrade ideas, explore the latest guides on carinteriormix.com.