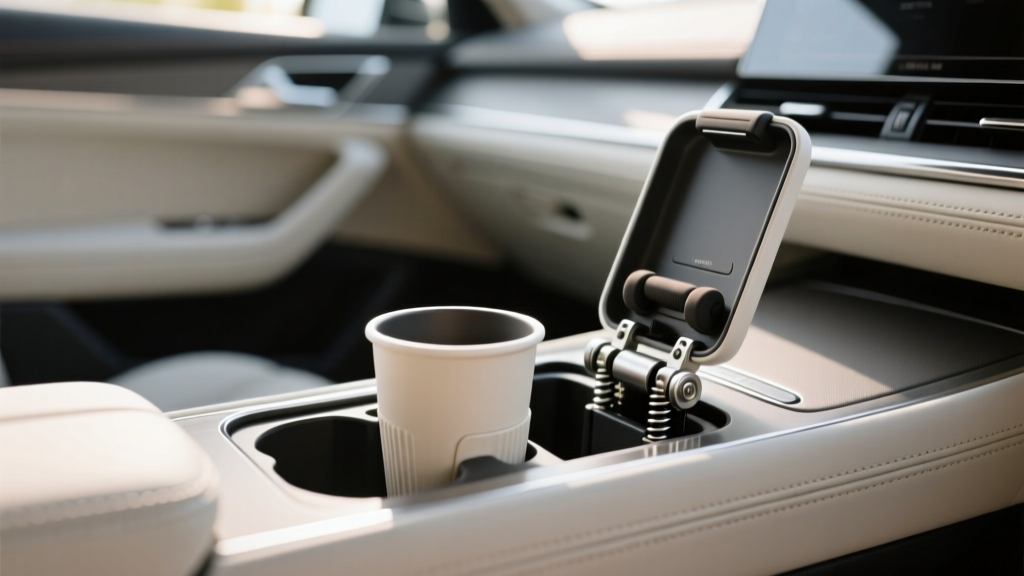
Cup Holder Expansion: Maintenance Tips for Longevity
Cup holders seem simple?until you add an expansion insert, an adjustable adapter, or a larger ?bottle-friendly? replacement and realize it?s now one of the most-used parts of your interior. Between coffee runs, water bottles, kids? juice cups, and the occasional energy drink, expanded cup holders see constant action. They also catch spills, crumbs, condensation, and vibration stress that the factory setup may not have been designed to handle.
Keeping a cup holder expansion kit working smoothly isn?t just about cleanliness. Proper maintenance protects trim plastics, reduces rattles, helps prevent sticky mechanisms, and keeps bigger bottles stable during braking and turns. If you?ve ever had a 40 oz tumbler tip and leak into your center console, you already understand how quickly a small convenience upgrade can turn into a detailing headache.
This guide breaks down how to care for popular cup holder expansion solutions?rubberized inserts, adjustable ?cup stabilizers,? drop-in extenders, and replacement console modules?so they last for years and keep your cabin looking sharp.
What ?Cup Holder Expansion? Usually Means (and Why Maintenance Differs)
Not all cup holder expanders are built the same. Maintenance depends on how the accessory grips, expands, and interfaces with your factory console.
Common cup holder expansion types
- Drop-in inserts (rubber/silicone sleeves, spacers, risers) designed to adapt small holders to larger cups.
- Adjustable expander adapters with expanding fins or arms that clamp inside the holder to stabilize larger bottles.
- ?Tall tumbler? extenders that raise a cup higher so handles or wide bases clear console edges.
- Replacement cup holder modules (vehicle-specific console inserts) that swap factory rings for bigger openings.
- 3D-printed or custom parts made for specific bottle sizes or vehicles.
Why expanded holders need routine care
- More contact points: Expanding arms and rubber fins collect sticky residue and lose grip when dirty.
- More leverage: Taller bottles increase torque on the holder during turns, stressing clips and plastic tabs.
- Moisture exposure: Condensation and spills creep under adapters, encouraging odors and staining.
- Rattle risk: A slightly loose expander can buzz against console trim on rough roads.
Tools and Supplies: What You?ll Actually Use
You don?t need a full detailing cart. These basics handle 95% of cup holder expansion maintenance.
- Microfiber towels (2?4 dedicated to interior plastics)
- Soft detailing brush or old soft toothbrush
- Mild interior cleaner (pH-balanced, plastic-safe)
- Warm water and a small bowl
- Cotton swabs for seams and tight corners
- Compressed air or a handheld blower (optional, great for crumbs)
- Isopropyl alcohol 70% (spot use for sticky residue; test first)
- Silicone-safe lubricant for moving parts (only if your expander has hinges/threads)
Skip: harsh degreasers, ammonia-based glass cleaners, and heavy petroleum oils. They can haze plastics, swell rubber, or leave slick residue that makes cups slip.
Step-by-Step: Routine Cleaning (Weekly to Monthly)
If you want long-lasting results, this routine is the sweet spot: fast enough to do regularly, thorough enough to prevent buildup.
Step 1: Remove the expander and shake out debris
- Lift the expander straight up to avoid scuffing the console ring.
- Tap it over a trash can to release crumbs.
- If your expander has expanding arms, open them slightly and tap again.
Real-world tip: If you carry sugary coffee often, do this weekly. Sugar residue is what turns ?fine? into ?sticky? quickly?especially around spring-loaded fins.
Step 2: Dry-clean the cup holder cavity first
- Use compressed air or a soft brush to loosen crumbs.
- Wipe the cavity with a dry microfiber to pick up loose grit.
This prevents you from grinding debris into the plastic when you start using cleaner.
Step 3: Wipe with a plastic-safe interior cleaner
- Spray cleaner onto a microfiber towel (not directly into the cup holder).
- Wipe the cup holder cavity, the surrounding trim, and the expander?s outer contact surface.
- Use cotton swabs for seams where the console meets the cup holder ring.
Step 4: Wash rubber or silicone parts (if removable)
- Rinse in warm water.
- Add a drop of mild dish soap and gently scrub with a soft brush.
- Rinse thoroughly and air dry completely.
Why it matters: Rubberized surfaces regain grip when clean. A ?slippery? expander is often just coated in oils from hands, cleaners, or beverage residue.
Step 5: Reinstall and check fit
- Ensure everything is fully dry.
- Seat the expander evenly?no rocking.
- Insert your most-used bottle and gently wiggle to confirm stability.
Deep Maintenance (Every 2?4 Months or After a Major Spill)
Deep maintenance focuses on hidden residue and wear points?where long-term problems start.
1) De-sticky the mechanism (adjustable expanders)
- Remove the expander.
- Wipe moving joints/threads with a damp microfiber.
- Use a cotton swab with a small amount of 70% isopropyl alcohol on sticky spots only.
- Cycle the arms/adjustment ring several times to work out residue.
If it still binds: Apply a tiny amount of silicone-safe lubricant to the hinge or thread?then wipe off excess. The goal is smooth movement, not a slick surface that attracts dust.
2) Inspect contact points and anti-rattle pads
- Look for flattened rubber fins, torn pads, or worn ?teeth.?
- Check for sharp edges or burrs (common on cheaper plastic or 3D-printed parts) that can scratch console trim.
- Confirm any foam tape or felt pads are still adhered.
Quick fix: Add thin adhesive felt strips to the expander?s outer wall where it contacts the cup holder ring. This is a proven way to reduce rattles without forcing a too-tight fit.
3) Clean under the trim lip (where spills hide)
- Wrap a microfiber around a plastic trim tool or a dull butter knife.
- Lightly dampen the cloth with interior cleaner.
- Slide along the edge of the cup holder ring to lift hidden residue.
Avoid metal picks or anything sharp that can gouge the plastic or tear faux leather surfaces.
Preventing Wear: How to Make an Expander Last
Most failures aren?t dramatic?they?re slow: loosening, squeaking, fading, or losing grip. These habits help prevent that.
Use the right bottle strategy
- Match the expander to your bottle size range. If you?re constantly forcing a 40 oz tumbler into an adapter designed for 26?30 oz bottles, the fins will fatigue.
- Keep handles oriented away from shifters and buttons. This reduces side-loading and stress on the expander.
- Avoid slamming bottles in. Drop-in force breaks clips and causes console scuffs.
Control condensation and ?sweat? rings
- Use a coaster insert or rubber cup mat inside the expander if compatible.
- Wipe the bottle base before placing it in the holder after being outside in humidity.
- Consider a double-wall bottle to reduce sweating (less moisture, fewer odors).
Heat and UV protection
- If you park in direct sun, use a windshield sunshade. Heat can warp cheaper plastics and soften adhesives on felt pads.
- Choose matte, UV-resistant materials when possible?especially for vehicle-specific replacement modules.
Product Recommendations and What to Look For
There are plenty of cup holder expanders on the market, but long-lasting performance usually comes down to materials, adjustability, and how the unit protects your factory trim.
Best for daily stability: adjustable expanders with rubberized fins
- Pros: Fits multiple bottle sizes, better grip on stainless tumblers, reduces tipping.
- Cons: More moving parts to clean; can squeak if sticky.
- Look for: Replaceable rubber pads, smooth threads, and a wide base that distributes load.
Best for easy cleaning: silicone or rubber drop-in inserts
- Pros: Simple, washable, fewer rattles, great for coffee cups.
- Cons: Less support for very tall/heavy bottles.
- Look for: High-temp silicone, snug fit, and textured surfaces that resist slipping.
Best OEM-like results: vehicle-specific replacement cup holder modules
- Pros: Clean look, strong fitment, often less rattle than universal parts.
- Cons: Higher cost, more involved install, sometimes limited to a specific bottle diameter.
- Look for: Secure mounting points, quality ABS plastic, and reviews that mention long-term fit.
Compatibility tip: If your car has a spring-loaded ?gripper? style OEM cup holder, test an expander carefully. Some expanders fight the factory grippers, leading to stuck adapters or excessive pressure on console rings.
Common Mistakes to Avoid
- Spraying cleaner directly into the cup holder. Liquids can seep into switches, shifter surrounds, or electronic modules nearby.
- Using oily dressings on rubber fins. Shine products can make the expander slippery and attract dust.
- Ignoring small spills. A few drops of latte becomes sticky varnish over time, causing arms to bind and pads to peel.
- Over-tightening adjustable expanders. Cranking down threads can crack plastic collars or deform console trim.
- Running parts through a dishwasher. Heat can warp plastics, and detergents can dull finishes.
- Forcing a poor fit. If it rocks, rattles, or requires excessive pressure, it?s the wrong size or design for your vehicle.
Troubleshooting: Quick Fixes for Real-World Problems
The expander rattles on rough roads
- Add thin adhesive felt strips to the outer wall.
- Check for missing rubber pads or loosened foam tape.
- Verify the expander is seated flat (crumbs underneath can cause rocking).
The arms don?t grip like they used to
- Wash rubber contact points with warm soapy water and let dry fully.
- Remove any shine dressing or oily residue with a lightly damp microfiber.
- If rubber fins are hardened or cracked, consider replacing the unit or the pads (if available).
It?s stuck in the cup holder
- Don?t pry with metal tools.
- Try twisting gently while pulling upward evenly.
- If it uses expanding fins, retract them fully first (follow the product?s adjustment method).
FAQ: Cup Holder Expansion Maintenance
How often should I clean a cup holder expander?
Light cleaning every 1?2 weeks if you regularly carry coffee, soda, or kids? drinks. Monthly is fine for mostly water bottles. Do a deep clean every 2?4 months or immediately after a sticky spill.
Can I use disinfecting wipes on cup holder expanders?
Occasionally, yes?if they?re safe for interior plastics and don?t leave a slick residue. Avoid heavy fragrance oils and test on a hidden area first, especially on rubberized or soft-touch finishes.
Why does my expander feel slippery even after cleaning?
Most often it?s residue from interior dressing, hand oils, or a cleaner that leaves gloss behind. Wash rubber/silicone parts with mild soap and water, and avoid ?shine? products on grip surfaces.
Will an expander damage my factory cup holder trim?
It can if the fit is too tight, the edges are sharp, or debris gets trapped between surfaces. Keeping both the console ring and expander clean, and adding thin felt where contact occurs, greatly reduces scuffing.
What?s the best way to stop condensation from pooling under the adapter?
Use a rubber mat or coaster insert (if your expander allows it), wipe bottle bases before placing them in the holder, and periodically remove the expander to dry the cup holder cavity.
Should I lubricate adjustable cup holder expanders?
Only if the mechanism binds after cleaning. Use a tiny amount of silicone-safe lubricant on moving joints or threads, then wipe excess. Never lubricate rubber fins or surfaces that need grip.
Next Steps: A Simple Maintenance Plan You Can Stick With
If you want your cup holder expansion setup to stay stable, quiet, and clean, keep it simple:
- Weekly (or biweekly): Remove the expander, shake out crumbs, quick wipe the cavity and adapter.
- Monthly: Wash rubber/silicone parts, clean seams, check fit and stability with your usual bottle.
- Quarterly: Deep clean mechanisms, inspect pads and edges, add felt for rattle control if needed.
Once you?ve done this a few times, it becomes a two-minute habit that saves you from stuck adapters, scratched trim, and that lingering sweet-coffee smell that never quite leaves the console.
For more practical interior care tips and accessory guides, explore the latest articles on carinteriormix.com.