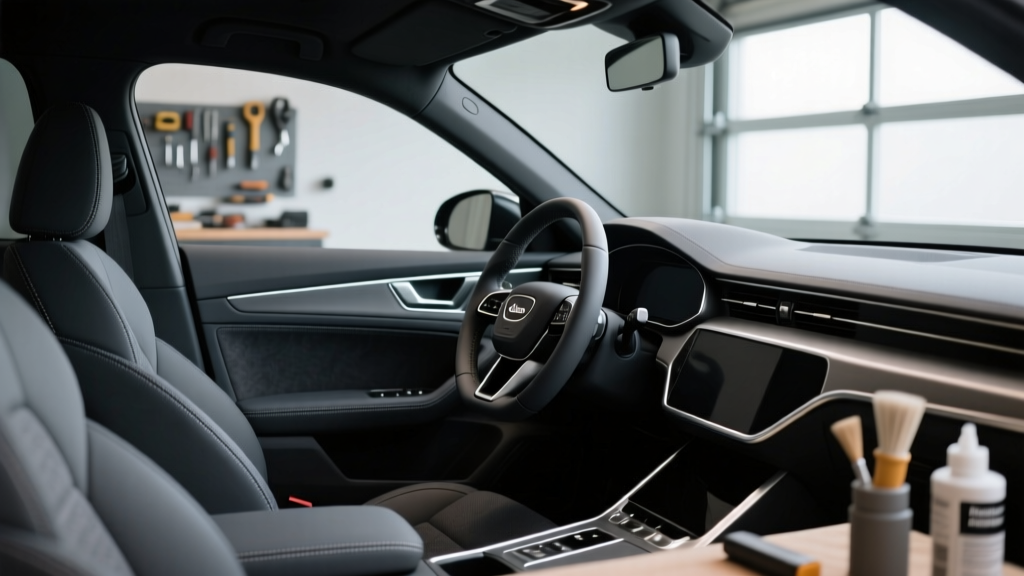
Matte Finish Conversion: Car Interior Guide (2026)
A matte finish conversion can completely change how your car feels day to day. Matte surfaces reduce distracting glare, hide minor fingerprints better than high-gloss pieces, and create that modern ?factory performance? vibe many enthusiasts chase. But once you get past the excitement of choosing a wrap color or a trim paint, the real difference between a clean matte build and a patchy one comes down to process.
This Part 2 guide focuses on the practical ?make it last? side of a matte conversion?surface prep details, installation technique, protection, and maintenance. If Part 1 helped you plan the look, this is the handbook for getting consistent results across interior panels, trim, and touch points without peeling edges, streaky finishes, or that dreaded ?chalky? matte haze.
Whether you?re matte-wrapping interior trim, converting glossy piano black pieces, or using a matte clear coat for plastics, the goal is the same: an OEM-like finish that holds up to heat, skin oils, cleaning products, and daily use.
Before You Touch a Tool: What ?Matte? Really Means Inside a Car
Matte is not just ?less shiny.? Interior matte finishes are designed to diffuse light, which is why they can look richer and more uniform when done correctly. The downside is that matte surfaces can show:
- Uneven texture (from poor prep or inconsistent spray distance)
- Burnishing (shiny spots from rubbing or aggressive cleaning)
- Residue streaks (from oily dressings or silicone-based products)
Pick the right matte method for each interior surface
Most beginners get better results when they match the method to the part?s shape and use:
- Matte vinyl wrap: Great for flat-ish trim pieces (console surrounds, dash trim, door accents). Reversible.
- Matte paint (interior-safe): Best for small hard plastic pieces, switch surrounds, or parts you can remove and spray evenly.
- Matte clear coat over color: Useful when you want durability and easier cleaning than a bare matte paint.
- Matte protection film (PPF-style) for interior: Niche, but can help protect high-touch matte wrap sections from burnishing.
Tools and Materials Checklist (Beginner-Friendly)
Having the right tools prevents 80% of common failures. Here?s a practical kit that works for most matte interior conversions:
Prep and cleaning
- pH-neutral interior cleaner (no gloss enhancers)
- Isopropyl alcohol (IPA) 70% or 91% + distilled water (for final wipe)
- Microfiber towels (separate ?cleaning? and ?final wipe? towels)
- Soft detailing brushes for seams and buttons
- Scuff pad (gray ultrafine) or 800?1500 grit sandpaper (for paint prep)
Wrap installation
- Heat gun (preferred over hair dryer for consistent heat)
- Plastic squeegee with felt edge
- Precision knife + fresh blades
- Wrap gloves (optional, but helpful for avoiding drag marks)
- Knifeless tape (for clean edges and safer trimming)
Painting (if applicable)
- Plastic adhesion promoter (for raw plastics, when recommended by the paint system)
- Interior-safe matte paint or color coat
- Matte or satin clear coat (for durability)
- Respirator mask rated for paint fumes + gloves
- Painter?s tape and masking paper
Step-by-Step: Matte Wrap Conversion for Interior Trim
This workflow is ideal for piano black trim conversions, glossy console pieces, and many dash or door trim inserts.
Step 1: Remove the trim (don?t wrap in place unless you have to)
Removing parts gives you cleaner edges, fewer cut marks, and better long-term adhesion. Use plastic pry tools and work slowly.
- Photograph each area before removal (helps during reassembly).
- Place clips and screws in labeled containers.
- If a panel feels stuck, look for hidden screws under rubber mats or caps.
Step 2: Clean like adhesion depends on it (because it does)
- Wash with interior cleaner to remove skin oils and dust.
- Use a brush around seams, edges, and texture.
- Final wipe with an IPA mix (common: 70% IPA cut 1:1 with distilled water).
- Let the part air-dry fully.
Real-world tip: Center console trim usually has invisible hand lotion and sunscreen residue. If your wrap keeps lifting at corners, it?s often contamination, not ?bad vinyl.?
Step 3: Test fit and plan your seams
Matte wrap is less forgiving than gloss for hiding stretch marks. Before peeling the backing:
- Lay the vinyl over the part and identify deep recesses.
- Decide where you can hide seams (underside edges, back corners).
- Allow extra material (at least 1?2 inches beyond all edges).
Step 4: Apply with controlled tension (avoid over-stretching matte)
- Anchor the vinyl lightly in the center.
- Work outward using a felt squeegee in short strokes.
- Use minimal heat at first?save heat for curves and edges.
- If you see a ?lightened? area, you?re stretching too much (matte can discolor when overstressed).
Step 5: Work recesses the right way
Deep cupholder surrounds and switch cutouts are where beginners struggle. The trick is to ?relax? the vinyl with heat and feed it in gradually:
- Warm the vinyl until it becomes pliable (not hot enough to distort).
- Use your fingers/glove to gently push into the recess.
- Squeegee from the recess outward to avoid trapping air.
- For very deep recesses, consider a hidden seam rather than forcing one piece.
Step 6: Trim safely and cleanly
- Use knifeless tape for visible edges whenever possible.
- When using a blade, cut on the backside edge, not on the face.
- Change blades frequently?dull blades snag matte vinyl.
Step 7: Post-heat the edges (this is non-negotiable)
Post-heating resets the vinyl?s ?memory? so it doesn?t shrink back and lift. Focus on edges, corners, and recessed areas. Use a heat gun carefully and apply firm pressure afterward.
Step-by-Step: Matte Paint Conversion for Interior Plastics
Painting is a great option for small pieces like vent bezels, trim rings, and removable panels?especially when you want an ultra-uniform matte texture.
Step 1: Prep the surface for paint adhesion
- Remove and clean the part thoroughly.
- Scuff evenly with a gray scuff pad or 1000?1500 grit (for smooth plastics).
- Wipe with IPA and let it flash dry.
Practical tip: If the plastic is very slick (common on some OEM trim), follow your paint system?s recommendation for adhesion promoter. Don?t guess?some plastics need it, others don?t.
Step 2: Spray in thin, controlled passes
- Keep the can/spray gun distance consistent (usually 6?10 inches for aerosols).
- Apply multiple light coats instead of one heavy coat.
- Maintain overlap (about 50%) to avoid striping.
Step 3: Use matte clear for durability (especially on high-touch pieces)
A matte clear coat helps resist hand oils and makes cleaning easier. It also helps prevent ?polishing? shiny spots over time.
Step 4: Cure time matters more than you think
Many interior paint jobs fail because parts get reinstalled too soon. Give it real cure time before handling aggressively?especially in cooler or humid conditions.
Product Recommendations and Comparisons (Beginner Priorities)
You don?t need the most expensive products, but you do want materials that behave predictably.
Matte wrap: cast vs. calendered
- Cast vinyl (recommended): Better conformability, less shrinkage, more durable on curves.
- Calendered vinyl (budget option): More likely to lift/shrink on edges and tight recesses.
If you?re wrapping a console with lots of contours, cast matte vinyl typically saves time and frustration.
Matte interior cleaning products to look for
- ?No gloss enhancers? or ?residue-free? labeling
- Non-silicone, non-oily interior detailers
- Matte-specific cleaners for vinyl wrap (helps prevent streaking)
Protection options
- Matte wrap sealants: Can make cleaning easier, but test first to ensure it doesn?t add sheen.
- Interior coatings: Some trim coatings can change the appearance?use only products that explicitly state matte-safe behavior.
Common Mistakes to Avoid (and How to Fix Them)
- Skipping final IPA wipe: Causes edge lift and bubbles. Fix: peel back, clean again, reapply with post-heat.
- Over-stretching matte vinyl: Leaves lighter ?stress? patches. Fix: redo that section; matte discoloration usually won?t disappear.
- Wrapping textured plastic without planning: Some textures trap air and reduce contact. Fix: consider paint or a texture-friendly film; use more heat and pressure carefully.
- Heavy paint coats: Leads to runs and uneven sheen. Fix: sand smooth after curing and respray in light coats.
- Using shiny protectants on matte: Creates blotchy shine. Fix: strip with a matte-safe cleaner and stick to residue-free products.
- Reinstalling too soon: Fresh paint or wrap edges can shift. Fix: allow proper cure, then reinstall with clean hands/gloves.
Maintenance: Keeping Matte Looking Matte
Matte finishes look best when they?re clean, dry, and free of dressings. Build a simple routine:
Weekly or bi-weekly quick clean
- Dust with a clean, dry microfiber (light pressure).
- Use a residue-free interior cleaner for spots.
- Follow with a second dry microfiber to prevent streaks.
Dealing with fingerprints and skin oils
- Use a matte-safe cleaner and a short-nap microfiber.
- Avoid scrubbing?use gentle passes and let the cleaner do the work.
Heat management
Interior wraps and coatings last longer when the cabin isn?t baking daily.
- Use a windshield sunshade.
- Park in shade when possible.
- Consider ceramic tint (where legal) to reduce interior heat load.
Real-World Example: Piano Black Console to Matte ?OEM Sport? Look
A common beginner project is converting scratch-prone piano black around the shifter and cupholders.
- Challenge: High-touch area, lots of curves, visible edges.
- Best approach: Remove the console trim, use cast matte vinyl, and plan a hidden seam near the underside.
- Key success detail: Post-heat every edge around cupholders and wipe down with IPA before installing.
- Maintenance win: Switch from glossy interior sprays to a residue-free matte cleaner to prevent patchy shine.
FAQ: Matte Finish Conversion for Beginners
Will matte wrap inside the car peel in hot weather?
It can if edges weren?t cleaned properly, corners weren?t post-heated, or the vinyl was overstretched. With proper prep, cast vinyl and correct post-heat, matte interior wrap holds up well to normal cabin temperatures.
Is matte paint or matte wrap better for interior trim?
Wrap is usually better for beginners because it?s reversible and doesn?t require curing space or overspray control. Paint can look more uniform on complex textures and small parts, but prep and cure time matter a lot.
How do I clean matte interior trim without making it shiny?
Use a residue-free cleaner designed for interiors or wrap, avoid silicone/oily dressings, and wipe gently with clean microfiber towels. Aggressive rubbing is what often creates shiny burnished spots.
Can I wrap over existing scratches on glossy trim?
Light swirls often disappear under matte wrap, but deeper scratches can telegraph through. If your fingernail catches the scratch, consider lightly sanding/smoothing the area (and cleaning thoroughly) before wrapping.
What sheen should I choose: matte or satin?
Matte gives the lowest glare and the most ?stealth? look, but it can show burnishing over time on high-touch points. Satin is a great compromise for daily drivers: still low-gloss, often easier to keep looking uniform.
Next Steps: Your Beginner Matte Conversion Game Plan
If you want the best chance of a clean, long-lasting matte interior finish, follow this simple plan:
- Pick one test area first (small trim piece or a simple console panel).
- Remove the part for clean edges and safer trimming.
- Clean and final-wipe with IPA before any wrap or paint touches the surface.
- Use controlled heat and avoid over-stretching matte vinyl.
- Post-heat edges and let everything cure/set before reassembly.
- Maintain with matte-safe products so the finish stays consistent.
Want to keep going? Explore more interior trim, cleaning, wrap, and detailing guides on carinteriormix.com to build a matte look that feels factory?not flimsy.