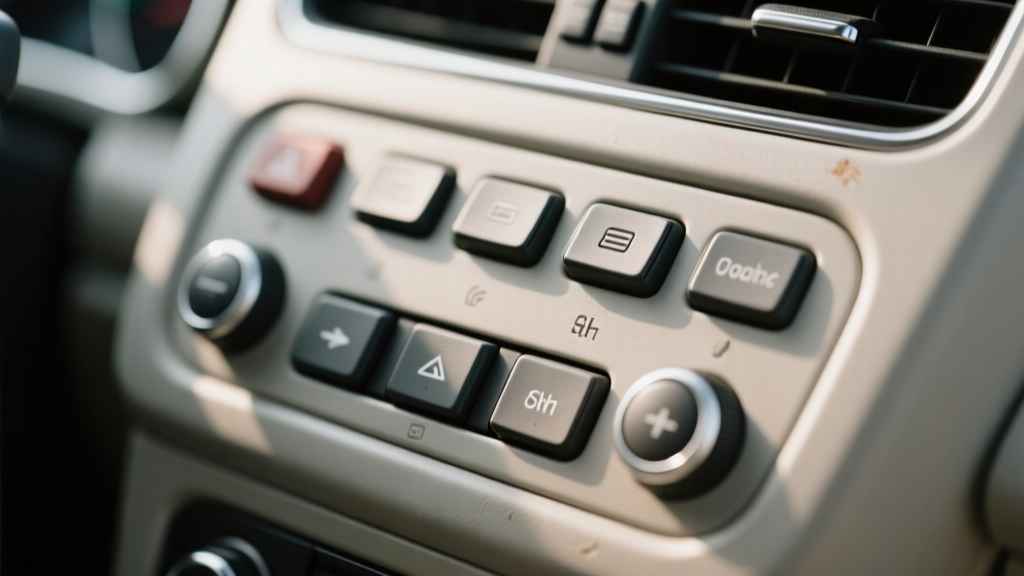
Commercial Vehicle Button Maintenance (2026)
Buttons are the most frequently touched parts of a commercial vehicle interior. From window switches and HVAC controls to hazard lights, PTO toggles, infotainment buttons, and steering-wheel controls, they get pressed hundreds of times per shift. That constant use?often with dirty gloves, dusty hands, or sanitizer-wet fingers?adds up fast.
When buttons start sticking, double-pressing, feeling ?mushy,? or failing outright, it?s more than a nuisance. For fleet operators, downtime costs money. For owner-operators, a broken defrost switch or hazard button can turn into a safety issue. The good news: most button problems begin with contamination, wear, and neglected cleaning?issues you can prevent with a simple routine and the right products.
This guide covers practical commercial vehicle button maintenance tips, step-by-step cleaning methods, product recommendations, and common mistakes to avoid. Whether you drive a work van, box truck, pickup used for job sites, or a heavy-duty rig, the principles are the same: keep grime out, keep moisture controlled, and treat plastics and electronics with respect.
Why Commercial Vehicle Buttons Fail (And What You Can Prevent)
Commercial interiors live harder lives than most passenger cars. More cycles, more contaminants, and more temperature swings mean button assemblies age faster.
Most common causes of button issues
- Dirt and grit intrusion: Fine dust, sand, drywall powder, cement dust, and road grime work into the gaps around buttons and switches.
- Sticky residues: Coffee, soda, energy drinks, hand lotion, sunscreen, food grease, and ?overspray? from interior dressings create tacky surfaces that trap more dirt.
- Moisture exposure: Wet gloves, rainwater, snow melt, and aggressive liquid cleaners can seep into switch housings.
- Chemical damage: Harsh degreasers, bleach, strong alcohol, and ammonia-based glass cleaners can haze, crack, or strip the button legends.
- Wear and fading: High-touch icons (defrost, fan speed, volume) can wear off, especially on soft-touch coatings.
Real-world examples
- Work van HVAC knobs: Construction dust mixes with interior protectant overspray, forming a paste that makes fan speed knobs stiff or inconsistent.
- Steering wheel buttons: Hand sanitizer residue makes buttons feel gummy, and repeated cleaning with strong alcohol can dull the icons.
- Power window switches on pickups: Mud and grit from open windows and dirty hands can cause intermittent contact or ?bounce? (multiple inputs per press).
Button Types You?ll Find in Commercial Vehicles (Cleaning Approach Matters)
Not all buttons are built the same. Understanding what you?re dealing with helps you choose safe products and avoid damage.
- Hard plastic buttons (ABS): Common on HVAC panels and dash controls; usually durable but can scratch and haze with harsh chemicals.
- Soft-touch coated buttons: Found on newer dashboards and infotainment; more sensitive to solvents and aggressive scrubbing.
- Rubber membrane buttons: Seen on older radios, some auxiliary panels, and aftermarket switch pods; can degrade or get tacky with solvents.
- Toggle switches with boots: Common for upfit controls (light bars, PTO, auxiliary power); boots protect against dust but trap grime around the base.
- Capacitive touch panels: Less common in heavy commercial use but increasing; require gentle cleaning and minimal moisture.
Tools and Products That Actually Work
You don?t need a full detail shop to keep buttons working. You do need products that clean effectively without flooding electronics or stripping coatings.
Recommended tools
- Soft detailing brushes: One small brush for tight seams and one medium brush for panels.
- Microfiber towels: Lint-free, dedicated for interior use.
- Cotton swabs or foam swabs: For edges around individual buttons.
- Compressed air (optional): Canned air or a low-pressure air blower to lift dust from crevices.
- Plastic-safe interior cleaner: Non-greasy, residue-free formulas are ideal.
Product comparisons (what to choose and why)
- Interior APC (all-purpose cleaner) diluted properly: Great for heavy grime on surrounding trim, but avoid soaking buttons. Choose a mild, interior-rated APC.
- Dedicated interior cleaner: Best all-around for dash buttons?cleans oils and grime without leaving slick residue.
- 70% isopropyl alcohol (use sparingly): Useful for disinfecting high-touch areas, but frequent use can dry plastics or fade legends. Spot use only and never flood switches.
- Plastic protectant (matte finish): Helps reduce dust attraction and UV damage. Avoid shiny, oily dressings that migrate into button seams.
- Electrical contact cleaner (advanced use): Only for diagnosed electrical contact issues and only if the product is plastic-safe. Use carefully and follow manufacturer directions.
Step-by-Step: Routine Button Cleaning (Weekly or Biweekly)
This is the safest method for most commercial vehicle button maintenance. It focuses on removing oils and debris without pushing moisture into the switch assembly.
- Power down the vehicle: Turn the ignition off. If you?re working around the steering wheel, consider waiting a few minutes so systems fully sleep.
- Dry dust first: Use a soft brush to loosen dust around button edges. Follow with a microfiber towel or a quick burst of compressed air (keep distance and use low pressure).
- Apply cleaner to the towel, not the buttons: Mist your microfiber lightly. Avoid spraying directly into seams?this is where fluid intrusion happens.
- Wipe the button faces: Use gentle pressure. For textured plastics, wipe in multiple directions to lift grime from the grain.
- Detail the edges: Use a dampened swab (not dripping) to trace the perimeter of each button and remove packed-in grime.
- Dry immediately: Buff with a dry microfiber to remove remaining moisture and prevent streaking.
- Optional: apply a matte protectant to surrounding trim: Lightly apply to a towel and wipe around (not into) buttons. Keep it minimal.
Quick tip for fleet vehicles
- Keep a small kit in the cab: a travel-size interior cleaner, two microfiber towels, and a small brush. A 3-minute wipe-down at the end of a shift prevents the ?months of buildup? problem.
Step-by-Step: De-Sticking a Sticky Button (Without Causing Damage)
Sticky buttons are usually residue-related. The goal is to dissolve and remove the grime without forcing liquid into the switch.
- Identify the source: Sugary drinks leave tacky residue; greasy fingerprints attract dust; interior shine products can gum up seams.
- Start with a barely damp microfiber: Use a dedicated interior cleaner. Wipe the button face and surrounding trim.
- Work the button gently: Press it repeatedly while wiping around the edges to help break the seal of residue.
- Use a swab for the seam: Lightly dampen a swab, trace the perimeter, and rotate the swab as it picks up grime.
- Dry and test: Use a dry towel, then test function after a few minutes.
- If it?s still sticking: Repeat once. If it continues to bind, stop and consider professional diagnosis?there may be internal damage or a broken button retainer.
Deep Cleaning Around Switch Panels (Monthly or Quarterly)
If your vehicle sees job sites, farms, warehouses, or dusty routes, plan for periodic deeper cleaning.
Best practice approach
- Clean ?outside-in?: Start with surrounding trim and seams so you?re not dragging grit onto button legends.
- Use brushes carefully: Soft bristles can reach into textured trim without scratching.
- Control moisture: Two-towel method works well?one lightly damp towel for cleaning, one dry towel for immediate drying.
When to consider panel removal
Removing trim panels to access switches can be helpful, but it?s also where clips break and wiring gets damaged. Consider panel removal only if:
- A switch is intermittently failing and you need to check connectors.
- There?s evidence of liquid intrusion behind the panel.
- You have trim tools, a service manual, and patience.
Disinfecting High-Touch Buttons (Without Destroying the Icons)
Many commercial drivers use disinfectant wipes daily. That?s understandable, but constant exposure to strong chemicals can fade symbols and make plastics brittle.
Safer disinfection habits
- Choose interior-safe disinfectant wipes: Avoid bleach-heavy products unless absolutely necessary.
- Don?t let liquids pool: Wring out excess moisture and wipe lightly.
- Follow with a dry wipe: This reduces chemical dwell time on delicate coatings.
- Rotate cleaning zones: Focus disinfection on the highest-touch controls (steering wheel buttons, radio volume, HVAC) rather than saturating the entire dash daily.
Preventive Maintenance: Make Buttons Last Longer
Button maintenance isn?t just cleaning?small habits reduce wear and contamination.
- Keep hands/gloves cleaner: A small hand-cleaning routine before driving (or swapping gloves) cuts grime dramatically.
- Control interior shine products: Spray protectant into a towel away from the dash, then apply. Overspray is a major cause of gummy seams.
- Use cabin air filtration: Replace cabin filters on schedule; a clogged filter increases dust and can contribute to dirty control surfaces.
- Manage spills immediately: If coffee or soda hits a center stack, blot first?don?t smear. Then clean with minimal moisture.
- Park smart when possible: Sun and heat accelerate plastic aging. Shade helps preserve button coatings and legends.
Common Mistakes to Avoid
- Spraying cleaner directly onto buttons: The #1 way to push liquid into switch housings.
- Using harsh solvents: Acetone, lacquer thinner, strong degreasers, and high-strength alcohol can strip coatings and erase icons.
- Scrubbing with abrasive pads: Magic-eraser-style sponges can remove grime?and the printed legends right along with it.
- Overusing glossy dressings: They attract dust, feel greasy, and migrate into seams where they trap grit.
- Ignoring early symptoms: A slight stickiness today can become a failed switch later, especially if moisture and dirt combine.
Troubleshooting: When Cleaning Isn?t Enough
If a button still behaves badly after careful cleaning, you may be dealing with a mechanical or electrical issue.
Signs of a deeper problem
- Intermittent function: Works sometimes, fails other times even when clean and dry.
- Double-press or ghost inputs: A single press triggers multiple actions.
- Button feels loose or crooked: Broken retainer clips or worn pivots.
- Backlight failures: Could be LED, circuit board, or connector issues.
- After a spill: Especially sugary drinks?residue inside the switch can corrode contacts over time.
What to do next
- Check for recalls or TSBs: Some vehicles have known switch panel issues.
- Inspect connectors (if accessible): Look for corrosion or loose plugs.
- Consider replacing the switch module: Many modern vehicles use integrated switch packs; replacement can be more reliable than trying to refurbish internal contacts.
- Use a professional detailer or technician: If the control relates to safety systems, lighting, or drivetrain functions, don?t experiment with aggressive chemicals.
FAQ: Commercial Vehicle Button Maintenance
How often should I clean buttons and switches in a work truck or van?
For most commercial vehicles, a light wipe-down weekly (or every 1?2 weeks) works well, with a deeper clean monthly. If you?re on dusty job sites or handling dirty materials, increase frequency?small cleanings prevent buildup that causes sticking.
Can I use interior disinfectant wipes on my dashboard buttons every day?
You can, but choose interior-safe wipes and avoid soaking. Daily use of harsh disinfectants can fade icons and dull soft-touch coatings. A good compromise is daily disinfection of the highest-touch buttons and a gentler interior cleaner for routine cleaning.
What?s the safest way to clean around window switches and steering wheel buttons?
Apply cleaner to a microfiber towel (not directly to the switch), wipe gently, then detail the edges with a lightly damp swab. Immediately dry with a second towel to keep moisture out of the switch housing.
My HVAC buttons feel sticky?should I use contact cleaner?
Not as a first step. Most sticky HVAC buttons are residue on the outside or packed grime around the edges. Try controlled cleaning and drying first. Contact cleaner is for confirmed electrical/contact issues and should be plastic-safe and used carefully.
Why are my button icons fading, and can I prevent it?
Fading usually comes from abrasion (rings, rough gloves, aggressive scrubbing) and chemical damage (strong alcohol, harsh cleaners). Prevent it by using gentle interior cleaners, soft towels, minimal pressure, and avoiding abrasive sponges.
Is it worth applying protectant near buttons?
Yes?if it?s a matte, non-greasy protectant used sparingly and applied to a towel first. Avoid shiny silicone-heavy dressings that migrate into seams and attract dust.
Actionable Next Steps
- Build a simple routine: Dust + wipe buttons weekly, deep clean monthly.
- Switch to safer products: Use a residue-free interior cleaner and avoid spraying directly into seams.
- Watch for early warning signs: Stickiness, intermittent response, or loose feel?address them before downtime hits.
- Create a cab cleaning kit: Microfibers, a small brush, and a travel-size interior cleaner make maintenance easy on the road.
If you want more practical interior care tips?from cleaning high-touch plastics to keeping work vehicles looking sharp?explore more guides on carinteriormix.com.