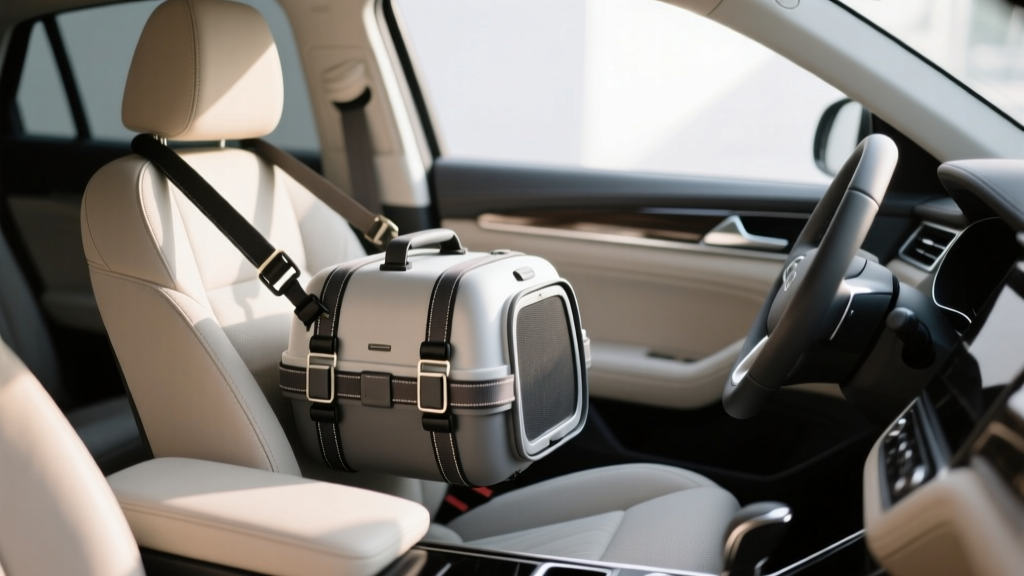
Cat Carrier Mounting Troubleshooting Guide - CarInteriorMix
Traveling with a cat in the car is one of those things that sounds simple until you try to do it safely. The carrier slides on the seat, the strap angles are awkward, the handle digs into upholstery, and your cat?s stress level rises with every squeak and wobble. If the carrier isn?t mounted correctly, you?re not just dealing with noise?you're risking a sudden shift in a hard brake, a tipped carrier in a turn, or a carrier that becomes a projectile in a collision.
This guide is designed for car owners who care about interior protection and real safety. You?ll learn how to mount a cat carrier on a seat or cargo area, how to diagnose common mounting problems, and how to fix them with simple adjustments. Whether you drive a compact hatchback, a sedan with tight rear seat belts, or an SUV with a big cargo area, the goal is the same: a stable carrier, secure tie-downs, and a calmer ride.
Throughout this troubleshooting guide, you?ll see practical setups, step-by-step instructions, and product recommendations that make mounting easier?without turning your interior into a web of straps.
Safety First: What ?Secure Mounting? Really Means
A properly mounted cat carrier should meet three benchmarks:
- It doesn?t move more than an inch or two under normal driving inputs (braking, turning, bumps).
- It can?t tip over even if the car corners sharply or you brake hard.
- The mounting method doesn?t damage the interior (seat fabric, leather, trim, door panels, cargo plastics).
Also consider airflow and temperature. A carrier wedged tightly against a door or covered with blankets can trap heat and reduce ventilation. Stability matters, but so does comfort.
Choose the Best Mounting Location in Your Vehicle
Option A: Rear Seat (Most Common and Usually Best)
The rear seat is typically the easiest place to secure a carrier because you have seat belts, flatter cushions, and a safer distance from airbags. For most cars, the rear seat passenger-side is a sweet spot: easier curbside loading and less driver distraction.
Best for: Small to medium carriers, sedans, coupes, and compact SUVs.
Option B: Cargo Area (SUVs, Wagons, Hatchbacks)
The cargo area can be excellent when you have solid tie-down points, a flat floor, and room to keep the carrier away from shifting cargo. The big advantage: you can often create a dedicated ?pet zone.?
Best for: Larger hard-sided carriers, multi-cat setups, and longer trips.
Option C: Front Seat (Not Recommended for Most Setups)
Front-seat mounting is generally a last resort due to airbags and the temptation for the cat to be near the driver. If you must use the front seat, move the seat back and keep the carrier positioned so it won?t interfere with controls. Avoid placing any carrier in front of an active airbag whenever possible.
Carrier Types and How They Affect Mounting
- Hard-sided carriers: More stable and protective, usually easier to strap down. Downsides: bulkier and can slide if the bottom is smooth.
- Soft-sided carriers: Lighter and easier to fit in tight spaces, but can deform under belt tension and tip more easily.
- Expandable soft carriers: Great for comfort when parked, but expansions should stay zipped during driving to avoid instability.
If your carrier has a molded base, integrated belt loops, or a ?seat belt channel,? mounting becomes significantly easier.
Step-by-Step: Secure Mounting on the Rear Seat with a Seat Belt
What you?ll need
- Your cat carrier (preferably with a firm base)
- Rear seat belt (lap/shoulder belt)
- Optional: non-slip mat or thin rubber shelf liner
- Optional: a small towel or seat protector to prevent scuffs
Steps
- Prep the seat surface. Place a non-slip mat where the carrier will sit. This reduces sliding and lets you use less belt tension.
- Position the carrier. Place it flat on the seat with the door facing the side you?ll use for loading. Keep it away from the edge of the seat so it can?t roll off.
- Route the seat belt. If your carrier has belt guides/loops, run the seat belt through them. If not, wrap the lap portion around the carrier?s midsection (not over mesh panels).
- Buckle and tighten. Pull the shoulder belt to remove slack. If your car has a locking retractor (common in many vehicles), slowly pull the belt all the way out and let it retract to ?lock,? then tighten.
- Check for movement. Push the carrier side-to-side and forward. If it slides or tips easily, adjust angle, add a non-slip layer, or move it closer to the seatback.
- Confirm door clearance. Make sure the carrier door can?t pop open against a seat belt edge or buckle.
Real-world example: If you drive a sporty sedan with bolstered rear seats, the carrier may rock on the seat contour. A thin rubber mat plus positioning the carrier closer to the seatback typically stops the rocking without over-tightening the belt.
Step-by-Step: Mounting in the Cargo Area Using Tie-Downs
What you?ll need
- Carrier
- 2?4 adjustable straps (cam buckle straps are ideal; avoid aggressive ratchets near plastic carriers)
- Non-slip cargo mat or rubber liner
- Access to factory cargo hooks or D-rings
Steps
- Clear the area. Remove loose items that can hit the carrier (grocery bins, tools, sports gear).
- Lay down a grippy mat. A rubber cargo liner dramatically reduces sliding and noise.
- Set the carrier orientation. Place the carrier so the door is accessible, but not pressed against a panel that can rattle.
- Attach straps to tie-down points. Use two straps minimum: one to prevent forward movement and one to prevent lateral movement.
- Tension gradually. Tighten just enough to keep the carrier stable. Over-tension can deform soft carriers or stress plastic shells.
- Test drive check. After a short drive, re-check strap tension; new straps and mats can settle.
Pro tip: If your cargo tie-down points are low, run straps across the carrier?s midline rather than near the top. Lower strap geometry reduces tipping.
Troubleshooting: Common Mounting Problems and Fixes
Problem 1: The carrier slides on the seat
Likely causes: smooth carrier base, leather seats, not enough friction, belt routed too high.
Fixes:
- Add a non-slip mat under the carrier (rubber shelf liner works surprisingly well).
- Route the belt lower around the carrier to reduce ?rolling? forces.
- Move the carrier closer to the seatback to reduce leverage.
- If available, engage the locking seat belt retractor for a tighter hold.
Problem 2: The carrier tips during turns
Likely causes: tall carrier profile, strap/belt too high, carrier placed on a seat contour or edge.
Fixes:
- Lower the belt/strap path so it cinches the center of mass.
- Use two-point stabilization: seat belt plus a secondary strap to a headrest post (only if it doesn?t interfere with headrest safety and the strap is stable).
- Switch to a more rectangular, lower-profile carrier for vehicles with heavily bolstered seats.
Problem 3: Seat belt won?t stay tight
Likely causes: belt retractor not in locking mode, belt routed over compressible soft panels, buckle sitting against the carrier at an angle.
Fixes:
- Try the locking retractor method: pull belt fully out, then let it retract while holding tension.
- Re-route the belt over a firm section of the carrier, not mesh.
- Rotate or reposition the carrier so the buckle isn?t forced into a twisted angle.
Problem 4: Rattles, squeaks, and vibration noise
Likely causes: plastic-on-plastic contact, buckle tapping the carrier, loose straps, carrier feet vibrating on seat material.
Fixes:
- Place a thin towel or felt pad between the buckle and carrier shell.
- Tighten straps evenly to eliminate slack ?snap? sounds.
- Add a rubber mat under the carrier to damp vibration.
Problem 5: The carrier blocks rear visibility or cargo access
Fixes:
- Move the carrier to the rear seat if it?s tall.
- In the cargo area, position it sideways so height doesn?t stack in the center of your view.
- Consider a compact, airline-style carrier if you need better sight lines.
Problem 6: Cat becomes more anxious after mounting changes
Sometimes a ?more secure? mount can feel tighter, louder, or less ventilated to your cat.
- Keep the carrier level?tilt increases stress.
- Maintain ventilation; don?t press mesh sides against seatbacks or door panels.
- Reduce motion: stability often improves calmness more than any cover or spray.
Product Recommendations and Comparisons (What Actually Helps)
Non-slip layers (high impact, low cost)
- Rubber shelf liner: Budget-friendly, easy to cut, excellent grip on leather or cloth seats.
- Vehicle cargo liner or rubber mat: Best for SUVs/hatchbacks; also protects against litter, fur, and accidents.
Straps: cam buckle vs. ratchet
- Cam buckle straps: Great control, less risk of over-tightening. Ideal for pet carriers.
- Ratchet straps: Very strong but easy to overdo; can crack plastic carrier shells or crush soft carriers. Use only if you?re careful and have a robust hard-sided carrier.
Carrier features worth paying for
- Built-in seat belt loops or channels (reduces awkward routing)
- Firm, flat base (less rocking)
- Multiple entry points (top load helps with anxious cats)
- Crash-tested designs (if available in your region and within budget)
Quick comparison tip: If your main issue is sliding, don?t replace the carrier first?add grip (mat) and correct belt geometry. If your main issue is tipping, a lower-profile carrier shape often solves it immediately.
Common Mistakes to Avoid
- Mounting the carrier loosely ?for comfort.? Extra movement usually increases stress and can cause injury in a sudden stop.
- Routing the belt over mesh. Mesh compresses and loosens, and it can damage the carrier.
- Over-tightening soft-sided carriers. Crushing the frame can reduce airflow and deform zippers.
- Letting the buckle rest against the carrier. It creates noise and can work itself into a weird angle that loosens over time.
- Ignoring the seat shape. Bolsters and sloped cushions can make a carrier rock; position and a non-slip layer matter more than brute-force tension.
- Putting the carrier where airbags can deploy into it. If you must use the front seat, think carefully about airbag locations and consult your vehicle manual.
Extra Practical Tips for a Cleaner, Calmer Ride
- Protect the interior: Use a washable seat protector or towel under the carrier to catch fur and any accident cleanup.
- Pre-trip ?mounting rehearsal?: Do one short drive around the block, then re-check belt tension and carrier position.
- Reduce visual stress: Some cats prefer a light cover over part of the carrier?just keep ventilation sides open.
- Load smart: Place a familiar blanket inside the carrier (not under it) so scent stays with the cat, not between carrier and seat where it could reduce grip.
FAQ: Cat Carrier Mounting Questions
What?s the safest place in the car for a cat carrier?
For most vehicles, the rear seat is the safest and easiest place to secure a carrier using a seat belt. In SUVs and wagons, the cargo area can also be excellent if you have solid tie-down points and can prevent shifting cargo from contacting the carrier.
Can I use the LATCH/ISOFIX anchors to secure a cat carrier?
It?s usually not recommended unless the carrier or restraint system is specifically designed for that purpose. LATCH/ISOFIX anchors are engineered and rated for child restraints with specific attachment hardware and load paths. A seat belt or cargo tie-down method is typically more appropriate for carriers.
How tight should the seat belt or strap be?
Tight enough that the carrier doesn?t slide or tip with firm hand pressure, but not so tight that it deforms the carrier, crushes soft panels, or restricts ventilation. If you see the carrier bending or the zipper line distorting, back off and improve grip with a non-slip mat instead.
My carrier doesn?t have belt loops. What?s the best workaround?
Use the lap portion of the seat belt around the carrier?s midsection (over firm panels), add a non-slip mat underneath, and position the carrier close to the seatback. For cargo areas, two cam buckle straps around the carrier (midline) to factory D-rings works well.
Why does the carrier still move even when the belt feels tight?
Usually it?s belt geometry or lack of friction. If the belt rides high, the carrier can roll or pivot. Lower the belt path, move the carrier back against the seatback, and add a rubber liner beneath it. Those changes often reduce movement more than cranking down belt tension.
Should I place the carrier on the floor behind the front seat?
It can work in some cars if the carrier fits snugly and stays level, but it?s harder to secure properly and can reduce airflow. If you try it, make sure the carrier can?t slide forward under braking and that it isn?t being squeezed into an uneven angle by the seat rails.
Next Steps: Lock In a Stable Setup Before Your Next Trip
Start by choosing the best location (rear seat or cargo area), then focus on the three stability basics: friction (non-slip mat), good strap geometry (midline routing), and consistent tension (locking belt or cam buckle straps). Do a short test drive, listen for rattles, re-check tightness, and make one adjustment at a time so you can tell what actually fixed the issue.
If you want to go further, consider upgrading to a carrier with belt channels and a firm base, and keep a simple ?pet travel kit? in the car: rubber liner, a towel, and a pair of cam buckle straps.
For more practical car interior tips?seat protection, cargo organization, odor control, and travel-ready setups?explore more guides on carinteriormix.com.