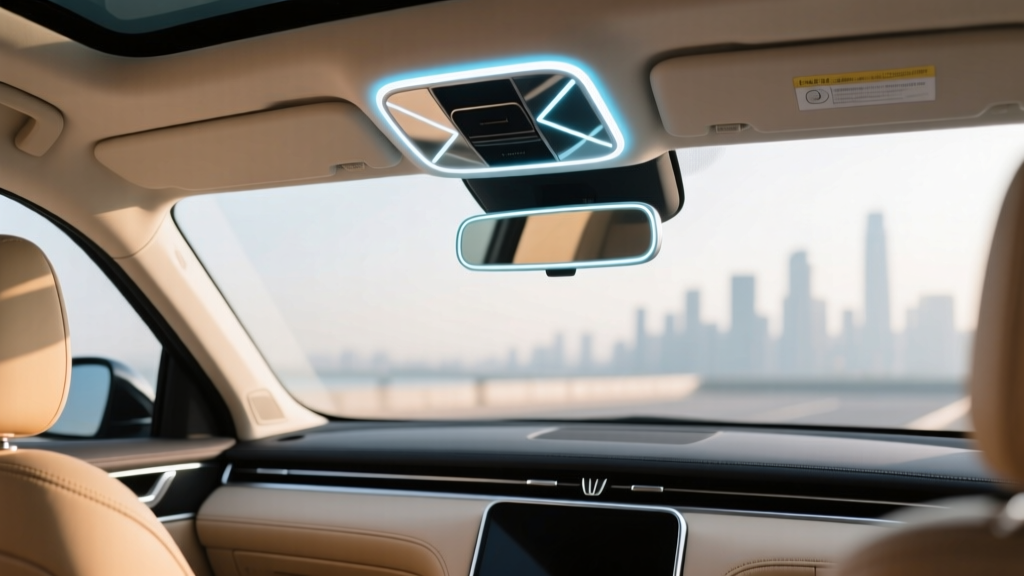
Lighted Mirror Installation: Custom Techniques (2026)
A well-placed lighted mirror can make your cabin feel more upscale, more functional, and safer to use at night. Whether you?re upgrading a sun visor vanity mirror, adding a lighted rearview mirror, or building a custom ?touch-to-light? setup for a show car, the difference is immediately noticeable: clearer visibility, better grooming lighting, and a more refined interior experience.
What makes lighted mirror installs tricky is that they sit right at the intersection of aesthetics and electrical reliability. You?re working with tight spaces, delicate trim, headliners, and sometimes airbags?plus the lights themselves can introduce glare, rattles, or battery drain if they?re not engineered into the car properly. This guide walks through advanced customization techniques that go beyond a simple plug-and-play swap, with real-world tips that help you get an OEM-clean result.
Expect detailed planning advice, wiring strategies, dimming options, and fit-and-finish techniques that keep your installation quiet, safe, and durable. If you?ve ever installed accessories but want a more professional-level outcome, this is your roadmap.
Choosing the Right Lighted Mirror Setup (and Why It Matters)
Types of lighted mirrors commonly used in vehicles
- Sun visor vanity mirrors (LED): Best for grooming, passenger convenience, and factory-like upgrades.
- Lighted rearview mirrors: Can include auto-dimming, HomeLink, compass, backup camera display, and integrated map lights.
- Aftermarket ?Hollywood-style? visors/mirrors: Very bright, often larger, popular for show builds, but can look non-OEM if not integrated carefully.
- Custom mirror panels: Bespoke acrylic or glass mirrors with edge-lit LED strips; often used in VIP-style or demo interiors.
Lighting tech: LED vs. older bulb designs
- LED: Lower current draw, less heat, longer life, easier to dim, more consistent brightness.
- Incandescent: Warm tone, but higher heat and power draw; typically avoided for modern builds.
Color temperature and diffusion
Most owners prefer a neutral white light (around 4000K?5000K) because it looks clean and doesn?t distort skin tones. Very cool white (6000K+) can feel harsh and reflect aggressively off glass and glossy trim.
- For OEM-like ambience: 4000K?5000K with a frosted diffuser.
- For maximum clarity: 5000K with a wide diffusion lens (reduces hotspots).
- Avoid: Exposed LED points without diffusion?these cause glare and ?cheap? looking reflections.
Planning the Install: Power Sources, Switching, and Safety
Decide how the mirror will turn on
Advanced installs feel factory because the switching logic makes sense. Pick the trigger that matches how you?ll use the mirror.
- Visor open/flip switch: Best for vanity mirrors. Uses a reed switch or micro switch to activate when the cover opens.
- Door-triggered lighting: Mirror lights come on with dome/courtesy lights?great for passengers at night.
- Ignition-switched power (ACC): Prevents battery drain for mirrors that are used mostly while driving.
- Touch sensor dimmer: High-end feel; integrates brightness control and often last-state memory.
Power sourcing options (from cleanest to quickest)
- Overhead console harness: Usually the cleanest route for visor vanity or rearview mirror upgrades.
- A-pillar to fuse box (add-a-fuse): Flexible but requires careful routing and protection.
- Tap into dome light wiring: Convenient but must be done correctly to avoid flicker or BCM issues.
Electrical safety checklist
- Disconnect the negative battery terminal before running wires near airbags or headliner harnesses.
- Use an inline fuse for any new circuit (typically 1A?5A for LED mirror lighting, depending on load).
- Maintain wire strain relief at hinges, visors, and moving covers to prevent fatigue breaks.
- Avoid ?quick taps? on critical circuits; use proper crimp connectors or solder + adhesive-lined heat shrink.
Tools and Materials for a Professional-Level Result
Core tools
- Trim removal tools (nylon)
- Multimeter (for voltage, continuity, and polarity)
- Wire strippers + ratcheting crimper
- Heat gun (for heat shrink)
- Tesa cloth tape or automotive harness tape (for noise control)
Materials that make the difference
- Adhesive-lined heat shrink: Seals out moisture and adds strain relief.
- Thin-wall automotive wire: 20?22 AWG is common for low-draw LED mirror lighting.
- Micro connectors: JST-style or OEM-style connectors for serviceability.
- Foam tape/felt tape: Prevents squeaks where mirror housings meet trim.
Step-by-Step: Advanced Lighted Mirror Installation (Visor Vanity Example)
This walkthrough assumes you?re adding or upgrading a visor vanity mirror with LED lighting and a cover-activated switch. The same concepts apply to rearview mirror lighting?just adapt the mounting and power source.
Step 1: Test fit and map wire routing
- Remove the visor (typically a few screws and a clip cover).
- Inspect the headliner area for an existing visor harness. Some trims have pre-wiring even if the mirror isn?t lighted.
- Plan a routing path that avoids sharp edges and doesn?t cross airbag deployment zones.
Real-world tip: If the A-pillar has a side curtain airbag, don?t zip-tie wiring to airbag brackets or run it across the airbag curtain path. Route behind factory harnesses where possible.
Step 2: Identify your power and ground
- Use a multimeter to confirm a constant 12V (for door/dome behavior) or ACC (for ignition-on behavior).
- Find a solid chassis ground or an existing ground wire in the overhead harness.
- Add an inline fuse close to your power source if you?re creating a new feed.
Step 3: Build an OEM-style mini harness
- Measure wire length with extra slack for service loops (don?t pull wires tight).
- Crimp or solder connections and seal with adhesive-lined heat shrink.
- Wrap the harness in cloth tape to prevent rattles and match factory appearance.
- Add a connector near the visor so the visor can be removed later without cutting wires.
Step 4: Install switching (cover switch or reed switch)
- Micro switch method: Mount the switch so it closes when the cover opens. Ensure it doesn?t bind or click loudly.
- Reed switch method: Use a magnet in the cover and a reed switch in the housing for a silent, premium feel.
Pro move: Use a reed switch when you want a factory-quiet action and long-term reliability. Mechanical switches can wear or start squeaking over time.
Step 5: Add dimming and anti-flicker control (advanced)
If your LED flickers when the car is off or when the BCM does ?bulb checks,? you?ll need a smarter approach.
- PWM dimmer module: Adds brightness control and a luxury feel. Choose a low-noise unit rated for automotive voltage spikes.
- Anti-flicker capacitor module: Stabilizes LED operation when the car sends small diagnostic pulses.
- Relay isolation: Use a relay to separate the LED load from sensitive body control circuits.
Step 6: Final assembly and function test
- Reconnect the battery.
- Test all behaviors: cover open/close, door open, ignition on/off, dimmer operation.
- Verify there?s no parasitic draw beyond normal vehicle standby levels.
- Reinstall trim carefully and confirm nothing rattles during a short test drive.
Customization Techniques That Elevate the Finish
Diffusion upgrades to eliminate hotspots
- Swap clear lenses for frosted polycarbonate or add a thin diffusion film inside the mirror housing.
- Use COB LED strips for smoother light output compared to spaced diode strips.
Color matching to factory ambient lighting
If your car has ambient lighting, aim for harmony rather than competing colors. A neutral white mirror light typically pairs well with most interiors, but if you?re doing a show build, consider an RGBW controller with a dedicated ?white? channel so white actually looks white.
Glare control and placement
- Angle LEDs away from the glass surface to reduce direct reflection into eyes.
- Add a small internal visor ?hood? or lip (even 2?3 mm) to block line-of-sight glare.
- Keep rearview mirror map lights from shining onto the windshield where it can bounce back at night.
Noise-proofing and vibration resistance
- Wrap wire runs with cloth tape anywhere they touch trim.
- Add felt tape between mirror housings and plastic trim to prevent squeaks.
- Use thread locker on mirror mounting screws where appropriate (avoid on plastic threads unless specified).
Product Recommendations and What to Look For
Lighted visor vanity mirror kits
- Best for OEM-like installs: Vehicle-specific visor kits with matching texture and mounting points.
- Best for customization: Universal LED vanity mirrors with separate diffuser lenses and room for a reed switch.
LED modules and strips
- COB LED strips: Smooth, continuous light?excellent for premium finish.
- Rigid LED boards: Consistent mounting and heat management; less prone to peeling than adhesive strips.
Dimmers and controllers
- 12V PWM dimmer with memory: Ideal when you want a consistent brightness every time.
- Touch capacitive dimmer: Clean look, fewer moving parts.
- Automotive-rated modules: Look for wide input voltage tolerance (to handle charging voltage) and protections for spikes.
Wiring hardware
- Add-a-fuse (fuse tap): Helpful if you?re pulling power from the fuse box?choose the correct style (mini, low-profile mini, micro2).
- OEM-style connectors: Makes the install serviceable and avoids cutting factory wiring when possible.
Common Mistakes to Avoid
- Skipping the fuse: Even low-draw LEDs can short?fusing prevents melted wiring and bigger problems.
- Using the wrong ground: Poor grounds cause flicker and intermittent operation. Verify ground quality with a multimeter.
- Routing wires across airbag paths: Dangerous and can interfere with deployment. Respect SRS components and routing rules.
- Ignoring BCM pulse behavior: Some cars send tiny voltage pulses that make LEDs glow faintly. Plan for anti-flicker solutions.
- Overly bright LEDs: More light isn?t always better. Too bright causes glare and makes the cabin feel harsh at night.
- Loose hardware or unpadded trim contact: Leads to squeaks and rattles that ruin the ?factory? feel.
FAQ: Advanced Lighted Mirror Installation
Will a lighted mirror drain my battery?
Not if it?s wired and switched correctly. Most LED mirrors draw very little power, but a poorly wired constant-on circuit or a faulty switch can create parasitic draw. Use an ignition-switched source or a proper trigger, and confirm standby draw after installation.
Why do my LED mirror lights flicker or glow when the car is off?
Many modern vehicles use body control modules that send small diagnostic pulses through lighting circuits. LEDs can react to those pulses. An anti-flicker module, relay isolation, or a proper dimmer designed for automotive use typically fixes it.
Can I tap power from the dome light for a vanity mirror?
Yes, and it?s common for clean overhead installs. The key is making solid connections, adding appropriate fusing if you?re creating a new branch, and ensuring your added load doesn?t confuse the vehicle?s lighting control strategy.
What color temperature looks most OEM?
Neutral white in the 4000K?5000K range usually blends best with factory interior lighting and avoids the harshness of very cool white. If your cabin lighting is warm, aim closer to 3500K?4000K.
Do I need a relay for a lighted mirror?
Often no, especially for simple visor lights. You may want a relay if you?re isolating sensitive BCM circuits, powering multiple mirrors, adding extra lighting zones, or troubleshooting flicker caused by control modules.
Is it safe to run wires down the A-pillar?
It can be safe if you route alongside factory wiring and away from side curtain airbags and their deployment path. Never attach wiring to airbag components. When in doubt, use the overhead console area or follow OEM harness routing points.
Next Steps: Build an OEM-Clean, Reliable Lighted Mirror Setup
Start by choosing the mirror style and switching behavior that matches how you actually use the cabin?cover-activated for vanity use, door-triggered for convenience, or ignition-switched for worry-free power management. Then focus on the details that separate a basic install from a professional one: fused power, proper connectors, rattle-proof harness wrapping, diffusion for smooth lighting, and a flicker-free electrical design.
If you?re planning multiple interior upgrades (ambient lighting, overhead console work, dash cams, radar detectors), consider building a small overhead accessory harness with a dedicated fused feed and labeled connectors. It keeps future installs clean and prevents the ?spaghetti wiring? problem that shows up later as squeaks and intermittent electrical issues.
For more interior upgrade walkthroughs, wiring tips, and OEM-style customization ideas, explore the latest guides on carinteriormix.com.