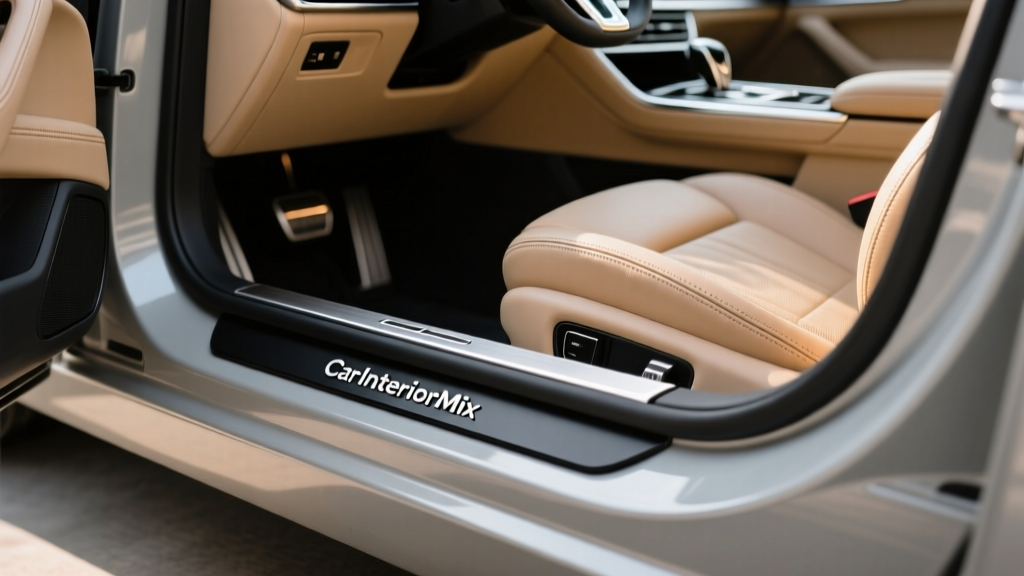
Door Sill Plate Installation: Custom Techniques (2026)
Door sill plates do more than cover a scuffed threshold. They?re one of the first things you (and your passengers) see when the door opens?right at eye level and in the path of shoes, bags, and gear. A well-installed, properly customized sill plate can elevate the cabin?s ?finished? look while protecting paint and trim in one of the most abuse-prone areas of the car.
Part 1 typically covers basics like sizing, surface prep, and straightforward adhesive installs. This Part 2 guide focuses on advanced customization techniques: integrating lighting cleanly, using templates for precision fitment, working with carbon fiber or stainless without damaging finishes, and ensuring long-term durability in heat, cold, water, and road salt. These are the same refinements installers use to make aftermarket sills look factory?and stay that way.
If you?re a hands-on owner or an enthusiast chasing a cleaner, more premium interior presentation, the details in this guide will help you avoid peeling edges, flickering LEDs, misaligned badges, and other headaches that show up weeks after installation.
Planning Like a Pro: Fitment Strategy and Design Choices
Choose the right style for your use case
- Daily driver, high foot traffic: Brushed stainless, textured aluminum, or rubberized step covers for slip resistance and scratch hiding.
- Show car or luxury build: Illuminated acrylic, mirror-polished stainless, or layered carbon fiber with clear coat.
- Off-road / winter climates: Corrosion-resistant materials (316 stainless, anodized aluminum), strong edge sealing, and drainage-friendly designs.
Measure beyond length: map the ?active? contact zone
Many owners measure only the visible flat area and forget the real contact points?heel strikes near the B-pillar, toe scuffs near the front hinge side, and the outer lip where people pivot out. Use painter?s tape to mark:
- Where your foot naturally lands when getting in
- Where passengers pivot when exiting
- Any raised ribs, clips, or trim seams that can telegraph through a thin plate
Create a cardboard or vinyl template first
For custom or universal door sill plates, a template saves money and prevents misalignment. Cardboard works, but thin adhesive vinyl (or masking film) is even better because it conforms to curves.
- Clean the sill area quickly (doesn?t need final prep yet).
- Apply masking film or painter?s tape over the area.
- Trace the boundary you want with a fine marker.
- Peel the film and transfer to cardboard for stiffness.
- Test fit and refine until you?re happy.
Real-world example: On many SUVs, the sill trim widens toward the rear. A universal straight plate can look ?off? unless you taper the template slightly or choose a stepped design that visually matches the factory shape.
Advanced Surface Prep: Making Adhesion Last Through Heat, Water, and Salt
Understand what you?re bonding to
Door sills may be painted metal, textured plastic, or a factory scuff plate. Each surface needs a different prep approach:
- Painted metal: Best adhesion when wax-free and lightly decontaminated.
- Textured plastic: Often lower surface energy; benefits from adhesion promoter and higher-tack tape.
- Existing OEM scuff plate: Some have anti-scratch coatings that resist bonding; scuff lightly only if you?re willing to risk cosmetic change.
Step-by-step: professional-grade prep process
- Wash and dry: Use mild soap and water, then dry thoroughly.
- Degrease: Use 70% isopropyl alcohol (IPA) on a lint-free towel. Follow with a dry towel.
- Optional decontamination: If the sill is painted and feels gritty, use a clay bar or synthetic clay mitt.
- Adhesion promoter (when needed): For textured plastic or cold climates, apply a thin layer of 3M Adhesion Promoter 06396 in the tape contact zone. Let it flash per label directions.
- Temperature control: Aim for 65?85�F (18?29�C). Use a heat gun carefully to warm the surface if the garage is cold.
Practical tip: If you can?t control ambient temperature, warm the door sill area and the adhesive tape backing (not the plate surface finish) with a hair dryer. Warm adhesive flows better and ?wets out? into micro-texture.
Precision Alignment and ?Factory-Look? Placement Techniques
Use alignment jigs with painter?s tape
A simple tape ?hinge? method reduces stress and prevents crooked installs.
- Set the plate in place and fine-tune the position.
- Run a strip of painter?s tape along one long edge, half on the plate and half on the car (this becomes your hinge).
- Flip the plate up on the hinge, peel the adhesive liner gradually, then roll the plate back down.
- Press from the center outward to avoid trapping air.
Centering logos and text to the door opening?not the trim
Trim pieces aren?t always symmetrical. Stand back and reference the door opening itself. A logo that?s ?perfectly centered? on the plastic trim may look shifted relative to the cabin line. Use these reference points:
- B-pillar line or seat belt anchor location
- Door latch striker alignment (visual center cue)
- Front seat base edge (often parallels the sill line)
Pressure, time, and curing: what actually matters
- Immediate bond: Apply firm pressure for 30?60 seconds across the full plate.
- Post-install compression: If safe, close the door gently and let the weatherstrip apply light pressure for 1?2 hours.
- Full cure: Most automotive tapes reach maximum bond after 24?72 hours. Avoid car washes and heavy water exposure during that window.
Advanced Lighting Customization: Clean Wiring, Reliable Triggers, No Flicker
Illuminated door sill plate options
- Battery-powered: Easiest install, but batteries die and housings can rattle.
- Hardwired to courtesy light circuit: Most OEM-like behavior; lights come on with door open/unlock.
- Hardwired with CAN-integrated modules: Cleanest integration for modern cars, but requires model-specific parts.
Step-by-step: routing wiring without pinching
- Plan the path: Follow factory harness routes where possible. Avoid sharp metal edges and moving hinge zones.
- Remove trim carefully: Use a plastic trim tool to lift the lower door sill trim if needed.
- Protect the wire: Use split loom or cloth automotive tape (Tesa-style) to prevent rattles and abrasion.
- Grommet discipline: If routing from door to body, use existing rubber boots. Don?t drill unless you?re prepared to rust-proof and seal perfectly.
- Strain relief: Leave a small service loop and secure with zip ties so door movement doesn?t tug on the sill plate.
Trigger choices: what works best
For reliable illumination that behaves like factory:
- Courtesy light circuit: Usually the best blend of OEM behavior and simplicity.
- Door pin switch (older cars): Easy and direct, but less common on newer models.
- ACC/IGN power: Avoid for sill plates?lights can stay on while driving, which looks odd and can be distracting.
Practical tip: Use a multimeter, not a test light, especially on modern vehicles. Some circuits are sensitive and can trigger faults if probed incorrectly.
Preventing flicker and protecting the vehicle
- Add an inline fuse: Place it close to the power source (1?3A is typical for LED sills).
- Use proper grounds: Ground to factory ground points, not random screws into painted metal.
- Consider a load resistor or interface: If your vehicle uses PWM dimming and the sill LEDs flicker, a CAN/PWM interface module may be needed.
- Waterproof connections: Use heat-shrink butt connectors or solder + adhesive-lined heat shrink in moisture-prone areas.
Material-Specific Customization Techniques
Stainless steel: avoid warping and micro-scratches
- Handle with clean microfiber gloves when possible.
- Keep the protective film on until final alignment is confirmed.
- For curved sills, choose plates with pre-formed contour; forcing flat stainless can cause edge lift later.
Carbon fiber overlays: match the weave and the interior theme
- Weave direction: Align left/right sides so the weave mirrors consistently.
- Edge finishing: If trimming is required, seal cut edges with a compatible clear coat or edge sealer to reduce lifting.
- Heat sensitivity: Don?t overheat resin-backed parts during install; use gentle warmth only.
Acrylic illuminated plates: manage hotspots
- Look for diffused acrylic and even light guides to prevent bright ?dots.?
- Test illumination in a dark garage before final bonding.
- Ensure the wiring exit point doesn?t create a visible bulge under the plate.
Recommended Products and What They?re Best For
Adhesives and tapes
- 3M VHB (automotive-grade, model varies): Great for smooth surfaces and strong long-term hold. Ideal for metal and painted thresholds.
- 3M Acrylic Plus tapes: Excellent for many plastics and mixed surfaces, often with better performance in challenging conditions.
- 3M Adhesion Promoter 06396: Helpful on textured plastics, colder installs, or when previous adhesive residue was present.
Wiring and protection
- Tesa cloth tape: OEM-style anti-rattle harness wrapping.
- Split loom tubing: Abrasion resistance where wires pass near metal.
- Add-a-fuse (fuse tap): Cleaner power sourcing when courtesy circuits are accessible via fuse box (verify correct circuit behavior first).
When to choose pre-cut vs universal
- Vehicle-specific pre-cut sill plates: Best for OEM-like fit, minimal trimming, and fewer alignment headaches.
- Universal plates: Best for custom branding, unique materials, or budget builds?expect more template work and edge management.
Common Mistakes to Avoid (and How to Fix Them)
- Skipping final degrease: Even clean-looking sills can have silicone, dressings, or wax. Fix by removing the plate, cleaning residue with adhesive remover, then IPA, then re-taping.
- Installing in cold weather without warming: Leads to edge lift. Fix by warming the area and applying sustained pressure; severe cases need re-tape.
- Misalignment due to rushing: Dry-fit multiple times and use the tape hinge method. If it?s already stuck, gently heat and remove slowly to avoid paint damage.
- Routing wires through pinch points: Causes intermittent lighting or shorts. Fix by rerouting along factory paths and adding loom/strain relief.
- Using household double-sided tape: It fails with heat and moisture. Use automotive-grade acrylic foam tape instead.
- Not sealing edges in wet climates: Water intrusion can weaken adhesion. Consider edge sealing with a thin, paint-safe sealant if your design allows (test on an unseen area first).
Step-by-Step: Advanced Install Workflow (A Repeatable System)
- Template and test fit: Confirm door clearance and trim transitions.
- Dry-run alignment: Mark reference points with painter?s tape.
- Prep surfaces: Wash, dry, IPA wipe, adhesion promoter if needed.
- Prepare the plate: Clean underside, apply fresh automotive tape if not pre-applied, keep film on top.
- Install using the hinge method: Peel liner gradually, press center-out.
- Apply uniform pressure: Use a microfiber-wrapped roller or your palm; focus on edges.
- If illuminated: Route wiring, fuse the power, make protected connections, test function before final trim reassembly.
- Cure smart: Avoid washing and heavy moisture for at least 24?48 hours; longer if temps are low.
FAQ: Advanced Door Sill Plate Installation
How do I keep door sill plates from peeling at the corners?
Corner peel is usually prep or temperature related. Clean with IPA, use an adhesion promoter on textured plastics, warm the surface/tape, and apply firm pressure on edges. If the plate is too flat for a curved sill, switch to a contoured plate or add a thinner tape layer at the edges to reduce stress.
Will removing old sill plates damage my paint?
If you remove them slowly with gentle heat, most come off cleanly. The risk increases with aggressive scraping or pulling cold tape. Use a plastic scraper, adhesive remover safe for automotive paint, and finish with a light polish if needed.
Where should I tap power for illuminated door sill plates?
The courtesy light circuit typically gives the most factory-like behavior. If you?re unsure, consult a wiring diagram or use a vehicle-specific harness/module. Always add an inline fuse and avoid sensitive circuits unless you?re confident in the load characteristics.
Do I need to drill holes for wiring?
Most clean installs avoid drilling by using existing grommets and factory harness paths. Drilling introduces rust and water-leak risk unless you seal and treat the metal properly. If you must drill, use rust inhibitor, a proper grommet, and automotive-grade sealant.
What?s better: stainless steel or carbon fiber sill plates?
Stainless is generally tougher against daily shoe scuffs and is easier to keep looking clean. Carbon fiber is lighter and sportier, but quality varies?cheap overlays can fade or lift. For a daily driver, stainless often wins; for a themed performance interior, carbon can look incredible if it?s well-made and installed carefully.
How long should I wait before washing the car after installing sill plates?
Give it at least 24?48 hours, longer if temperatures are cool or humidity is high. Avoid high-pressure sprays aimed directly at edges during the first week if possible.
Next Steps: Make Your Install Look OEM and Stay That Way
If you want the best results, treat door sill plate installation like a mini interior detailing and light fabrication project: template first, prep meticulously, control temperature, and use automotive-grade tape and wiring protection. If your build includes illuminated sill plates, take extra time on wire routing and fusing?clean wiring is what separates a ?mod? from a factory-style upgrade.
- Pick your plate style based on foot traffic and climate
- Use a template to guarantee symmetry and proper coverage
- Upgrade to quality tape and adhesion promoter when surfaces are textured
- For lighting, prioritize courtesy-circuit triggers, fusing, and abrasion protection
For more interior upgrade walkthroughs, fitment tips, and product-focused guides, explore the latest articles on carinteriormix.com.