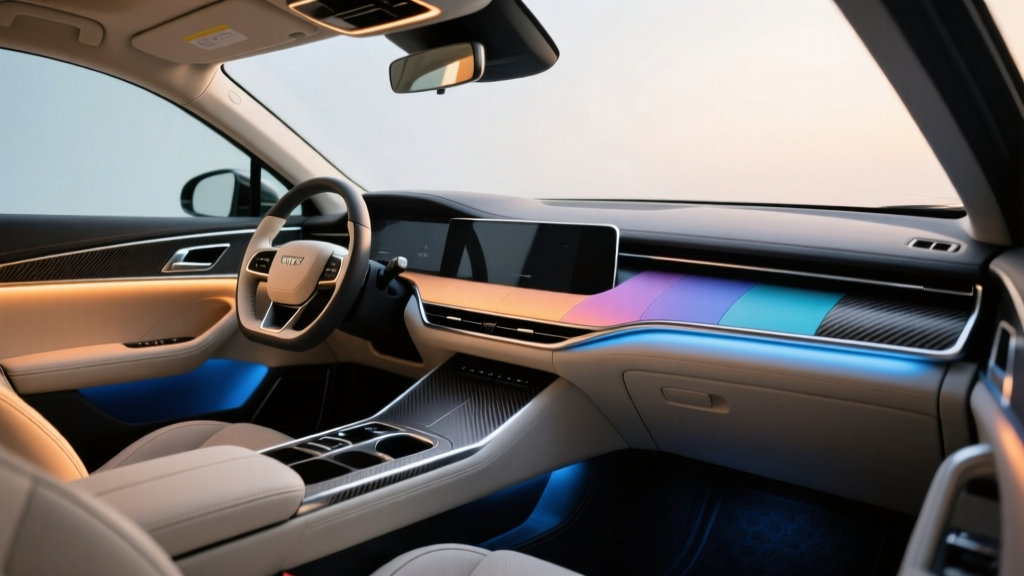
Ambient Lighting Setup: Customization Techniques (2026)
Factory ambient lighting has come a long way, but once you?ve lived with a basic ?one-color-fits-all? setup, you start noticing the limitations: hot spots near the footwells, dim door strips, mismatched color temperature, or animations that feel more gimmicky than premium. The good news is you can go beyond simple plug-and-play LED strips and build an interior lighting system that looks OEM, behaves intelligently, and holds up over time.
This second part focuses on advanced ambient lighting customization techniques?how to plan zones, tune brightness and color for real-world driving, integrate with doors and ignition, and avoid the electrical issues that cause flicker, battery drain, or warning lights. Whether you?re refining a previous install or starting fresh with a higher-end kit, these techniques help you get a cleaner finish, better night visibility, and a more ?factory-plus? feel.
Done right, ambient lighting makes your cabin more comfortable and easier to use at night. Done poorly, it becomes distracting, unreliable, and hard to maintain. Let?s set it up the right way.
Plan Like an OEM: Zoning, Layers, and a Lighting ?Hierarchy?
Advanced ambient lighting isn?t about ?more LEDs.? It?s about thoughtful placement and control. OEM interior lighting is built in layers, each with its own purpose.
Define your zones (and what each zone should do)
- Accent zone: door trim lines, dash strips, center console accents. Subtle, continuous, low glare.
- Functional zone: footwells, door pockets, cup holders. Slightly brighter for usability.
- Task zone: map lights, glovebox, trunk. Separate from ambient; typically white and higher brightness.
Set a brightness hierarchy
A premium look usually means the accent zone is dimmer than the functional zone. A common mistake is blasting bright RGB in the dash and leaving footwells too dark.
- Accent strips: 10?25% brightness at night
- Footwells / storage areas: 20?40% brightness
- Task lighting: independent, full brightness when activated
Real-world example: sporty sedan setup
- Dash + doors: deep blue at 15% for a calm ?wraparound? effect
- Footwells: neutral white at 25% for visibility
- Cup holders: same blue as accents but dimmer (10%) so they don?t steal attention
Advanced Power Strategy: Add a Safe, Stable Electrical Foundation
If your ambient lighting flickers when you start the car, changes brightness with RPM, or randomly resets, you?re dealing with power integrity. Higher-end customization starts with doing power the right way.
Choose the right power source (constant vs switched)
- Switched/ACC power: lighting turns on with ignition. Best for most installs to avoid battery drain.
- Constant 12V: useful when you want ?welcome lighting,? but you must manage sleep current carefully.
Use a fuse tap and correct fuse rating
For most interior ambient LED systems, a 5A fuse is often sufficient, but always confirm the kit?s current draw. Over-fusing is a common safety mistake.
Add a relay for clean switching (especially on sensitive circuits)
If your kit draws more than a minimal amount or your vehicle is picky about electronics, power the LEDs through a relay:
- Find an ACC signal source (low current is fine).
- Use that signal to trigger a 12V automotive relay.
- Run fused power directly from the fuse box (or battery, if required) through the relay to the lighting controller.
- Ground to a proper chassis point (scrape paint, use a ring terminal, tighten securely).
Reduce flicker and voltage drop
- Keep grounds short and solid: weak grounds cause random dimming and controller resets.
- Avoid ?daisy-chaining? long runs: long thin wire drops voltage and makes far-end strips dimmer.
- Use thicker power leads when needed: 18 AWG is usually fine; 16 AWG helps on longer runs or higher output.
- Add a noise filter (optional): if you see PWM whine or flicker, a DC noise filter can stabilize supply to the controller.
Color Science for Cars: Matching White, Avoiding ?Cheap RGB,? and Picking the Right Palette
Color tuning is what separates a high-end ambient lighting setup from ?aftermarket glow.? The biggest giveaway is mismatched white or overly saturated colors that reflect harshly off glossy trim.
Match your interior?s ?white? first
Cars typically use different whites across screens, buttons, and factory lighting. Aim to match your cabin vibe:
- Warm white (2700K?3500K): luxury feel, pairs well with tan interiors and wood trim
- Neutral white (4000K?5000K): modern, clean, best all-round
- Cool white (6000K+): crisp but can feel harsh and ?blue? in dark cabins
Use a ?two-tone? approach for premium results
Many enthusiasts get better results by combining one main accent color with a neutral functional light:
- Accent: cyan/ice blue/purple at low brightness
- Footwells: neutral white for usability
Practical tip: tame reflections and glare
- If your dash trim is glossy, avoid bright saturated colors (pure red/blue) at high intensity.
- Dim the dash strip first, then bring up door/footwell brightness to balance.
- Use diffusion (frosted covers or fiber optic channels) to eliminate ?LED dots.?
Advanced Placement & Diffusion: Making It Look Factory
Placement and diffusion matter more than raw brightness. A well-diffused low-output line looks expensive; a bright strip with visible hotspots looks unfinished.
Upgrade from bare strips to diffused solutions
- COB LED strips: continuous light appearance, fewer hotspots, great for footwells and under-console
- Neon-style diffused strips: flexible, consistent, ideal for under-dash and door lines (check thickness for fit)
- Fiber optic kits: very OEM-like ?glow line? in dash/doors; requires a light source module and careful routing
Step-by-step: hide LEDs and eliminate hotspots
- Mock mount first: use painter?s tape to test angles and reflection.
- Aim for indirect lighting: bounce light off a surface rather than pointing it at occupants.
- Use a channel or lip: tuck strips behind trim edges to hide the emitter.
- Secure properly: upgrade adhesive with automotive-grade tape (3M VHB) and add clips where heat may loosen tape.
- Test at night: what looks subtle in daylight can be blinding in the dark.
Real-world example: door panel lighting done right
- Install the strip behind the door pull trim line so the light ?washes? downward.
- Keep brightness lower than footwells to avoid distraction.
- Route wiring through the factory loom boot between door and body (avoid pinching and water ingress).
Smart Controls: Scenes, Animations, and Integration That Makes Sense
Advanced ambient lighting isn?t only about hardware?it?s about how it behaves. The best setups feel predictable and useful.
Choose the control style that fits your goals
- App-controlled RGBIC: great for multi-zone color and effects; quality varies widely
- RF/IR remote kits: simple and reliable, but fewer advanced options
- CANBUS-integrated controllers (vehicle-specific): more OEM-like behavior (door triggers, dimming with dash, welcome effects)
Set up ?scenes? instead of constantly changing colors
Most owners end up using 3?5 scenes. Try these as a starting point:
- Night Drive: low brightness, cool or neutral tone, minimal animation
- City: slightly brighter footwells, accents moderate
- Show/Park: brighter accents, animated effects (only when parked)
- Rain/Fog: avoid deep blue/purple; use softer neutral colors to reduce perceived glare
Step-by-step: build a distraction-free setup
- Disable ?music mode? while driving; save it for parked use.
- Set a max brightness cap for dash-level strips (start at 15?20%).
- Use slow fades rather than fast strobes.
- Keep saturated red out of your direct field of view (can feel harsh and affect night adaptation).
Product Recommendations: What to Buy for an Advanced Setup
There isn?t one perfect kit for every car, but there are clear categories that work best for advanced ambient lighting customization. The goal is stable power, good diffusion, and reliable control.
Best for clean ?no hotspots? installs: COB LED strips
- Why: smooth light output, excellent in footwells and under-console areas
- Look for: 12V COB strips, high-density, strong adhesive backing, consistent color
- Ideal use: functional lighting zones
Best OEM-style light lines: fiber optic ambient kits
- Why: true ?glow line? effect across dash/doors
- Look for: quiet light engine (no whining fan), multi-zone support, vehicle-specific trim tools/lengths
- Ideal use: accent zones and premium visuals
Best balance of ease + premium diffusion: neon-style diffused strips
- Why: consistent output, flexible placement, fewer visible dots
- Look for: slim profile for tight gaps, heat resistance, RGBIC if you want zone effects
- Ideal use: under-dash edges, door contours, console outlines
Quick comparison
- COB strips: smooth + practical, less ?light line? elegance than fiber
- Fiber optic: most OEM-like, more install time and routing complexity
- Neon diffused: great visual payoff, check fitment thickness
Common Mistakes to Avoid (That Ruin Otherwise Good Installs)
- Tapping power from random wires: leads to flicker, CANBUS errors, or battery drain. Use proper fuse taps and grounds.
- Over-bright dash lighting: looks cool parked, distracting at speed. Keep dash accents dim.
- Skipping diffusion: visible LED dots instantly read ?cheap aftermarket.?
- Poor wire routing: pinched wires in seat rails, door hinges, or trim clips will fail over time.
- No strain relief: controllers and connectors should be secured so vibration doesn?t loosen them.
- Mixing unmatched LED types: different whites/colors across zones makes the cabin look inconsistent.
- Ignoring heat: adhesive fails near HVAC ducts or hot surfaces. Use clips, VHB tape, and keep strips away from high heat.
Step-by-Step Checklist: Final Tune and Validation (Night-Test Method)
Once everything is installed, do a proper validation so you?re not chasing issues later.
- Check for electrical stability: start the engine, turn on HVAC, rear defrost, headlights?watch for flicker or resets.
- Confirm sleep behavior: turn the car off, lock it, and verify the lights shut down fully. If possible, check for parasitic draw using a multimeter.
- Balance zones: set footwells first, then match the door/dash accents to be slightly dimmer.
- Look for reflections: sit in your normal driving position and scan for glare in side windows and glossy trim.
- Secure and silence: zip-tie loose harnesses, foam-tape any rattling modules, and ensure connectors won?t pull apart.
FAQ: Advanced Ambient Lighting Customization
Will ambient lighting drain my battery?
If wired to ACC/switched power, it won?t draw power when the car is off. If you use constant 12V for welcome lighting, you must ensure the controller sleeps properly and current draw is low. Battery drain issues usually come from poorly designed controllers or incorrect wiring.
Why do my LEDs flicker when I start the car?
Common causes include voltage drop during cranking, weak ground, or a controller that doesn?t tolerate noisy automotive power. Solutions include using a relay, improving ground, and powering the controller from a stable fused source rather than a sensitive signal wire.
What?s the best way to make ambient lighting look OEM?
Use diffusion (COB, neon diffused strips, or fiber optic lines), hide the light source, route wiring through factory paths, and keep brightness subtle?especially across the dash.
Can I integrate ambient lighting with door open/close behavior?
Yes. Some vehicle-specific CANBUS controllers support door triggers and dimming with factory illumination. For universal kits, you can integrate using a relay triggered by a door/footwell light circuit, but be careful?modern vehicles can be sensitive, so avoid loading factory circuits directly.
What color is best for night driving?
Most drivers prefer low-brightness blue/cyan or a soft neutral white. Avoid high-intensity red or bright saturated colors in the direct line of sight, and keep animations off while driving.
Do I need RGBIC, or is regular RGB fine?
RGB is enough if you want one color per zone. RGBIC is ideal if you want multiple colors on a single strip or smoother animations. For daily driving, many owners set a single scene and rarely use complex effects, so prioritize build quality over flashy modes.
Next Steps: Build Your ?Factory-Plus? Ambient Lighting Setup
If you want the biggest upgrade with the least frustration, focus on three things: a stable power plan (fuse tap + good ground, relay if needed), proper diffusion to eliminate hotspots, and scene-based tuning so your lighting stays subtle and usable at night. Start with footwells and door accents, validate sleep behavior, then expand into dash lines or fiber optic elements once your foundation is solid.
For more interior upgrade walkthroughs, trim-safe installation tips, and lighting ideas that actually work in real cars, explore more guides on carinteriormix.com.